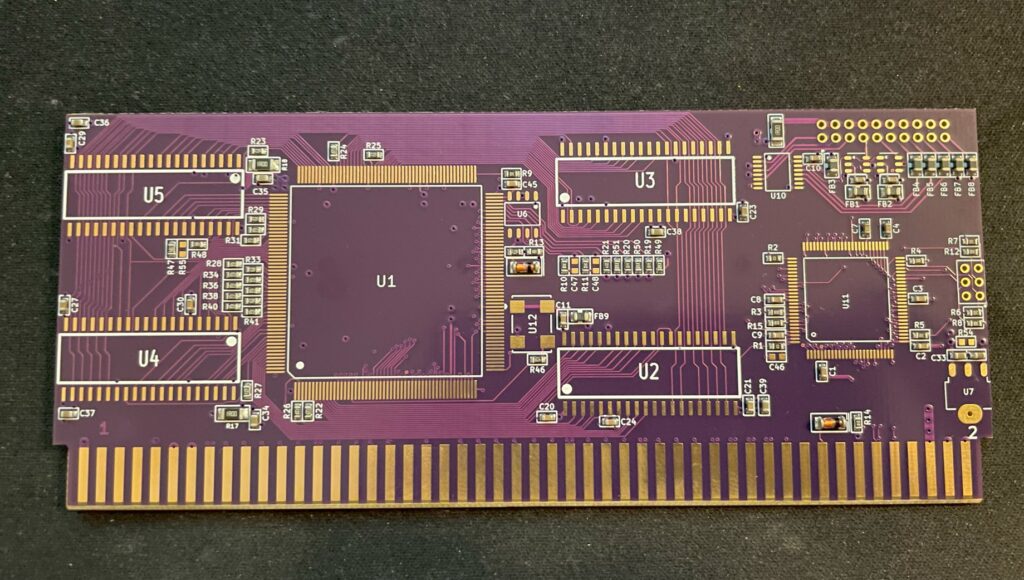
Today I picked up a small parcel that was sent to me, the parcel contained a GBAPII++ mini Amiga graphics card PCB. The GBAPII++ is a half size Zorro 2 Amiga graphics card based on the Cirrus Logic GD5434 chip, you can read all about that project here. This is a smaller version of that card – It is intended to be used with the Denise A500+ clone (Mini-ITX) but can be used on all Amiga systems with Zorro slots. You can read all about the mini version of the graphics card here.
Specification of the GBAPII++ card
This is a Zorro 2 card, it has 2 MB memory and is comparable with the Picasso 2 graphics card in performance (give or take performance in some tests). It is a perfect match for Z2 and 030+ systems IMHO but is not really a competitor with the zz9000 regarding performance (in a Zorro 3 system).
Lets take a look at the GBAPII++ card
Front side of the GBAPII++ Amiga Zorro 2 graphics card
Usually I prefer to build projects from scratch but in this case I did not mind a version where the passives where already pre-installed. The GBAPII++ mini version uses mostly 0603 component sizes. That is 1.6 x 0.8 mm in size, not impossible to solder, and to be honest not that challenging, just very tedious. Especially if you do not have a proper workshop with microscope.
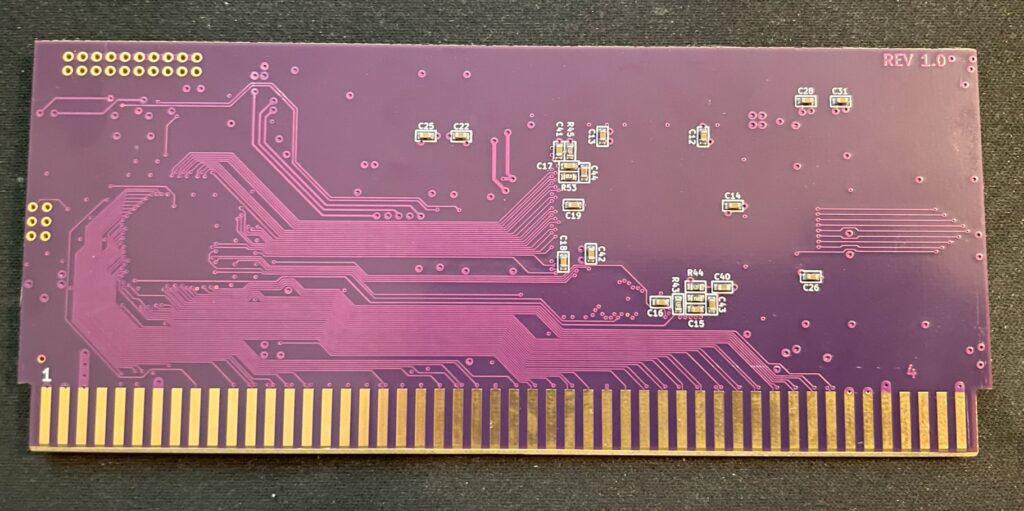
Here is the back of the graphics card, not much happening just some 0603 parts
The missing components are 2 MB memory consisting of four chips, SOJ40 (this is the same memory type that is installed in an Amiga 1200 rev 1.4d). The card needs one CPLD, two ICs, crystal and the GD5434 chip. The Cirrus Logic chip can be taken from a PC graphics card. Occasionally NOS chips show up on Ebay from time to time. Expect to pay 25-40 euro for the graphics chip alone (and more for the full graphics card).
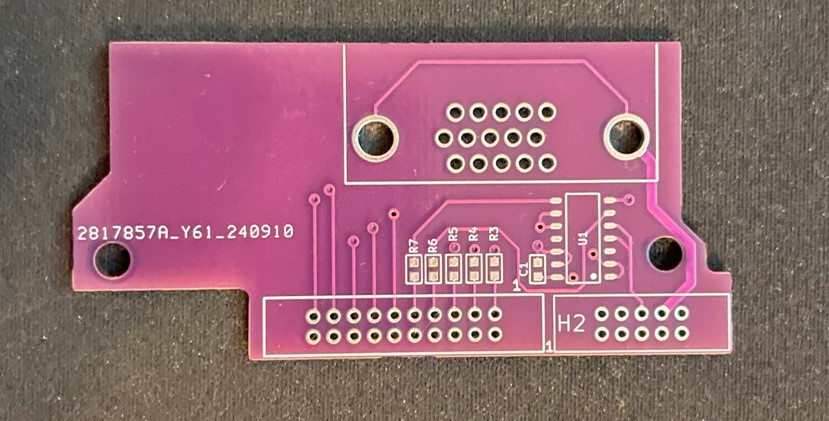
I also got this little VGA out PCB that hooks up to the graphics card and fits neatly at the back of the Denise Amiga 500+ clone.
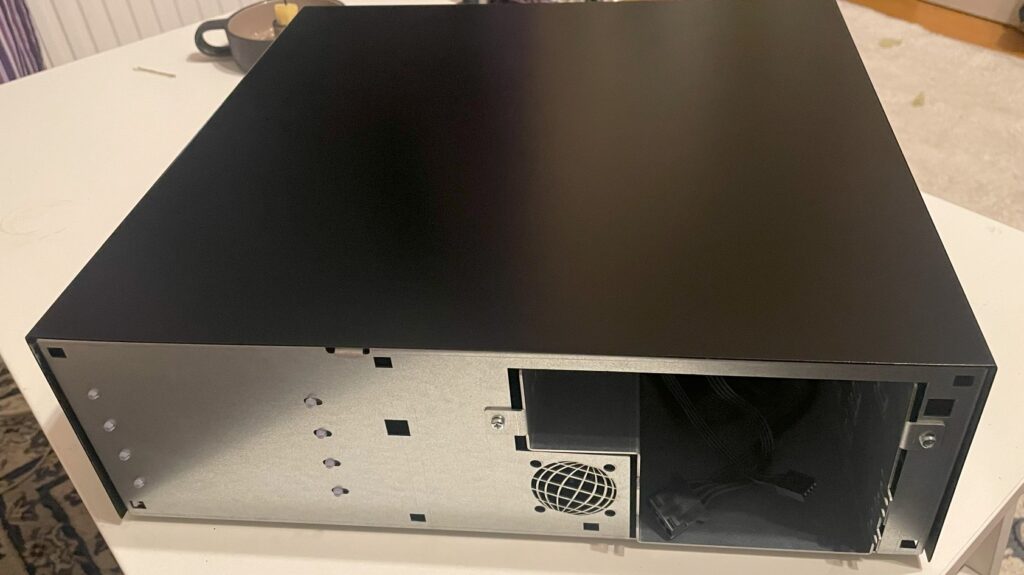
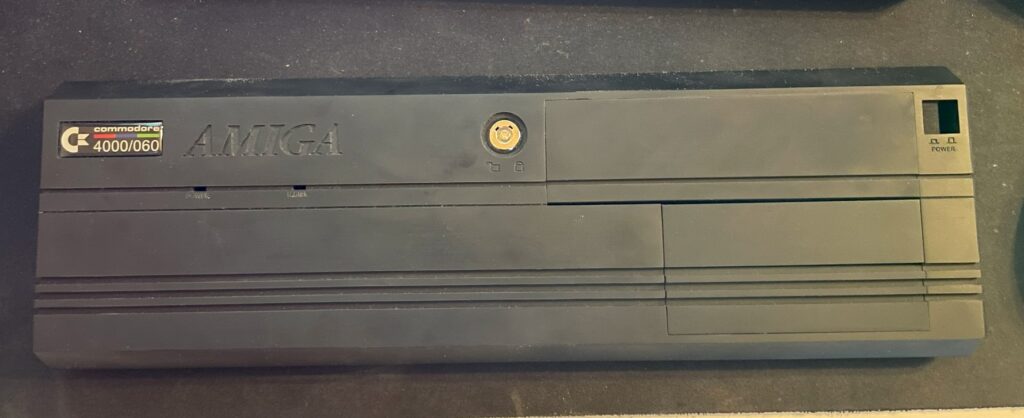
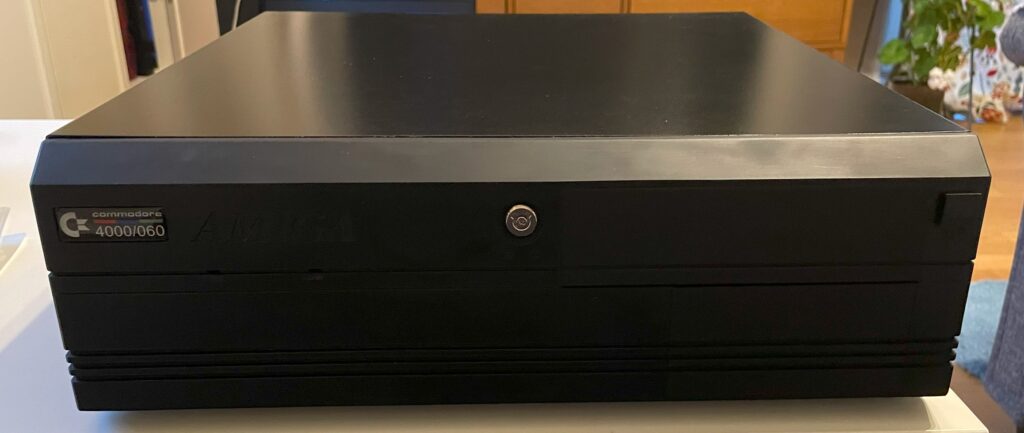
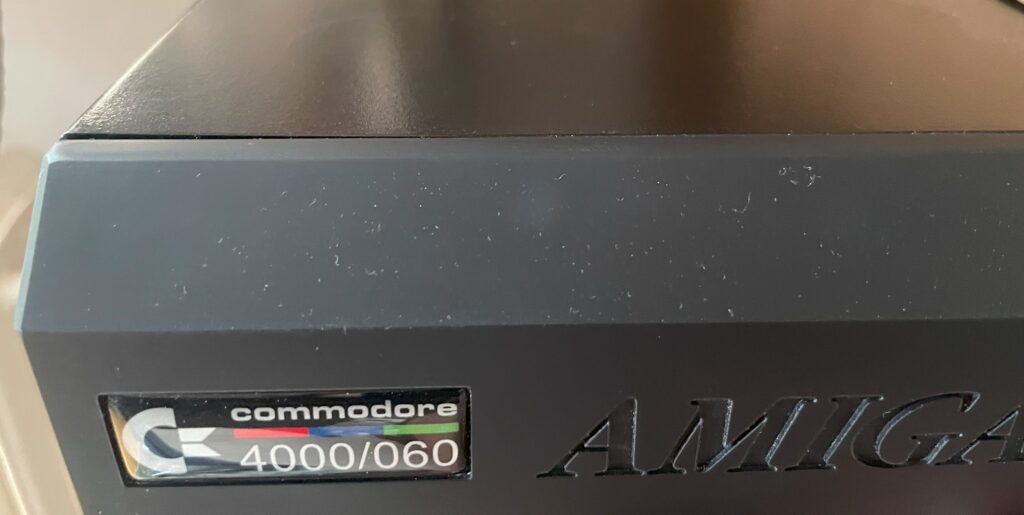
I bought a replica Amiga 4000D case earlier this year on Amibay. It is really good clone of the A4000D case with the exception it has slightly better cooling, space for a 40 mm fan, was painted black, has some options the original Commodore A4000D did not have, uses an SFX ATX PSU and did not come with a front panel.
I really like the look of the A4000D (even if it is just a lousy PC case that was adapted to the A4000D in the last minute), especially the front panel. If there is a template for a professional early 90ies computer case, I think this could be one of them (together with SGI, Sparcstation and so on) – There is just something about the angled look of it and the Amiga logo inprinted in the case cover mold.
Functionality wise, the case is a disaster. The Amiga 4000D case has lousy cooling. The whole case depends on the fan in the PSU to cool the whole system. There is no active cooling at all on the Zorro board section. It has the mouse and joystick port awkwardly mounted on the side making it difficult to remove the cover. And while it has a 5.25 slot, it is too shallow and wont take a full length CD-rom (or DVD). Many of these problems has been solved in the replica case and many of these problems are not problems anymore (I never want to touch optical media again).
What about the A4000D 3D printed front panel?
Its a bit dusty in the picture but the finish is really smooth
The files for the 3D printed A4000D cover can be found here. You can find the different 5.25 and 3.5 cover slots there too. I got them printed at JLCPCB in nylon resin and something, I have forgotten, I also got the power button on a stick 3D printed. All in all the total cost was somewhere around 50 euro, very affordable IMHO. The front was printed in one piece. It has a bit of a rough look to it if you look close, but it is surprisingly well done. I do like the rough look as it resonates with the home built A4000D motherboard, its not perfect as in a factory made case/computer as it is DIY built.
However, the front panel do not fit on the A4000D case that good. The clips are too long and they are really soft and became slack quick, meaning the front panel hangs off the front of the case and just looks cheap.
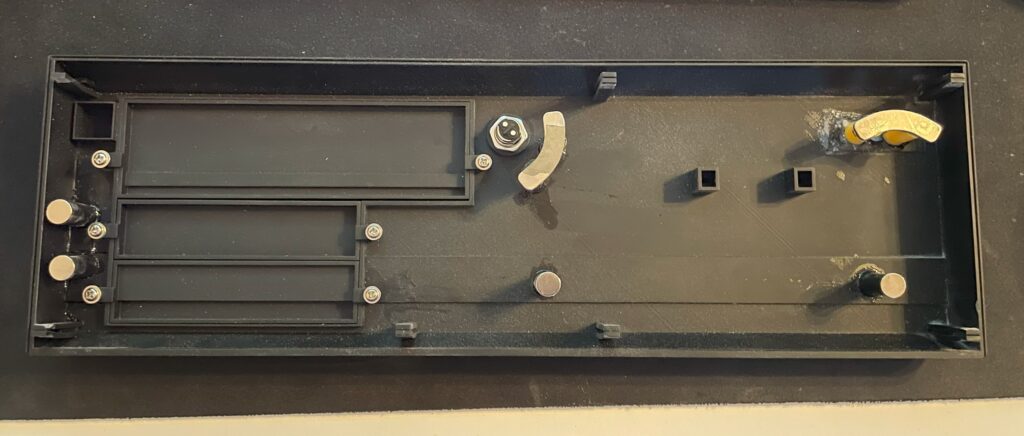
How I got the Amiga 4000D 3D printed front panel attached to the case
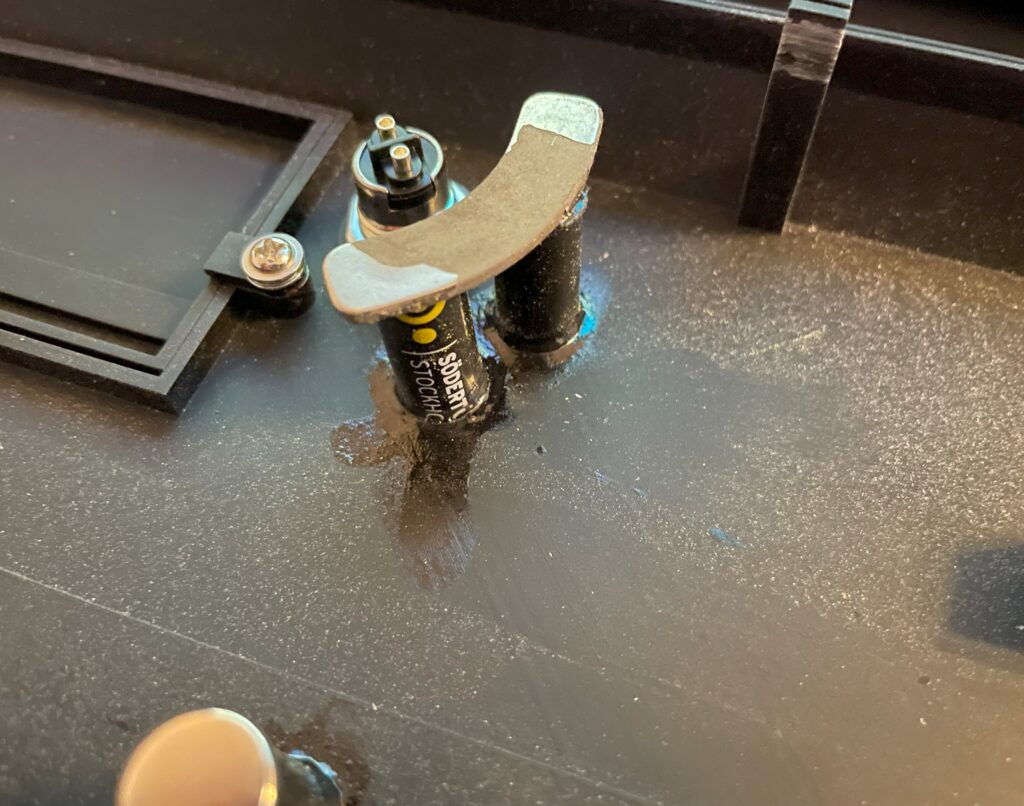
I had an idea to use strong neodymium magnets to hold the front cover onto the A4000D case.
In the picture above you can see four round magnets and two banana shaped magnets. The banana shaped magnets came from an old 3.5″ harddrive that I recycled. These magnets are really strong.
The round magnets are also neodymium magnets but less strong. If I was to start over I would just use three of the really strong banana shaped magnets they hold the 3D printed front panel to the case strong and secure. See the peg in the bottom left corner and how it has sagged.
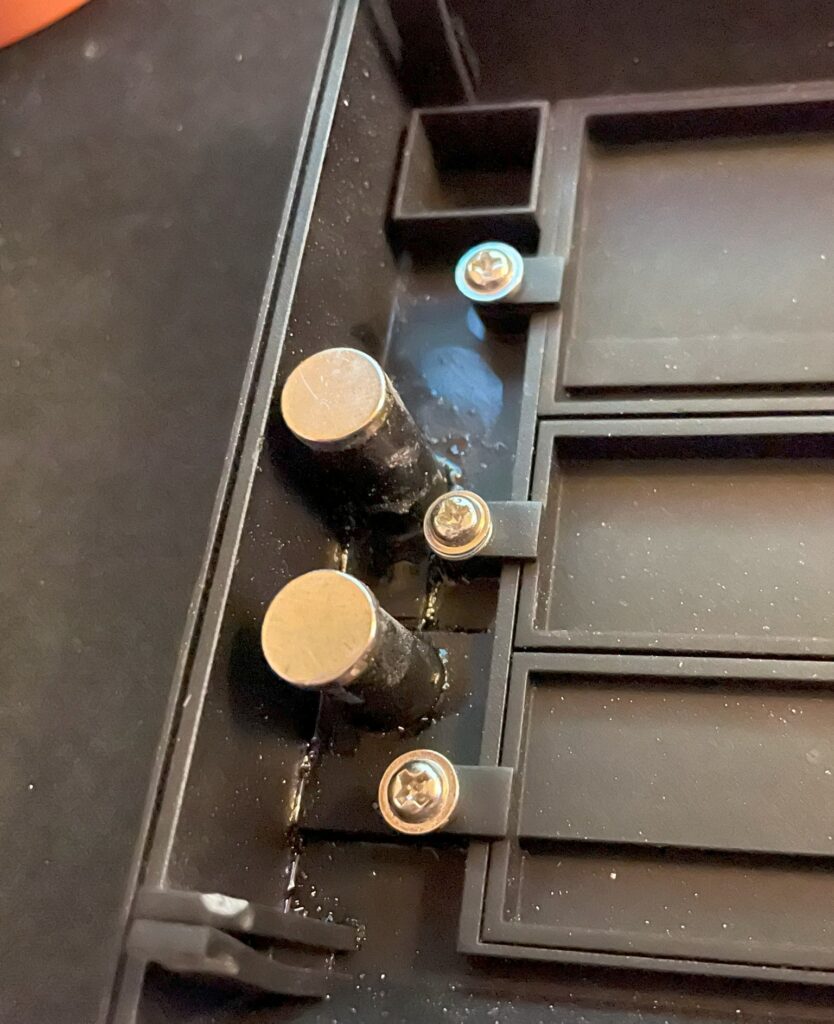
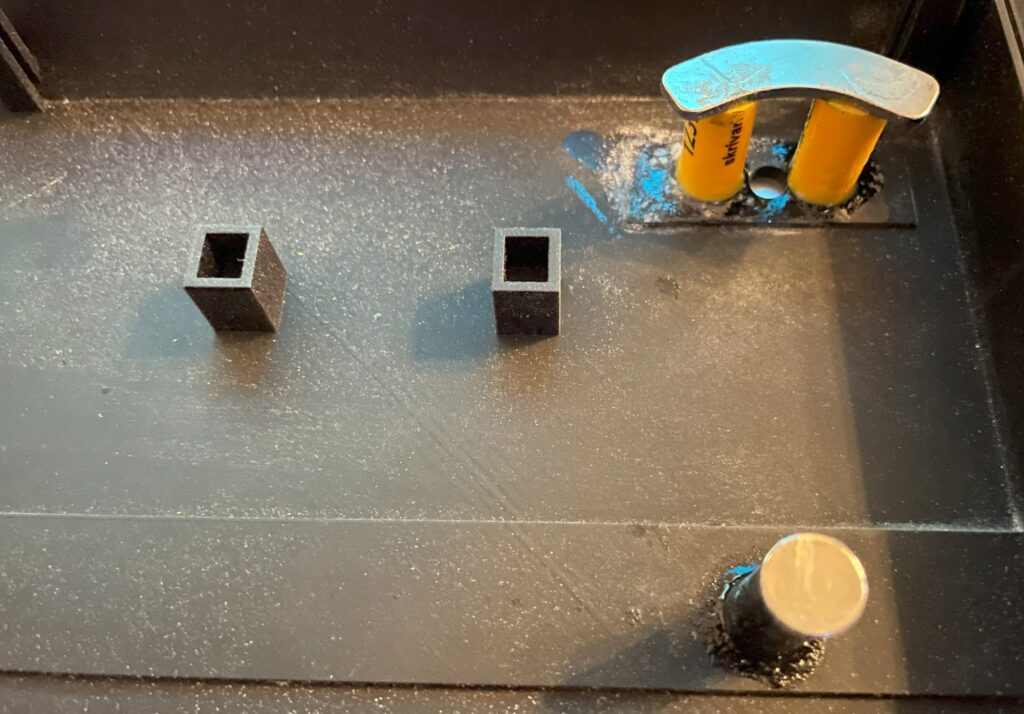
It looks a bit sloppy because it is, I will paint the stand offs for the magnets black and maybe even add some black bondo to them to make it look nicer. However as a proof of concept everything works and is secure. The stand offs are regular plastic pencils that I cut to lenght and then super glued to the 3D printed A4000D front, I then super glued the magnet to them and let everything dry over the night.
I thought that the magnets would work themself loose from being super glued to the stand offs but I have been proven wrong. They are secured to the stand offs and case and wont move or brake off.
Here is the case with the cover added to it, being held to the case just by the magnets. Taking it off the case needs a lot of force. To make it easier I sanded off the hooks on the pegs of the front cover to make it easier to slide out the holes of the front of the case. Again, looks rough but works fine.
Here is a closeup of the 3D printed A4000D front cover, the badge was bought from a store online.
All in all I am very happy with my black A4000D case. I think it fits into a modern office much better when it is black as so few computers come in beige these days.
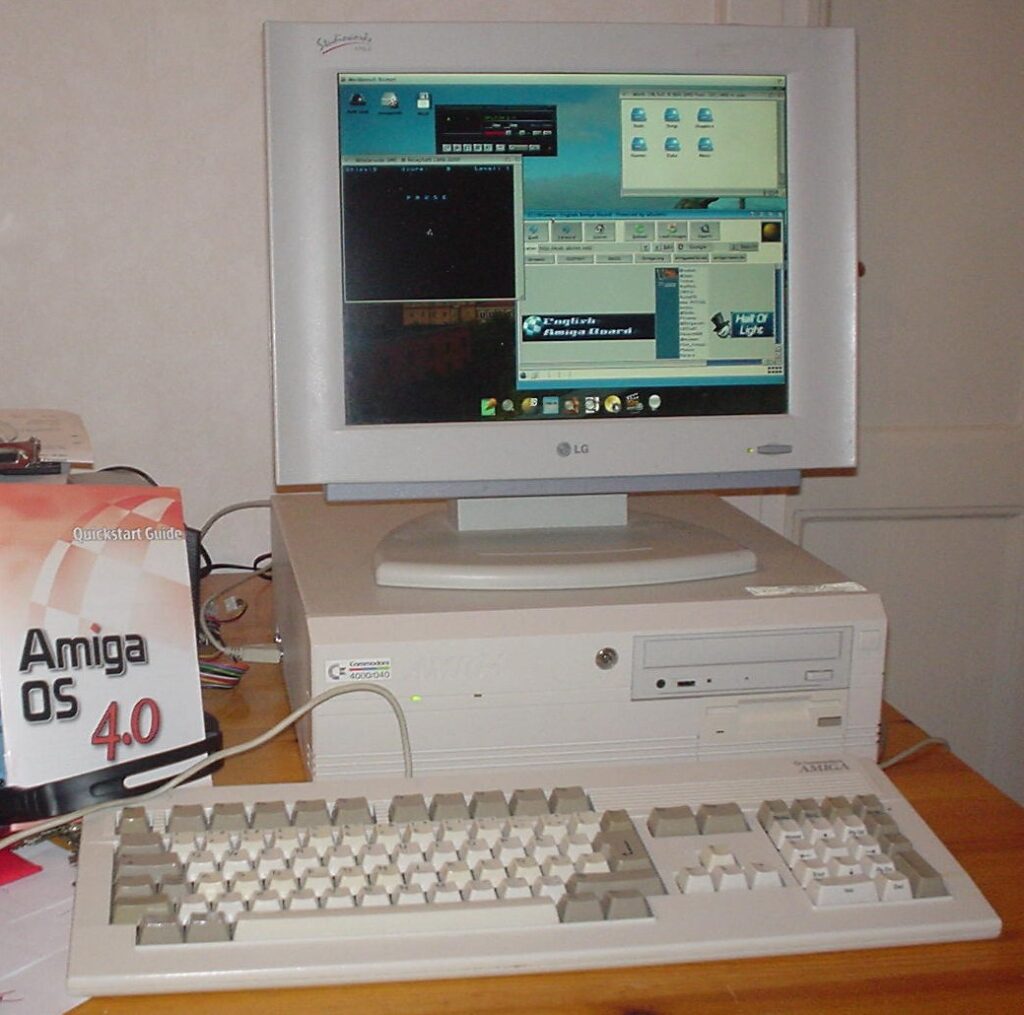
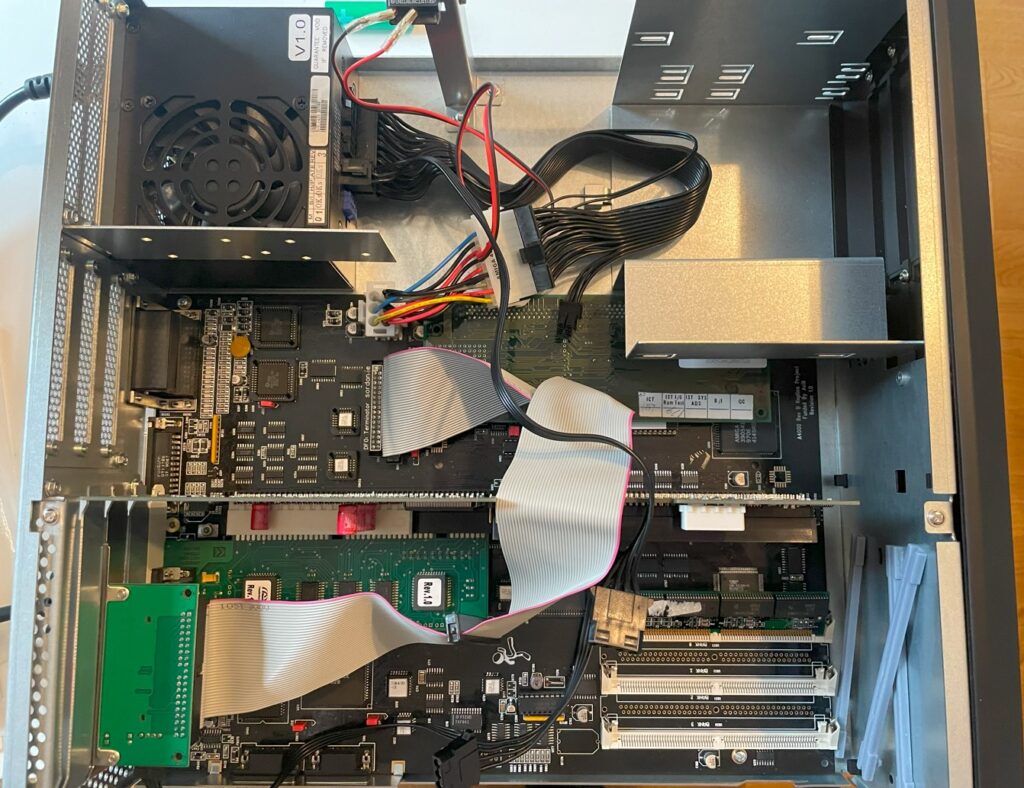
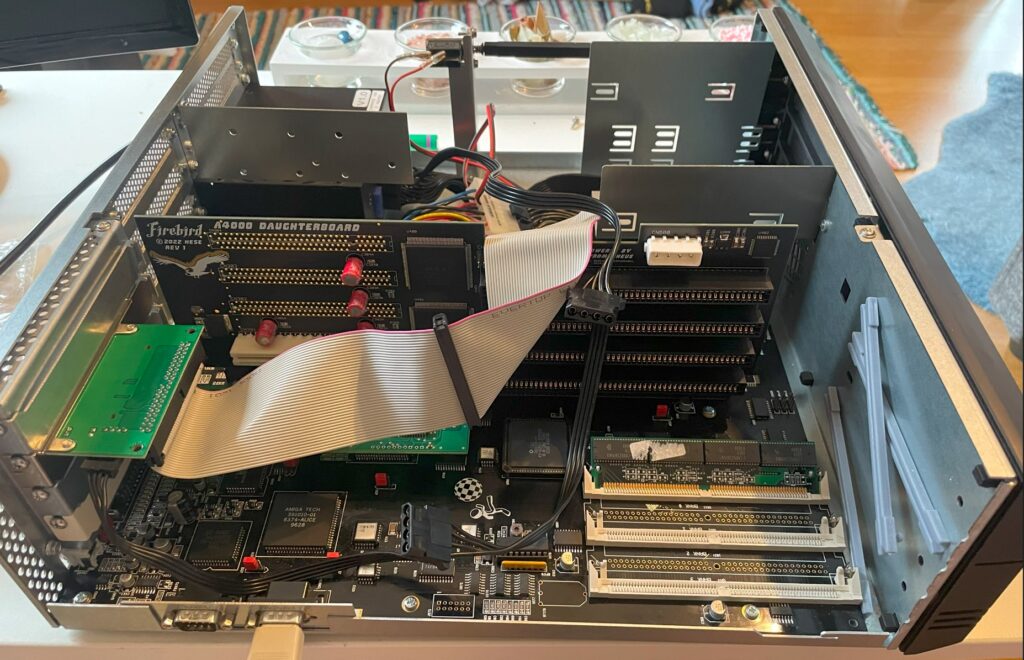
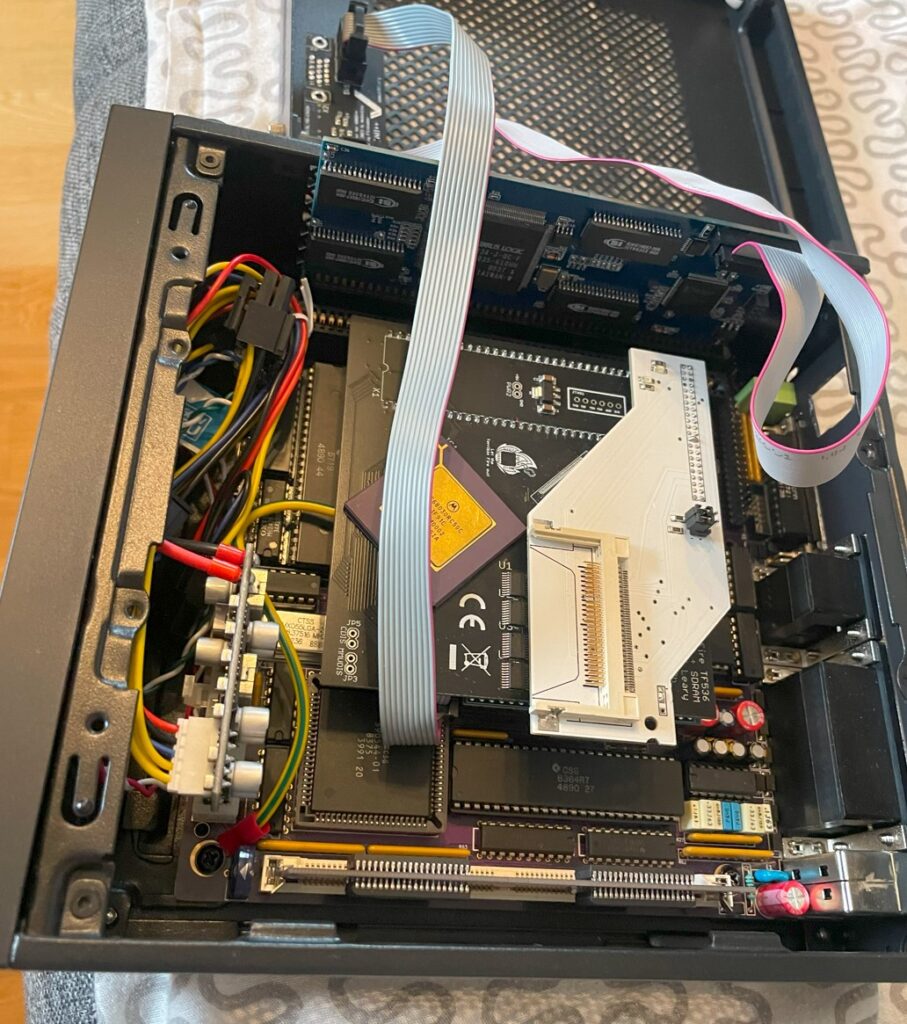
I have an Amiga 4000D that is in a work in progress state. I am in no rush to get it finished and I enjoy the process of setting it up. It is an Acill A4000D motherboard that built last year. It has a Firebird PCI daughter card, a MicroniK scandoubler and a C= 030 CPU card. Everything is mounted in a replica black A4000D case with a 3D printed A4000D front (incl. covers). Final state of this Amiga 4000 will probably look a lot different but for testing purposes, this will be fine.
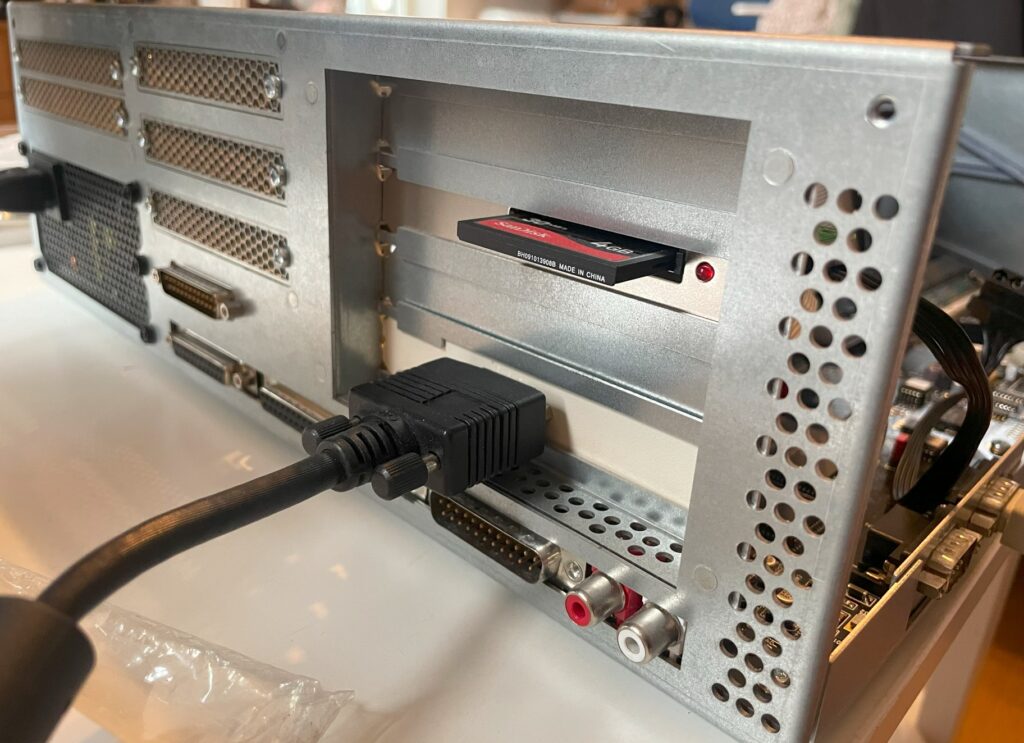
Adding a IDE-CF interface to the Amiga 4000D
Today I added a slot bracket mounted Compact Flash card adapter to it so I could test out a couple of 72-pin SIMM slots. I do not have a floppy drive in most of my Amigas so I had to run Workbench of off a CF card to be able to see total memory. Thankfully I still have old school 40 pin IDE cables in my parts stash.
I used the Workbench installation from my Denise ITX Amiga 500+ clone by simply borrowing the CF card from it. I will post some more info on this beautiful little Amiga computer later sometimes.
With the CF card inserted in the Compact flash adapter my A4000D booted happily of off the WB 3.1 installation on the CF card. Having the CF card accessible from the outside of the Amiga is a must. I often find myself mounting the CF card in WinUAE to take backups and to install and transfer software.
Testing 72 pin SIMM memory
The first thing I wanted to do was to remove the 32 MB SIMM I was using in the Chip memory socket and replace it with a genuine 2 MB SIMM. All fine, the 2 MB 72 pin SIMM worked fine as chip mem! 2 MB 72 pin SIMM memory is getting more difficult to find these days unfortunately – hopefully there will be more DIY options in the future.
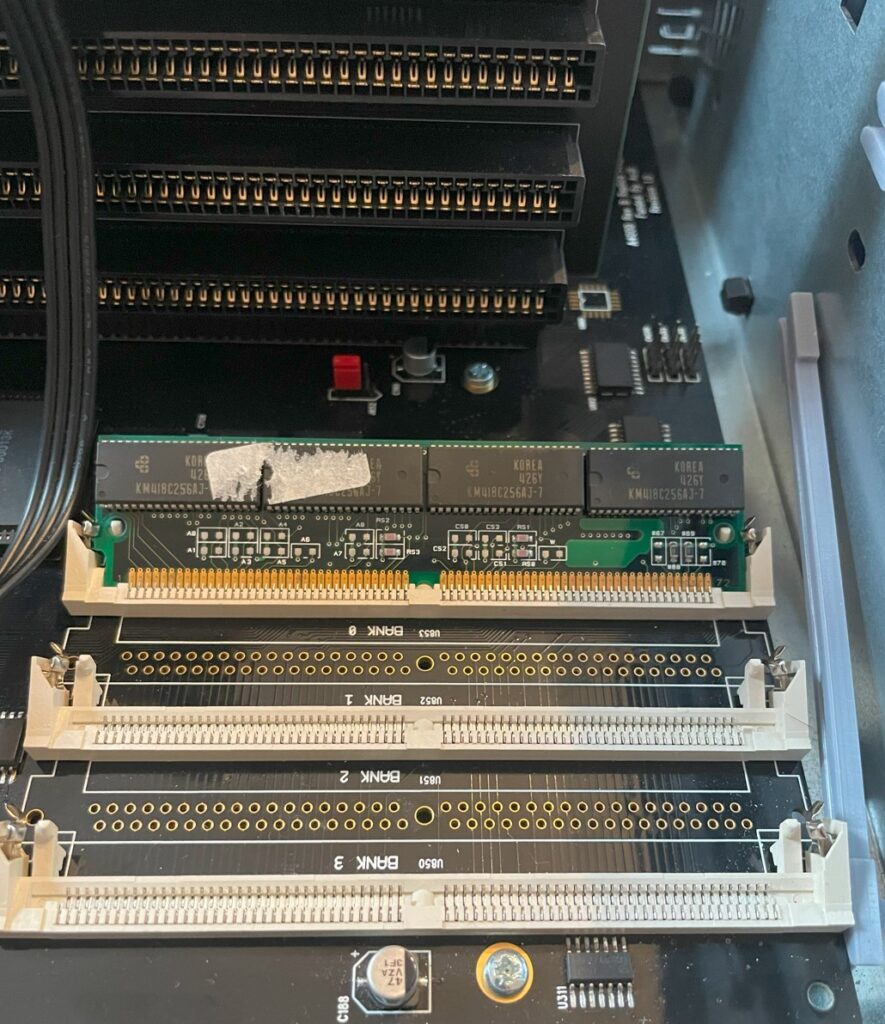
The A4000D supports up to 16 MB fast memory on the motherboard, either through four 4 MB memory modules or through two 8 MB memory modules. You can see that I built the A4000D motherboard with only two 72 pin sockets for fast memory, so I need two 8 MB modules to get 16 MB.
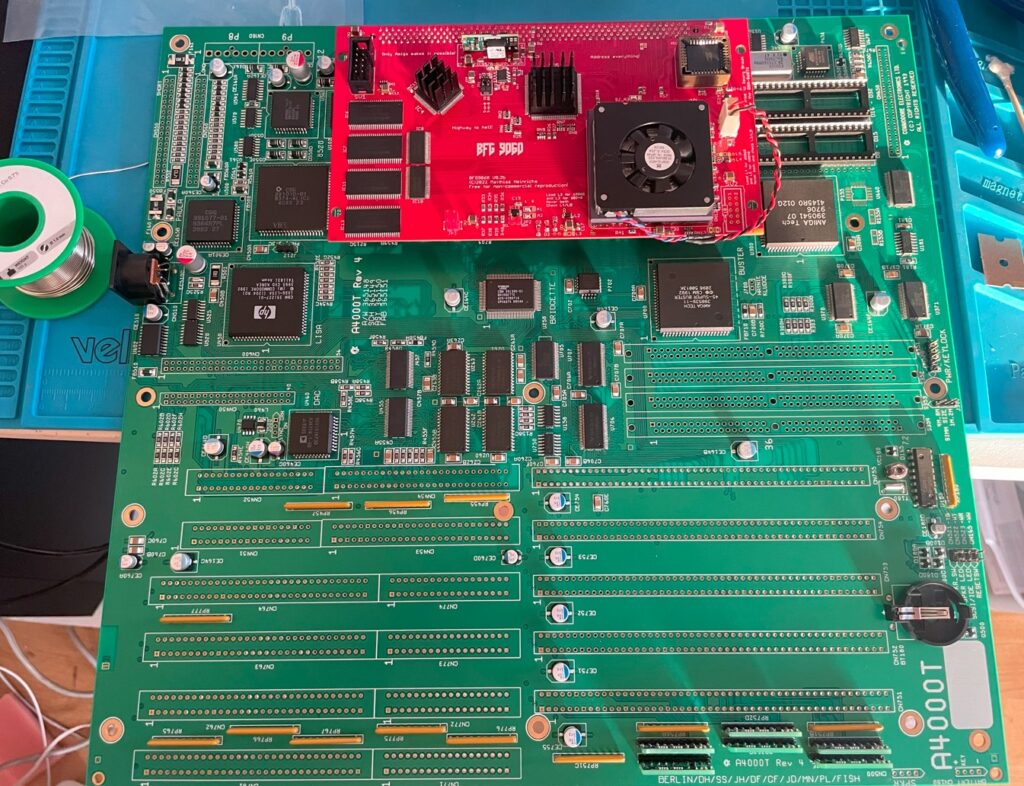
Unfortunately, I did not have any 8 MB SIMM memory (all I had was 16 and 32 MB modules) so the maximum memory I could add was 4 MB (one 16 MB SIMM becomes 2 MB in the socket). 72 pin memory modules rarely indicated memory size so it was necessary to test them in a computer. Now this is not really a problem since I will be running either a BFG9060 or a TF 060 card in this computer. But it is always nice to max out memory if it is possible to so.
Conclusion
I added a new thing to my todo list, find some 8 MB SIMMs.
I also flagged some things on the todo list as finished, CF card adapter + chip mem is working.
I built my second Amiga 2000 EATX last year, it is a beautiful clone of the Amiga 2000 remade into a standard extended ATX format so it can fit a standard EATX case. You can be sure that I will add an article about that motherboard here in the future. The author of that project has also made the n2630 project, its a clone/reimplementation of Commodores 030 card for the A2000, the Commodore A2630.
To be honest, I wish there was a modern 060 or 040 card we could build for the A2000 since I think 030 is just too slow these days – at least for my modern Amiga standards. To be fair while the A2630 was 25 Mhz this one runs at 50 Mhz, so its a little bit faster. 040 runs so hot, but would be a perfect fit for the A2000EATX because of the improved case airflow (and having an 040 in one of my machines could be interesting to compare performance with 060 machines).
Anyways, I should be glad with what I have and I am thankful that we can build this cool modern 030 card for our A2000 computers. And the n2630 is such a nice compliment to the A2000 EATX motherboard having IDE/CF slot built in.
Building the n2630 for my A2000EATX
I decided to build my n2630 card earlier this year with 128 MB fast memory. There was an option to go for 256 MB fast memory also but thought it was not really worth it, maybe I will regret it in the future. Otherwise this build was very straight forward. It uses three CPLDs and six memory chips.
There was some parts that was difficult to find, first it was the 030 CPU socket. I actually got the parts number for one that was availble on Mouser after asking around, surprised about that. The CF slot at the back of the card needs to be the right one to fit solder points on the board, ask on the Discord if you wondering what type you should get if you are building one. Other than that it was an easy build. There are also two eproms you need to have and program, but as usual, most stuff that is rare can be found with some patience.
I have since mounted an FPU to the card and I also got a 3D printed bracket so I could secure it in my regular ATX tower that was converted to EATX. I ran out of black pin stripes that is why I used yellow and green (it was also a joke about obsessing over the color syncing of hardware).
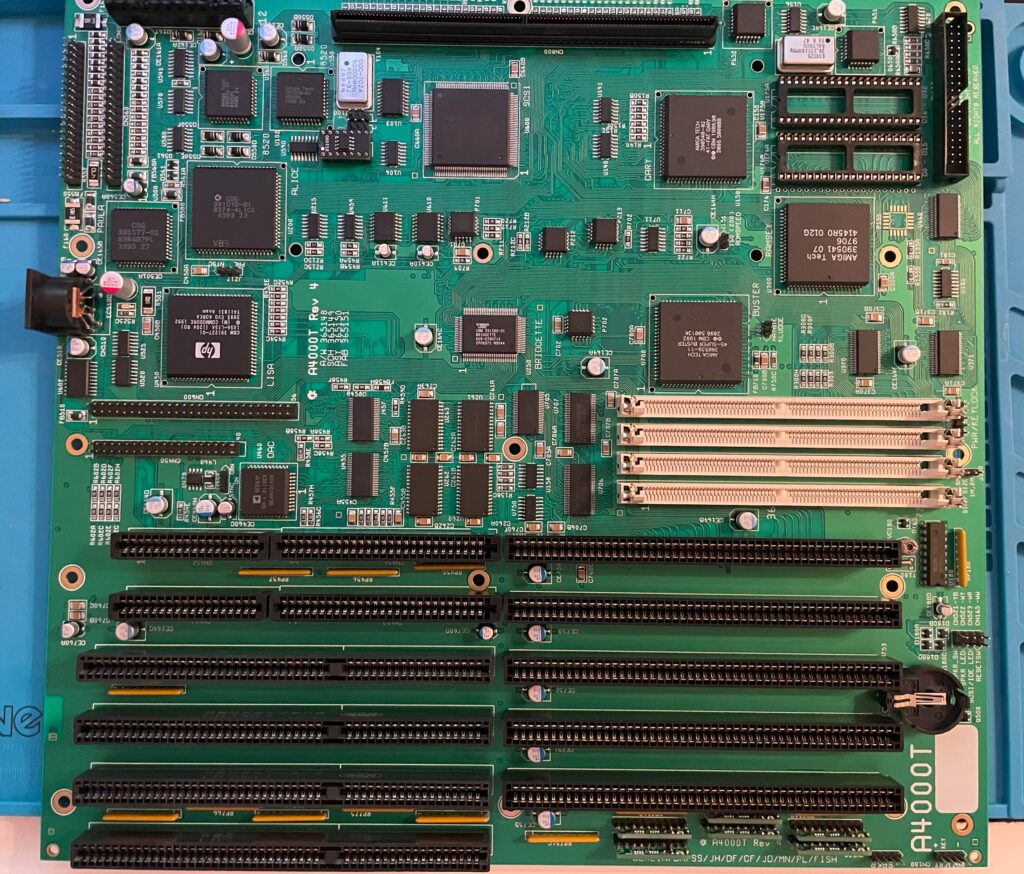
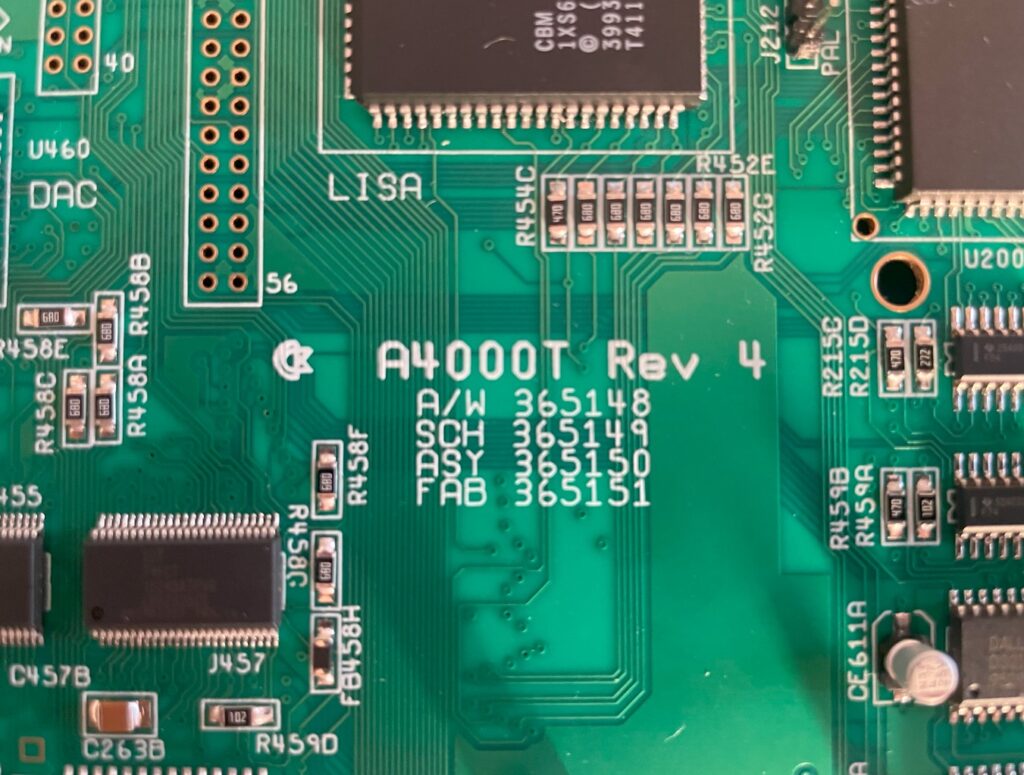
I finally got the last part that was missing from the BOM from a seller in Germany so that I could finish my Amiga 4000T motherboard replica build.
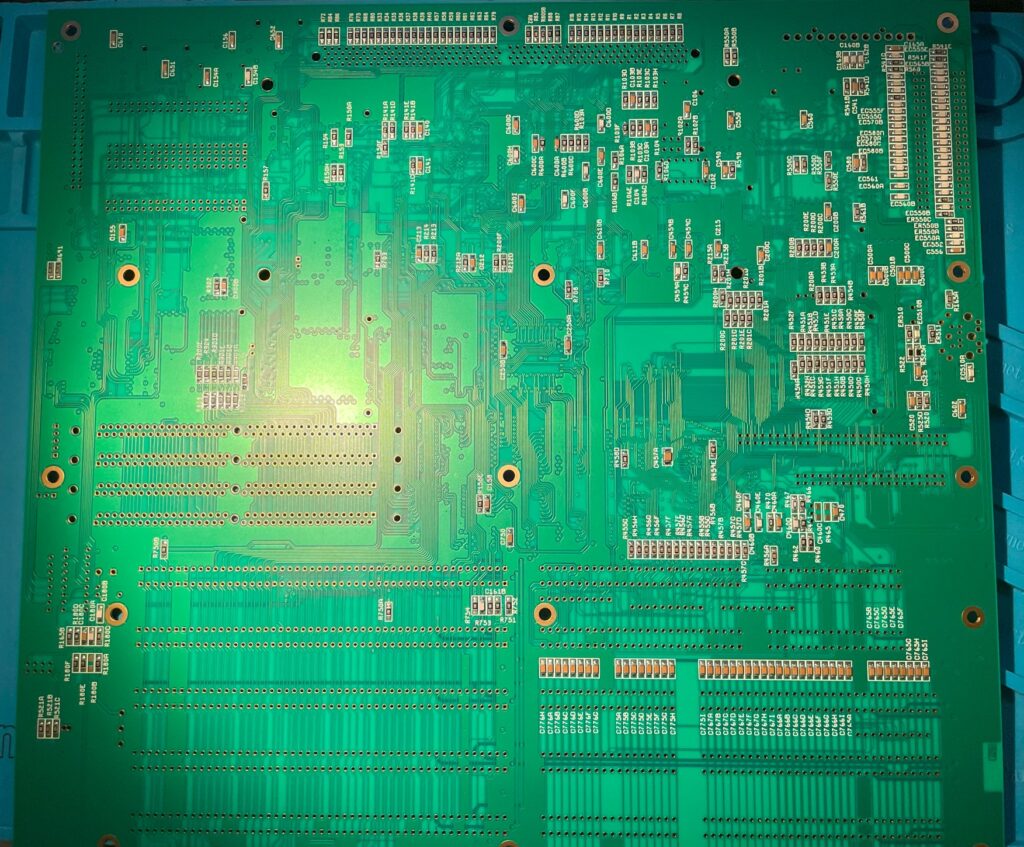
The motherboard is fully built, so is the AV module, the disk module and the ATX I/O module.
Unfortunately I do not have any AT PSUs anymore. I have ordered an AT to ATX converter, hopefully I can test the board once it arrives next week.
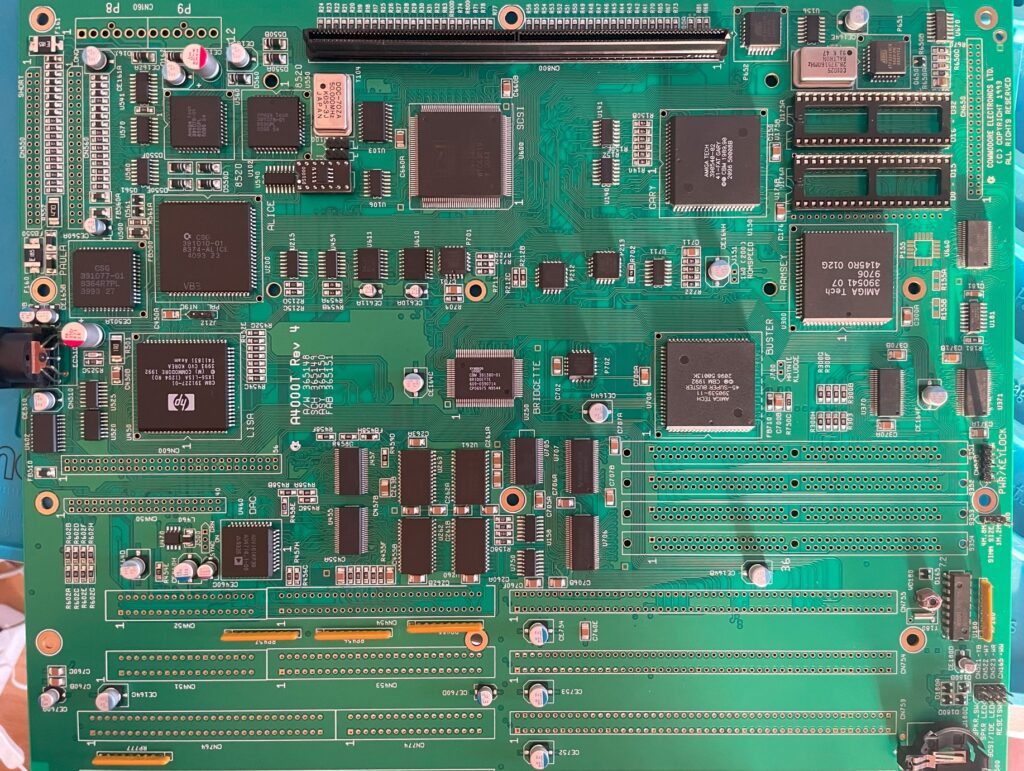
Looking back at building the Amiga 4000T
I think this build was fairly easy. The most difficult thing was locating parts on the PCB, thankfully there is an Ibom for both the main board and the modules here. If there was no Ibom, I honestly dont know how I would placed some of the components as placement can differ from Commodore made PCBs. You can not just compare part placement on pictures.
I will go through the build in more detail when I have tested the board fully.
I am happy to say that my A4000T build is soon finished. I am waiting for some pinstrips and a couple of passives I missed out on in my first order of components. When I get them I will proceed with the video and Zorro slots and also the three ISA slots (and the P8P9 power connector).
I am always nervous when soldering the 200 pin KEL CPU card connector. If you do it wrong side, you have to desolder it and turn it around – that is a lot of work. Better option is to triple check everything before soldering.
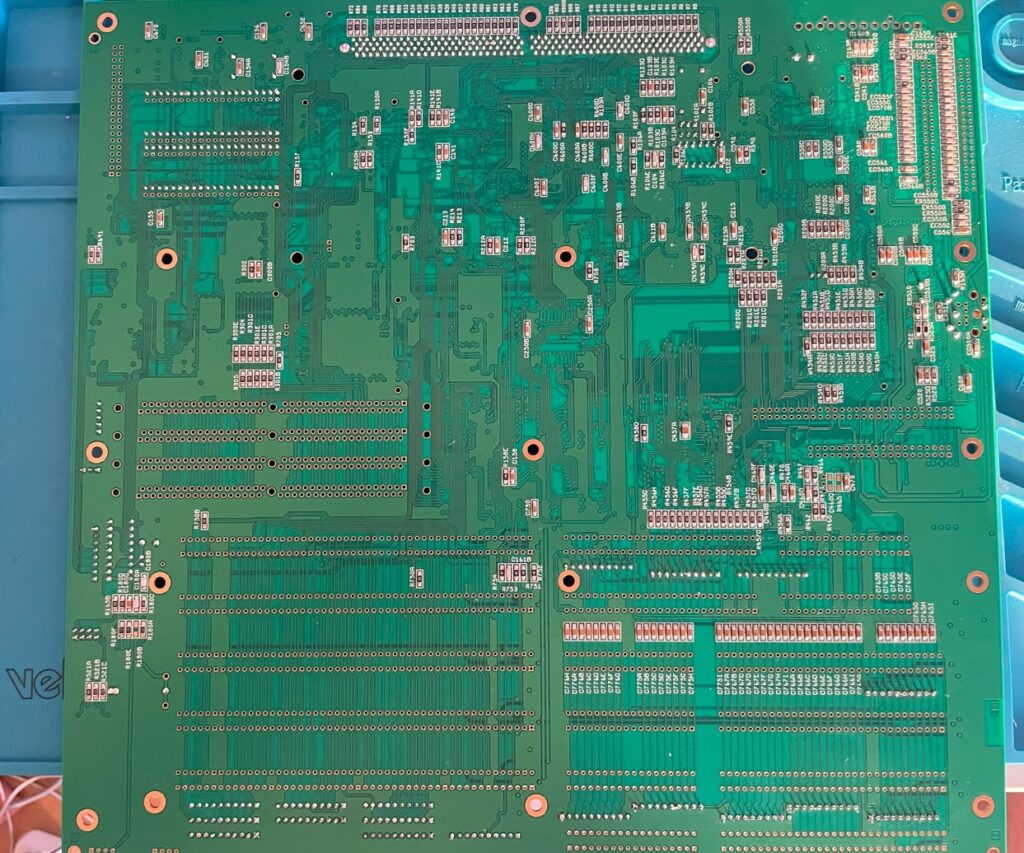
The backside of the A4000T PCB contains a lot of passives to solder on. All passives are 1206 though installation went fairly smoothly.
All thats left to do is to solder in the pin strips, 72-pin SIMM sockets, P8P9 socket, edge card slots and some small parts and then I will clean up the bord, inspect everything twice and do a test run with Diagrom. You can be sure I will post about it here!
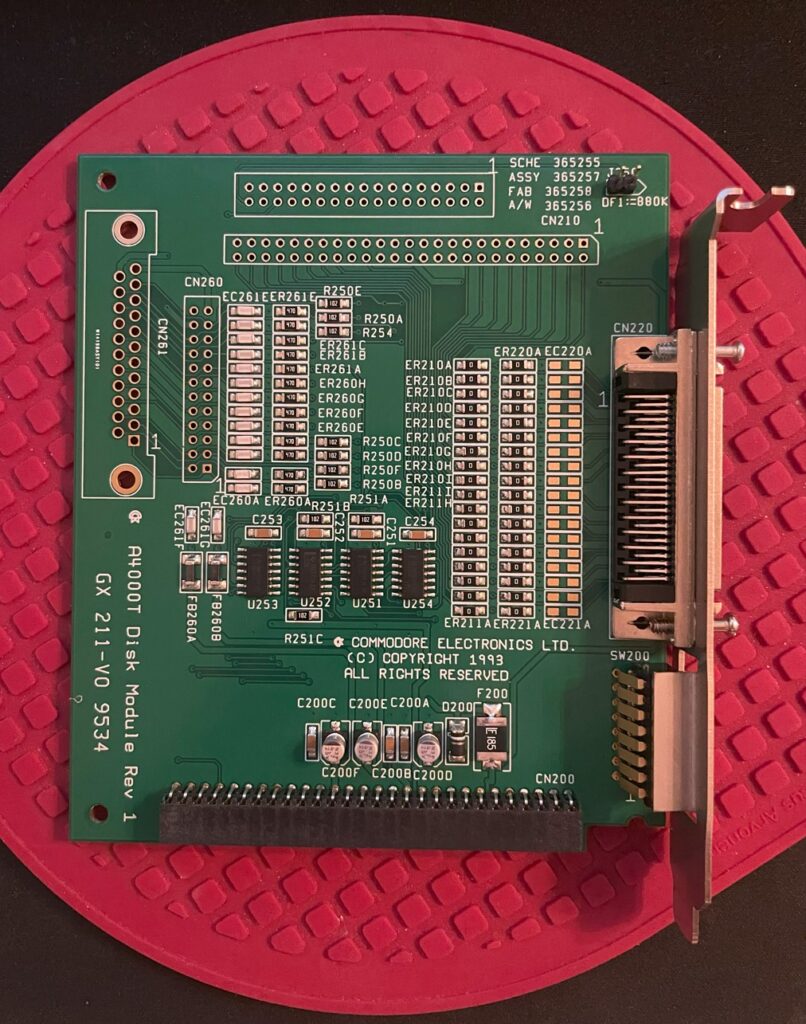
I am building an Amiga 4000T motherboard and its modules at the moment. Here is the disk module for the A4000T. It is almost fully built, missing two double row pin headers and screws for the external SCSI2 port.
The disk module has the internal 50 pin SCSI port and the external SCSI2 port. It also has the SCSI switches (accessible from backside) and floppy port. It is attached to the Amiga 4000T motherboard on a pin header.
Work continues on my Amiga 4000T replica build. On the A4000T a lot of functionality is placed on daughter cards such as audio and video out that is placed on the AV module. The A4000T AV module slots into the Amiga 4000T motherboard in a 40 pin 20 x 2 double row 2.54 mm pin header.
As you can see on the image above, the AV module is about 95% done. It is missing the headphone jack, 20 x 2 double row female connector and two 3904 transistors (and some jumpers).
I am currently building an Amiga 4000T replica that I got from Amibay. I got the components from Mouser last week and spent the weekend starting the build. There was a lot of components to solder on this and I am far from finished, but happy to say that I am finished with 90% of all passives. Backside of the motherboard is finished!
I still have a ton of 1206 passives to solder on the daughter cards. But those will be far smother to build since the cards are smaller.