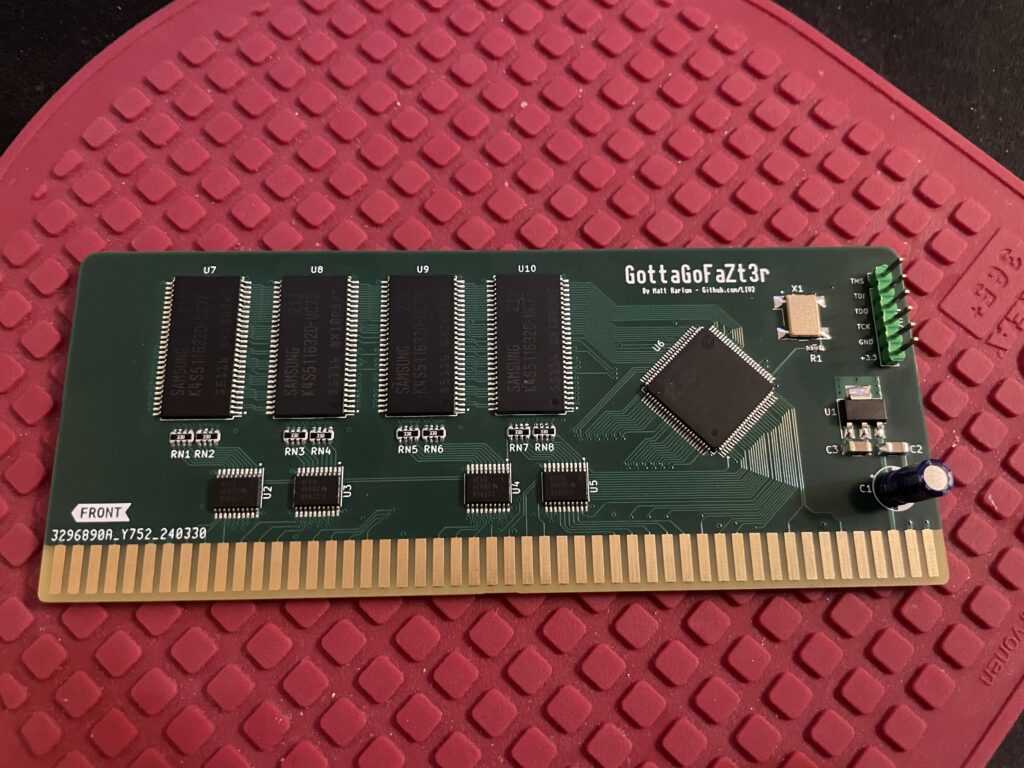
GottaGoFaZt3r 256 MB RAM Zorro 3 card for the Amiga
GottaGoFaZt3r is a memory card for Zorro 3 big box Amiga computers that you can build or buy premade. Find out more information about the GottaGoFaZt3r Amiga memory card here.
Amiga with a Zorro 2 bus supports up to 8 MB memory on the Zorro 2 bus, that memory is shared with other devices on the bus so if you have a graphics card with 2 MB you can only have 6 MB additional fast mem on the Zorro 2 bus. With Zorro 3 that is IIRC increased to 1 GB.
Phase 5 Fastlane vs GottaGoFaZt3r
Before this card was released there was not a huge offering of Zorro 3 memory cards, the most famous was probably the Fastlane from Phase 5, a huge full size Zorro 3 memory card that uses rare 30 pin memory and commanded high prices on the second hand market. The Fastlane has 16 30-pin SIMM sockets and can be expanded to 256 MB, but that would require 16 very rare 16 MB 30-pin SIMM memory. Phase 5 made awesome hardware back in the day but time marches on.
While the Fastlane was also a SCSI card the GottaGoFaZt3r is just a memory card. Where the Fastlane is full size the modern card is a mini half size Zorro 3 card. It is autodetected and just does one thing, adding more memory to your Z3 Amiga.
Whats the point of a 256 MB memory card in an Amiga?
The GottaGoFaZt3r can be built to be a 128 MB card or 256 MB card. Off course I went for the 256 MB option. While this could be seen as just bragging rights to be able to pump up your Amiga with a 256 MB memory card, keep in mind that this is actually usable on an Amiga, even with oldschool applications thanks to being able to use the memory card as a huge RAM disk.
Some comments about building the GottaGoFaZt3r Amiga memory card
Memory and CPLD was sourced from China, other than those parts its a very straight forward BOM. The build is also very simple. While the BOM does not mentions a capacitor at C1 I got the recommendations to add one so thats what I did.
My setup
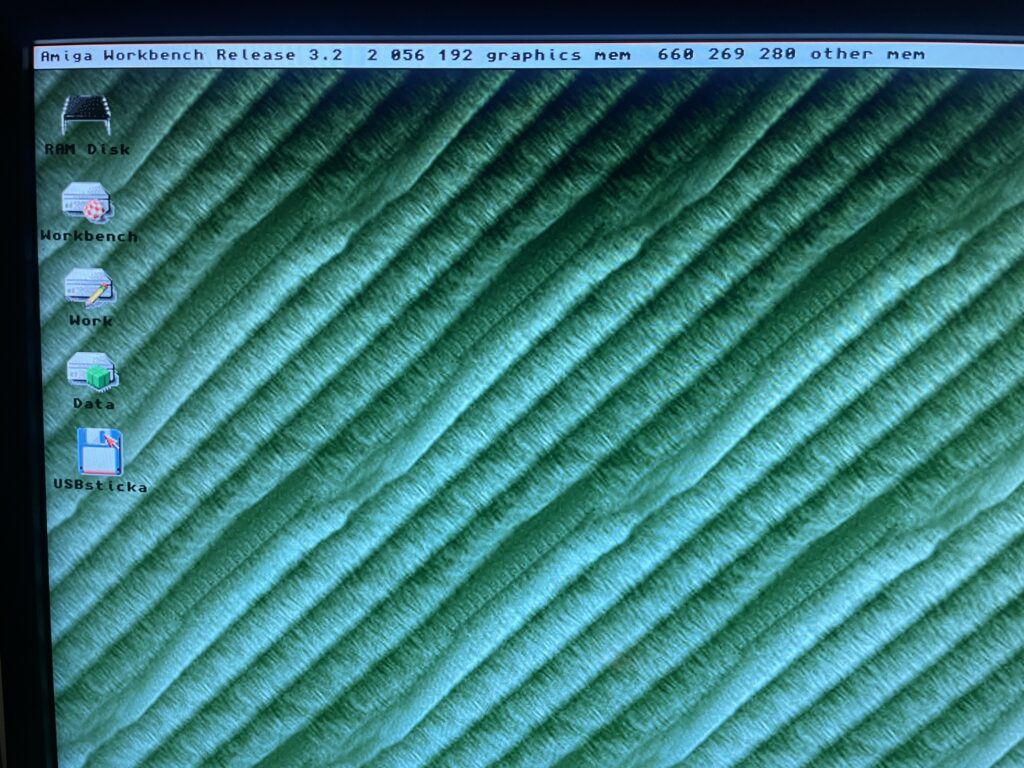
In total there is 660 MB Fast RAM in my Amiga 4000TX
I installed the GottaGoFaZt3r card in my A4000TX. Currently the memory setup looks like this on my Amiga 4000TX which is alsy my primary Amiga.
GottaGoFaZt3r: 256 MB
BFG9060: 128 MB
ZZ9000: 256 MB
I will add 128 MB fast ram to the motherboard (which will be used as 96 MB by the A4000TX), so in the future I will have 736 MB fast mem in my daily driver. Currently the memory is reported as 660 MB as I have a memory stick that is not really supported by the TX so it only partially works.
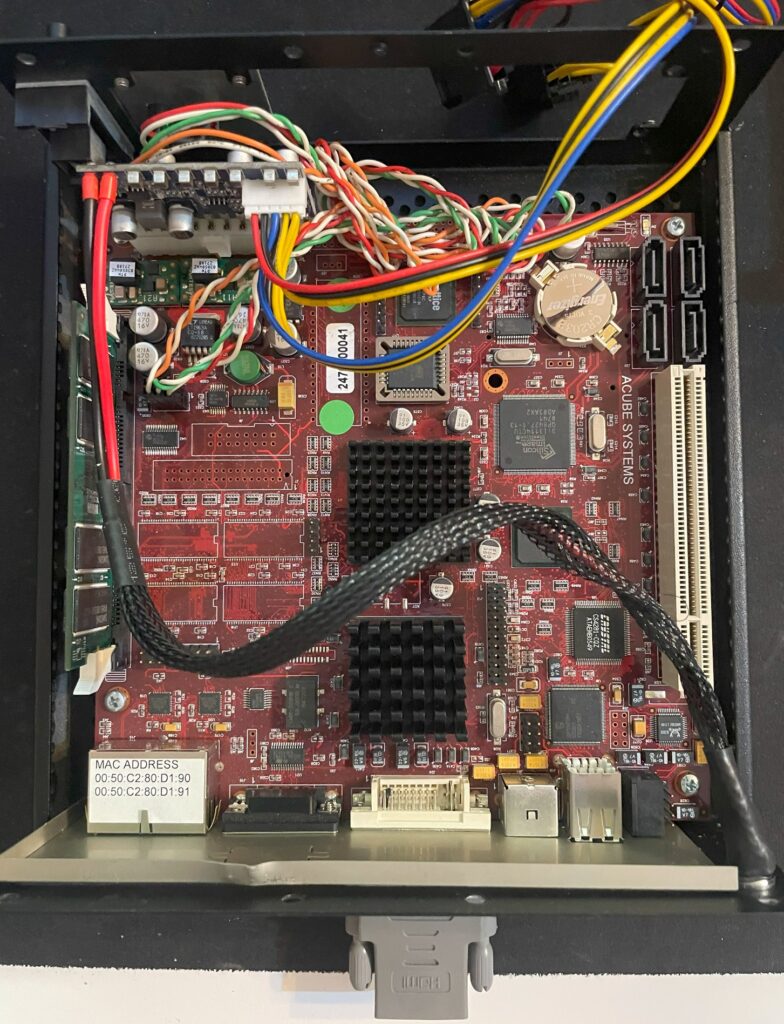
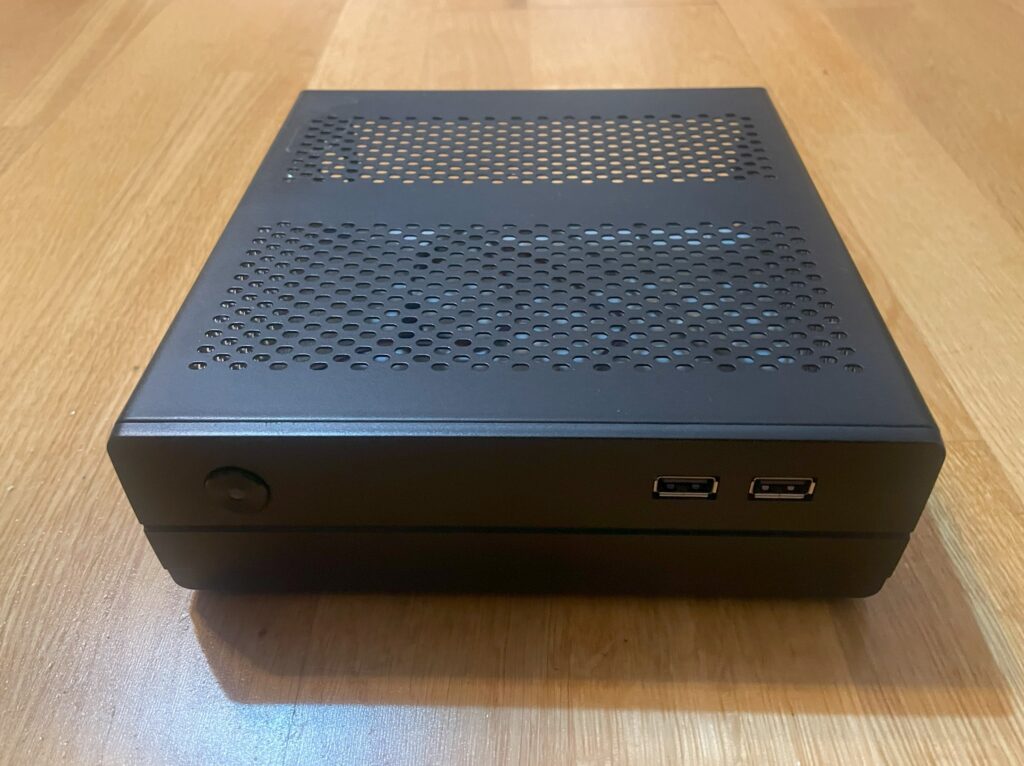
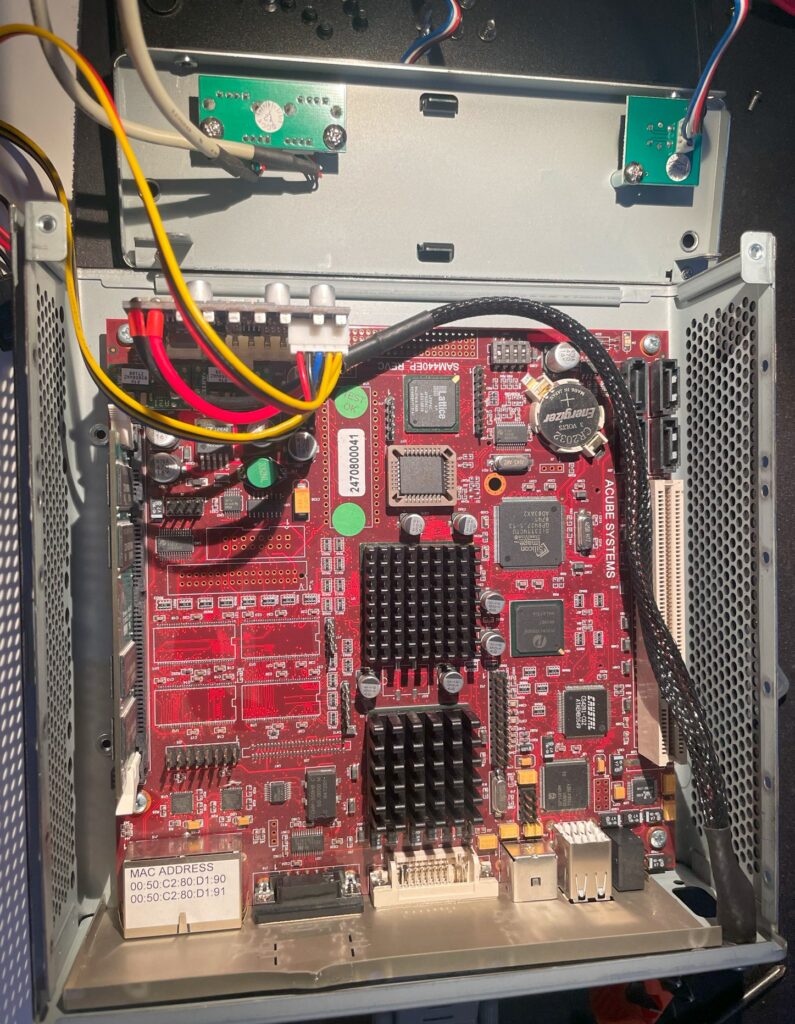
My Acube Sam440ep motherboard that I have been running AmigaOS4.1 on has been installed in this beautiful Emko case (see picture below) for the last couple of years. I wanted to swap cases with one that had front mounted USB ports since the Amiga Sam440ep motherboard only has two USB ports on the back side (and those are used by the keyboard and mouse).
Here is my Sam440ep mounted in a case made by Emko
Emko is a Czech manufacturer of cases, sadly it does not seem they are making cases for private persons any more, but a couple of years ago they had quite a large offering of small Mini-ITX cases that you could buy. I picked up two of them back then, the one on the picture above and the slightly taller version of the same case. They also had a similar case as the one above available in aluminium, I should have picked that one up when I had the chance, c’est la vie…
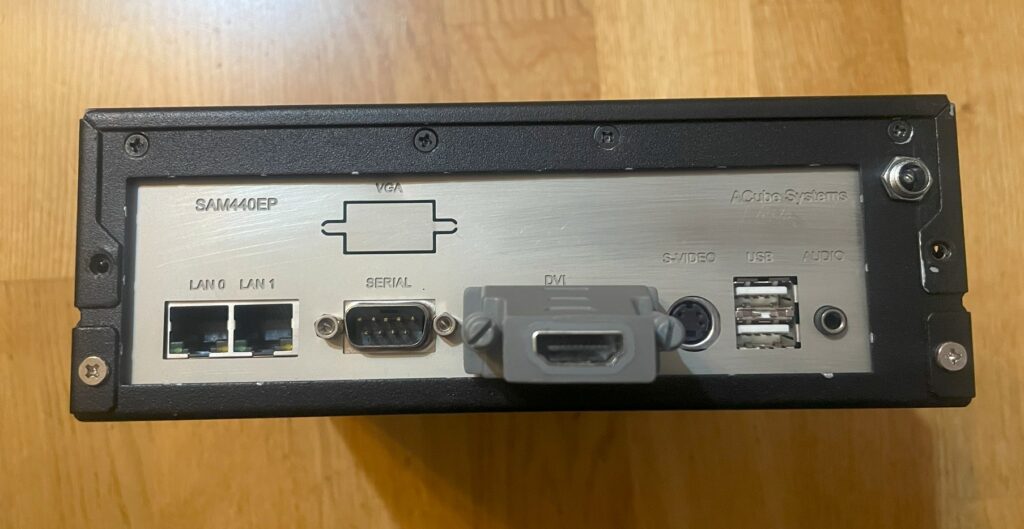
Back of the Sam440ep with the steel backplate
Here is the back of the Emko case. As you can see the Sam440ep does not have many ports. There is a serial port, DVI port, S-video port, audio out, two USB ports and two ethernet ports. Not all of these ports are usable in AmigaOS4.1 though. It is possible to hook up more USB ports from the motherboard also. Acube kindly sent the backplate to me for free if I paid for shipping.
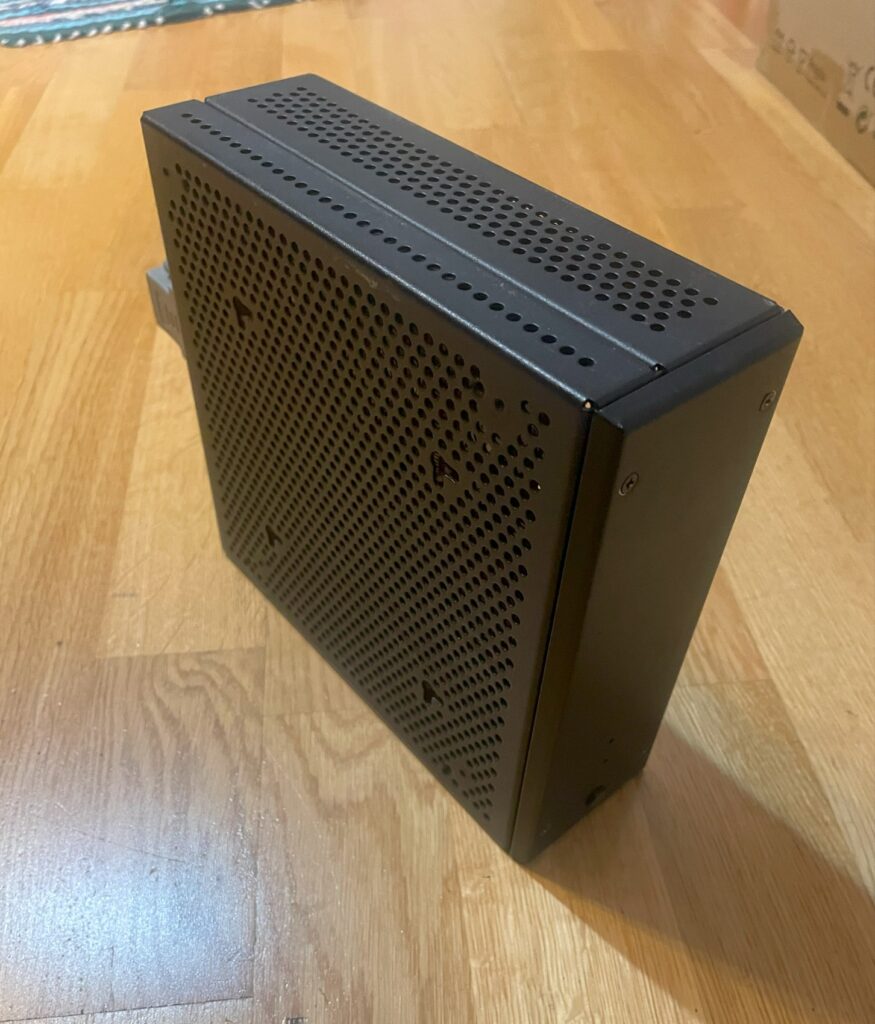
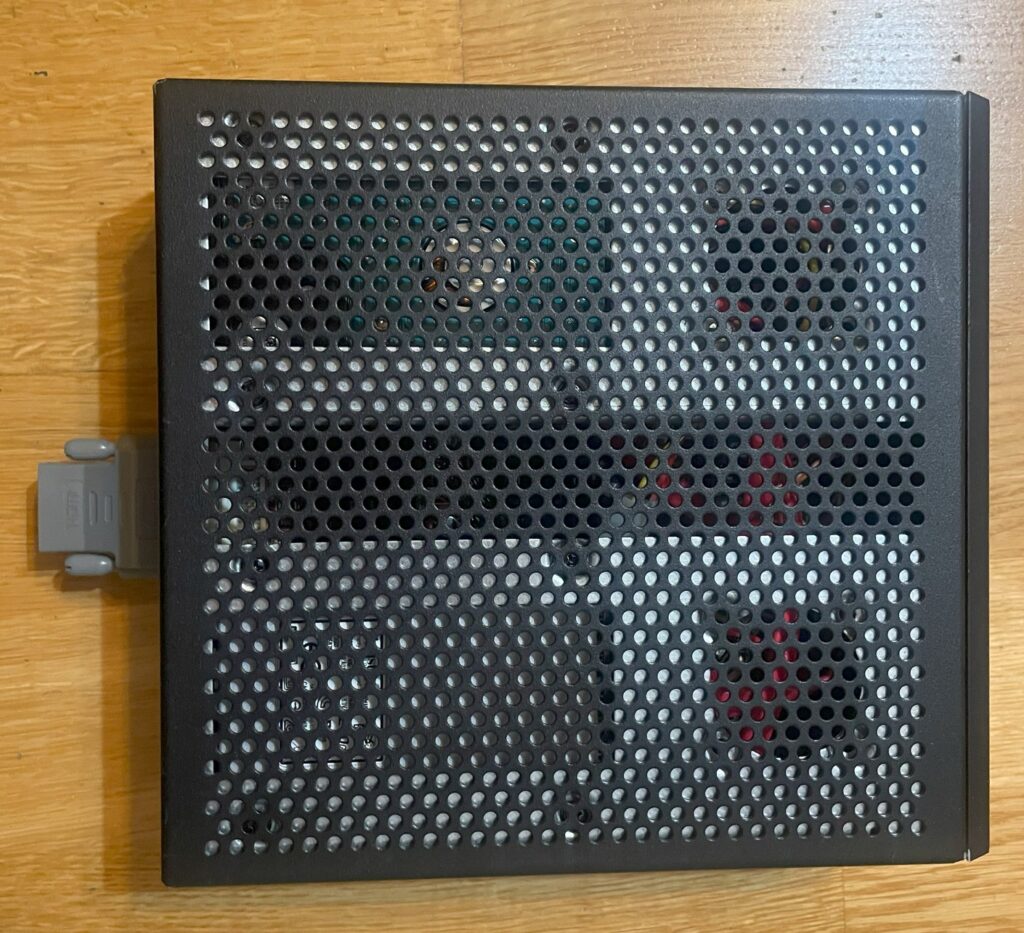
The case offers generous ventilation
One of the best things with the Emko case is its well ventilated design, this is a beautiful case for fanless systems such as the 533MHz Sam440ep motherboard.
Migrating the Sam440ep AmigaOS 4.1 motherboard to the Morex 557
Morex 557 mini-ITX case
I have had my eyes on the Morex 557 Mini-ITX case for a while and was happy finding a second hand unit for sale locally. The Morex 557 is a small ITX case, not that much larger than a Mini-ITX motherboard (and actually just a tiny bit smaller than the Emko case). I suspect these type of cases will be much more difficult to find in the future thanks to the popularity of ITX gaming rigs where you need space for a graphics board so if you like small ITX cases, time to hoard up.
Step 1 – Dismounting the old case
There are a lot of screws to unscrew to open up the Emko case
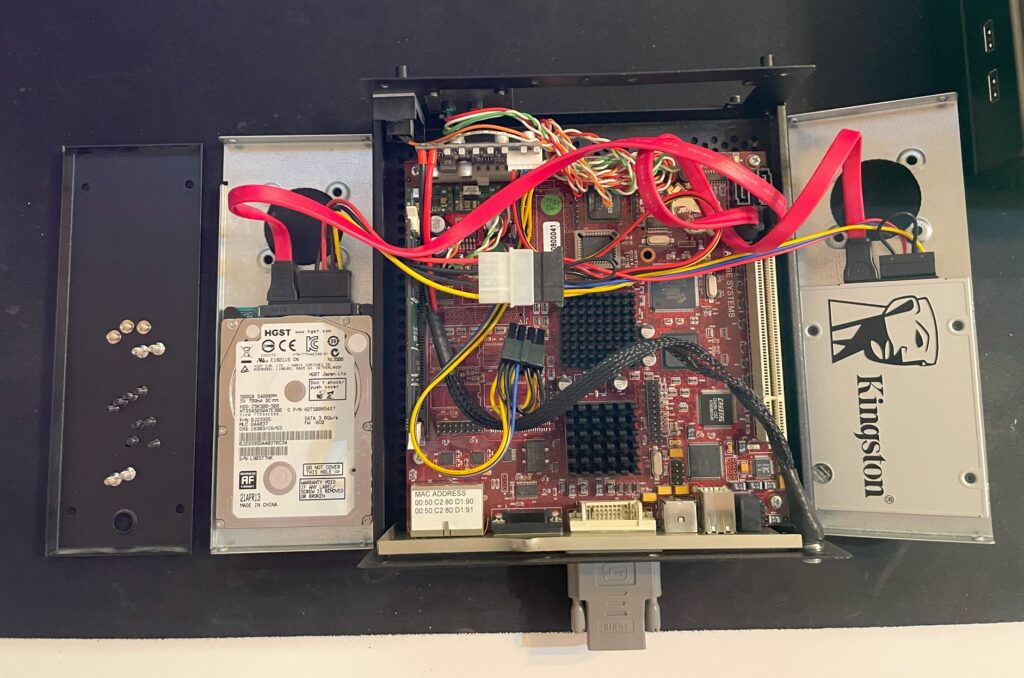
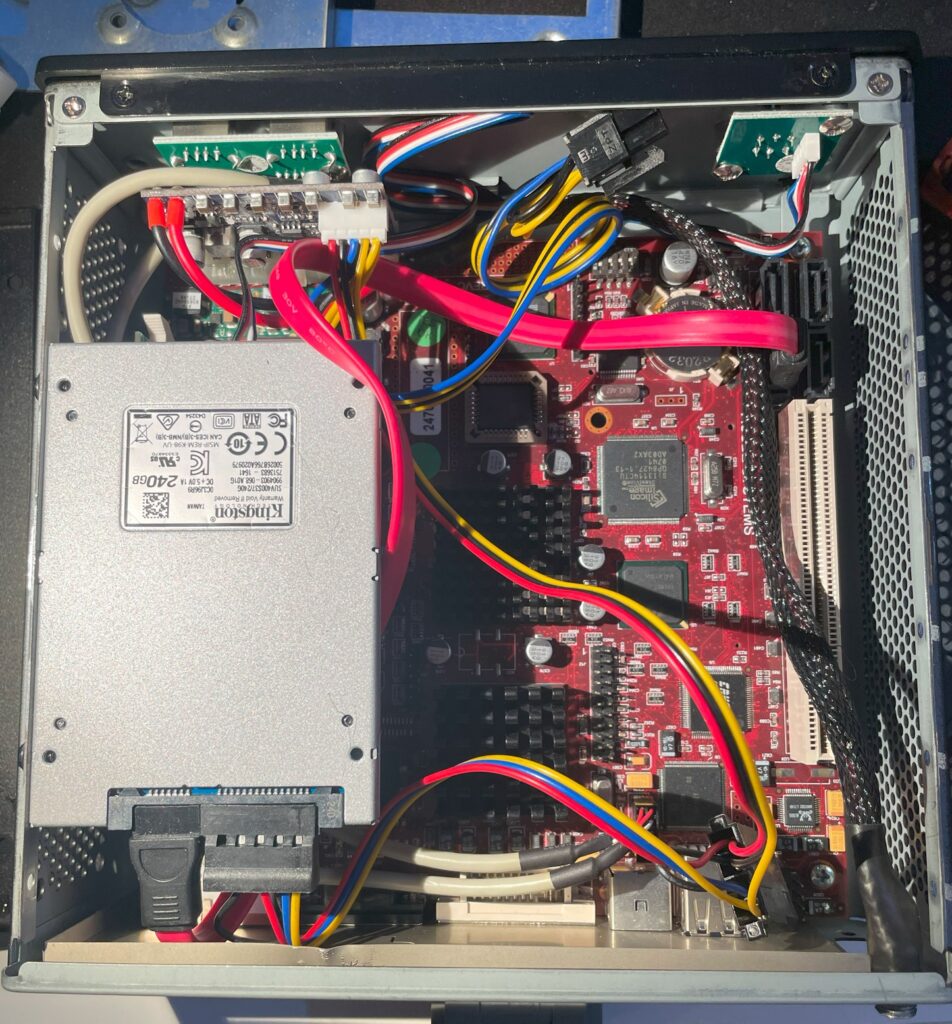
I have set up the Sam440ep with two drives, one 256GB SSD for the Workbench and Work partition and one old 2.5″ 500GB HDD as a data drive. I had this idea to get a larger drive and migrate all Amiga stuff I have to the HDD. That way I would have a backup of all my Amiga hoard of files. That proved difficult though as the FTP program crashed no matter what I tried. Will give it another try in the future but I will definitely retire the slow mechanical HDD sometime in the future.
Step 2 – Prepare installation in new case
Close up of the Sam440ep Next generation Amiga motherboard
The motherboard is a bit dirty, I did not have enough IPA to clean it though, so next time maybe. If I remember correctly, the upper heatsink sits over the CPU and the bottom heatsink sits over the GPU. The 533MHz Acube Sam440ep can run fanless. Believe it or not, for regular Amiga stuff, 533MHz is fast enough. AmigaOS4.1 definiely does not feel slow on this modest next generation Amiga.
Step 3 – Installation in Morex case
The Morex 557 case was a really tight case, the front had to be removed to get the motherboard into the case. Also note the USB headers on the motherboard, they where not keyed so I had to look up pinouts.
Step 4 – Adding SSD and harddrive to the Sam440ep
It was not obvious where to put the storage drives at first – There was holes on the side of the case for 2.5″ units. Here is the SSD mounted to the side with two screws only, it was a tight fit but it aint going anywhere now.
And here is the 500GB harddrive mounted. I will run this until I find a good replacement. This drive has a bad habbit of spinning down which makes it slow whenever you need to access it again, no idea how to disable that and a good reason to get rid of it in the future.
As you see, with both drives mounted there is still space between the for heat to rise and escape the case.
Some words about AmigaOS 4.1 before closing this post…
AmigaOS 4.1 Final edition
So the reason for all this is to run AmigaOS4. The Sam440ep motherboard came out in 2008 (or was it 2009), even back then it was obsolete by PC standards. That it cost as much as a much higher perfoming PC of its day made it a hard sell for those outside of the Amiga community and not sold on Workbench.
But the future was bright back then, thanks to the Sam440ep. Because of legal problems, there had been no new next generation Amiga hardware released for quite some years. The released of the Sam440 changed that and that created a lot of excitement and hope for a bright future for Workbench (or AmigaOS depending on what you want to call it).
The Sam440ep was the first batch of AmigaOS 4 compatible hardware released by Acube that lead to renewed interest in the next generation Amiga PPC platform. Unfortunately as we look back today, PPC was probably not the right way to go for the Amiga.
The future of Amiga here and now is probably ARM and Workbench 3.*, not PPC and AmigaOS 4.*.
Thanks to PiStorm, anyone can have a high performance Amiga with “full” compatibility with 68k applications, so IMHO the future of AmigaOS 4 is sadly bleak. But that does not and should not stop anyone from using it (or developing it further).
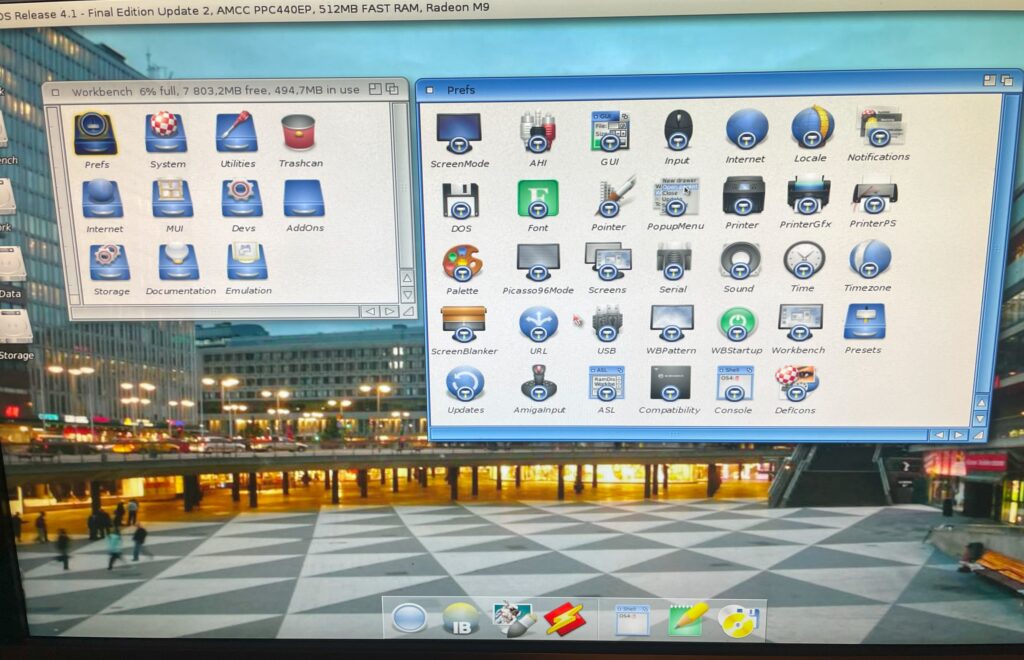
AmigaOS 4.1 showing Prefs
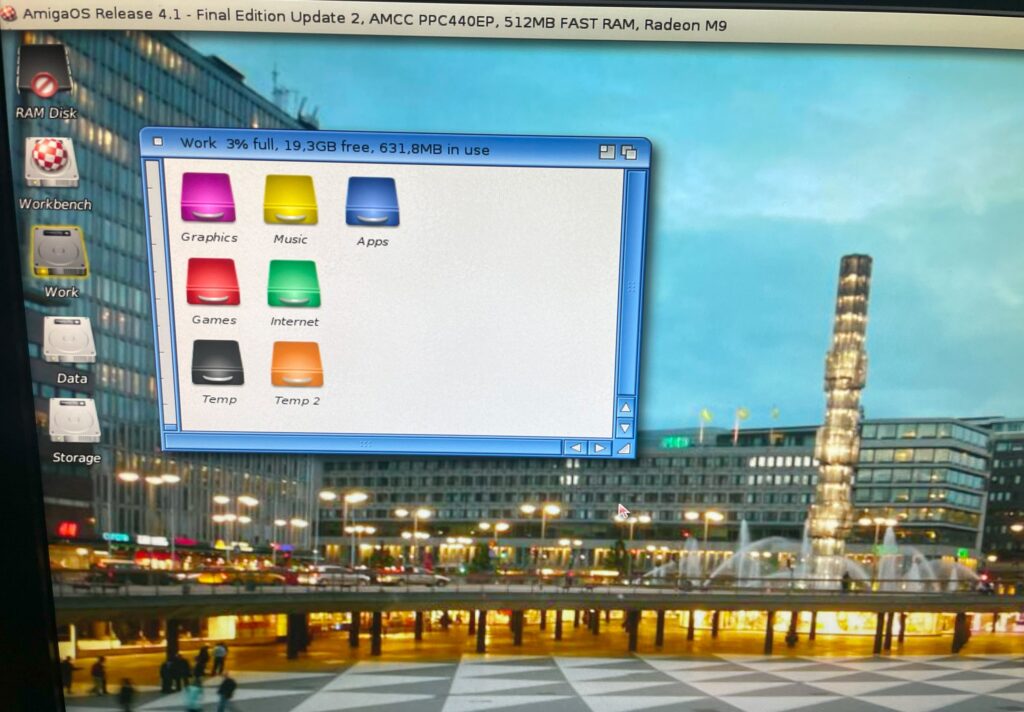
One of the advantages of a next generation Amiga Workbench is that its a much more updated version of the Amiga operating system, both from a software and hardware point of view. There is a TCP/IP stack included, AHI is standard and fonts look amazing on Workbench for example. At the same time, hardware is complete, relatively modern and reliable.
But installing AmigaOS 4.1 is a sharp reminder that we are still in the early 90ies. Configuring AmigaOS to your liking from the first installation is a reminder of how far general computing has gotten in comparison with the “modern” AmigaOS.
There is a lot of clicking and editing files to get it custom tuned to your liking.
Prepare to sit off a couple of days to get it tuned to your liking. Sadly Prefs is unfortunately just a mess by modern standards.
But when AmigaOS 4.1 is fine tuned to your liking, it is perfect – And most of the stuff is exactly where you expect it to be and where it used to be. That is the huge selling point of AmigaOS4, but also a dead end!
The best thing is, you can get it today (and pretend its 1995 again).
Someone said that AmigaOS4 is for hardcore Workbench users – I can not agree more!
This is what every Amiga fan was dreaming of back in 1995 -An Amiga running on a modern CPU with a ported operating system-. The best thing is, you can get it today (and pretend its 1995 again).
Closing off, my primary use of my Sam440ep next gen Amiga is for PPaint, there is a PPC port of it that runs beautifully on the Sam. If there was a modern browser capable of the modern web available I would not mind running a higher performance next gen Amiga as a daily driver.
I got the opportunity last year during fall to purchase a GBAPII++ mini graphics card with all passives already mounted. Only thing it did not have was the Cirrus Logic chip, memory chp and the CPLD (and some small components). The mini version of the GBAPII++ is the same card functionality wise as the regular one. You can read about the regular GBAPII++ here, you can read about the mini version of the card here.
As I was going to build the regular version of the graphics card in parallell I got lazy when I put together the BOM and assumed that the voltage regulator was the same for both of the cards. I was wrong, the GBAPII++ mini uses another voltage regulator, which explains why I could not program the CPLD and why the voltage regulator was running very hot on the card once I had built it.
Having received another shipment of components from Mouser late last year in December with the correct voltage regulator, I was anxious to find out if I had fried the card or if it was going to work. Happy to tell you the card in the picture is working fine after I swapped the voltage regulator to the correct one!
Whats the point of such a small Amiga graphics card?
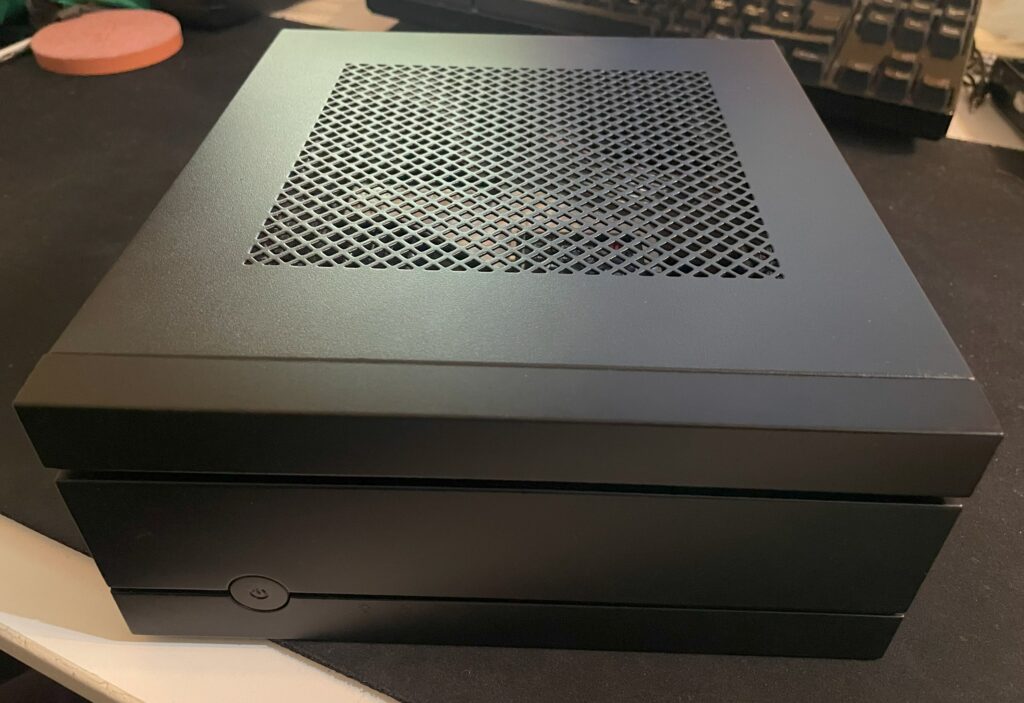
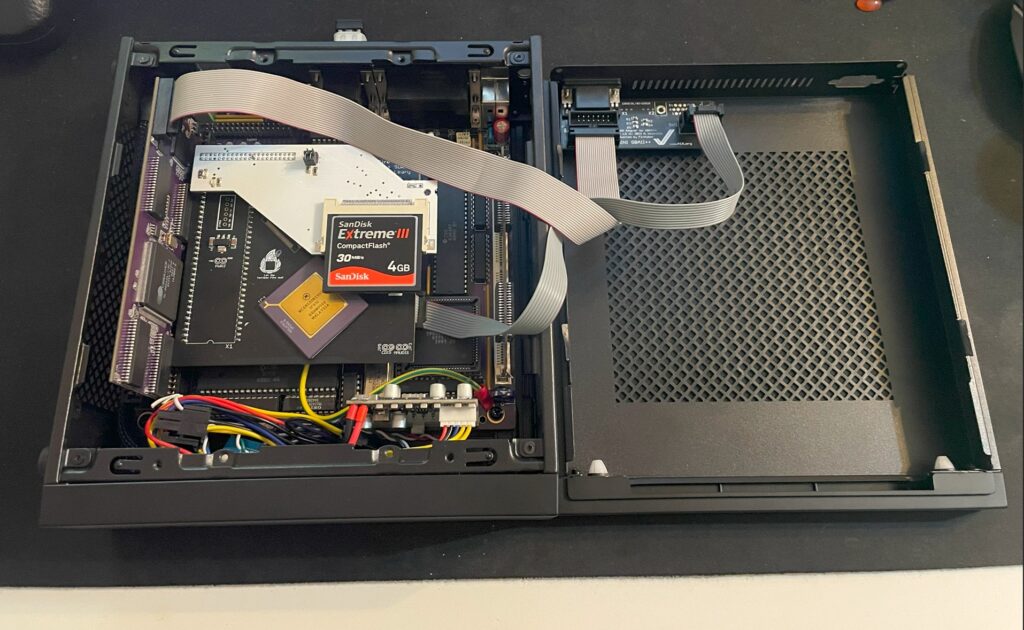
I use my other GBAP2++ mini card in my Mini-ITX Amiga Denise but I think I will use this one in another big box Amiga. As you can see the Denise is installed in a very low profile case – The tiny card makes it possible to use a small case. If anyone is wondering what case I am running, it is a Chieftec IX-01B Mini-ITX case but it has the CD/DVD addition stacked on top of it to make room for the graphics card (Chieftec MK-35DV).
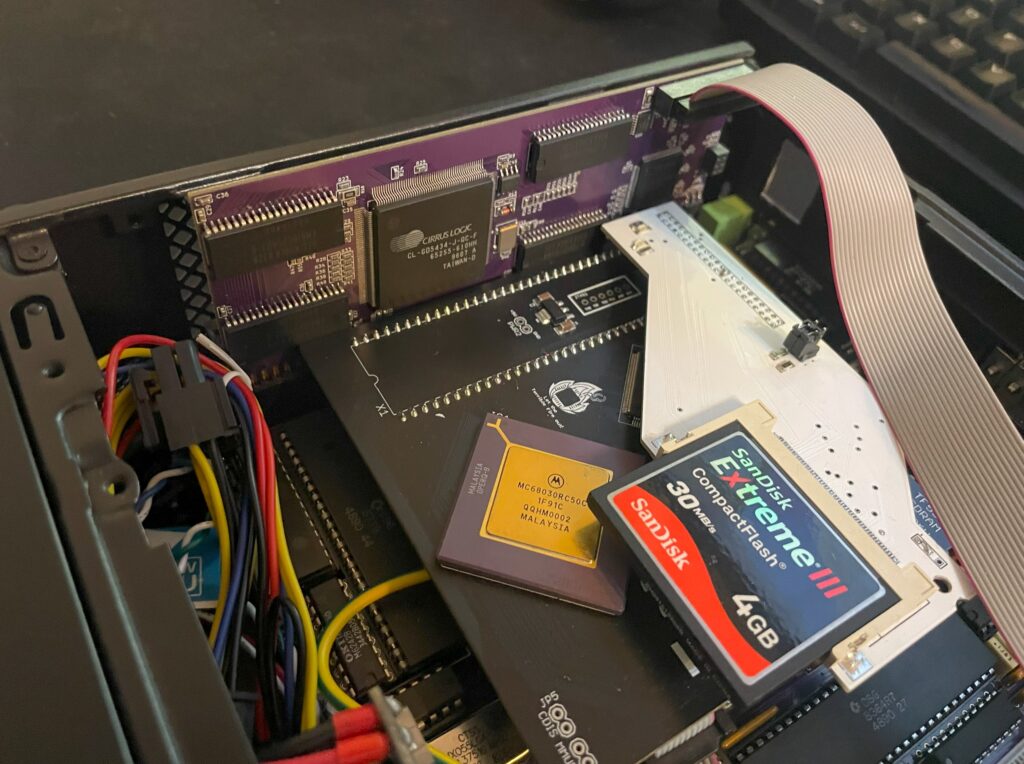
This Amiga is based on the Denise Mini-ITX A500+ clone motherboard. It has a TF356 68030 turbo card with 64MB memory, a 4 GB CF card and an Indivision ECS MK3, it also has a GBAP2++ mini graphics card. The video output from the VGA connector is beautifully switched from native ECS to P96 output (and vice versa).
Here is another closeup of the card running fine in my Denise Amiga clone.