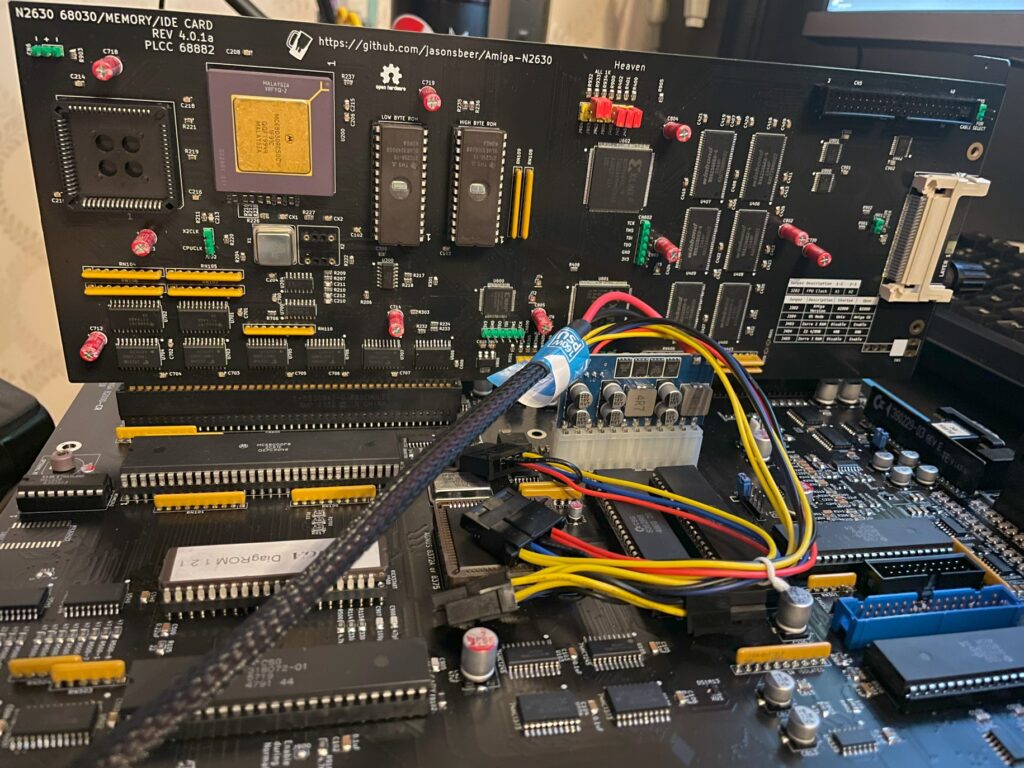
N2630 is a great 68030 CPU card you can build yourself for the Amiga 2000 or A2000EATX project. You can find more information about the N2630 project on the website here.
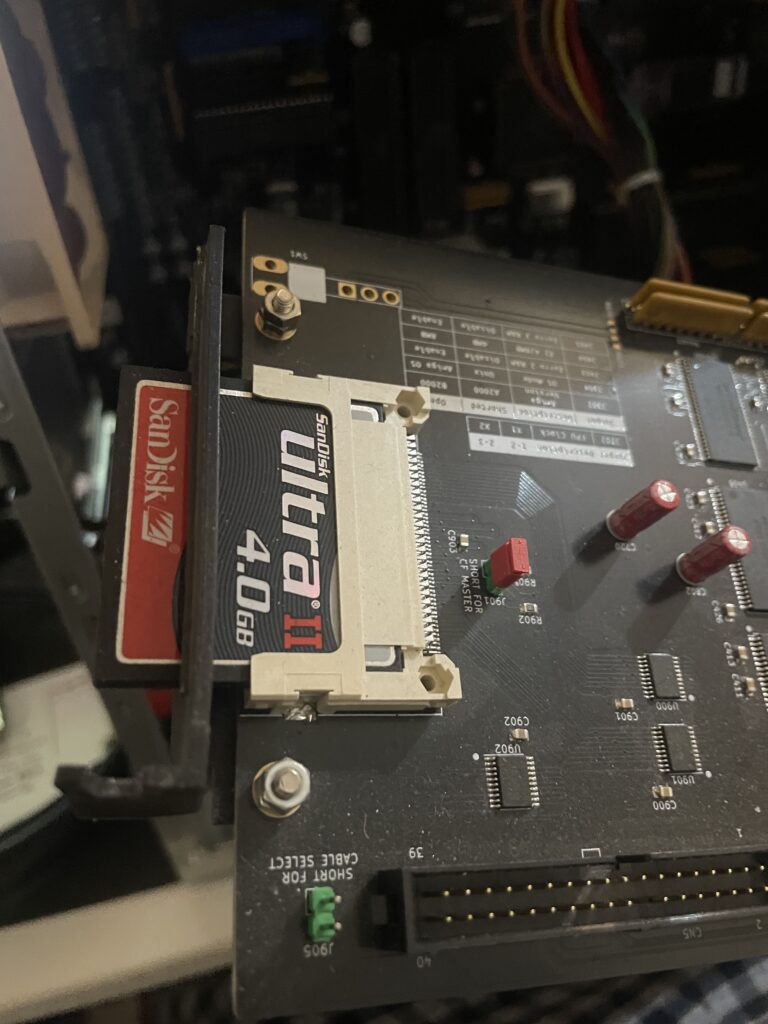
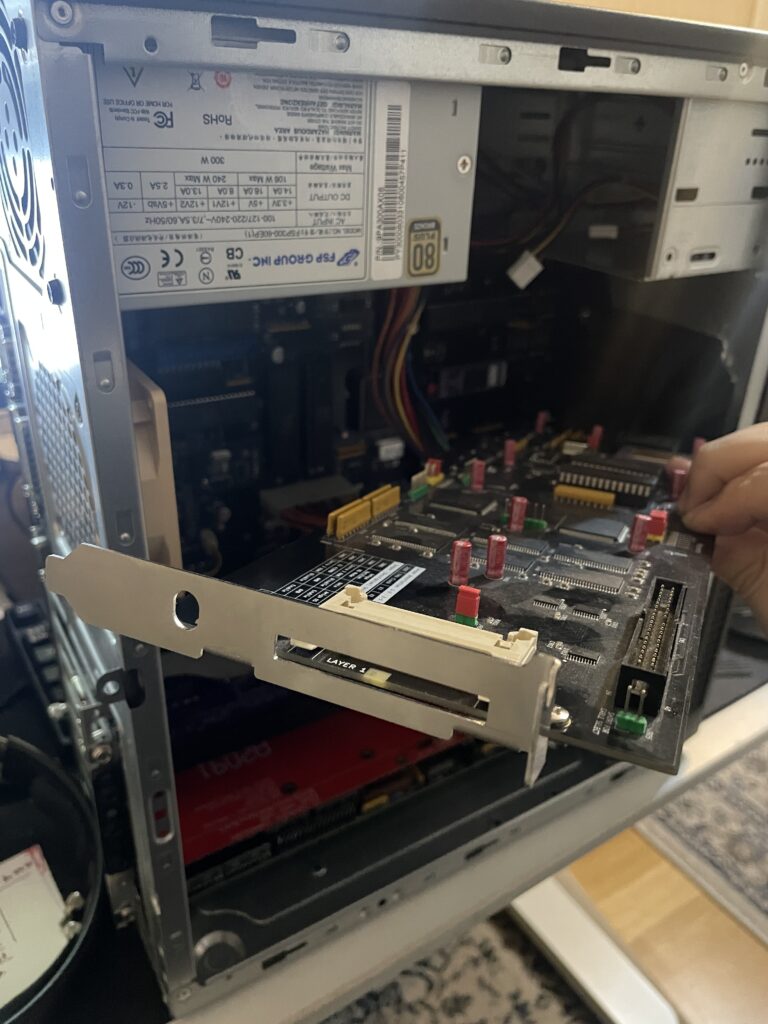
N2630 CPU card with 3D-printed bracket (that has a part broken off)
There is a model for a bracket for the N2630 that you can 3D print. I did that but it was too flimsy and eventually broke in two pieces.
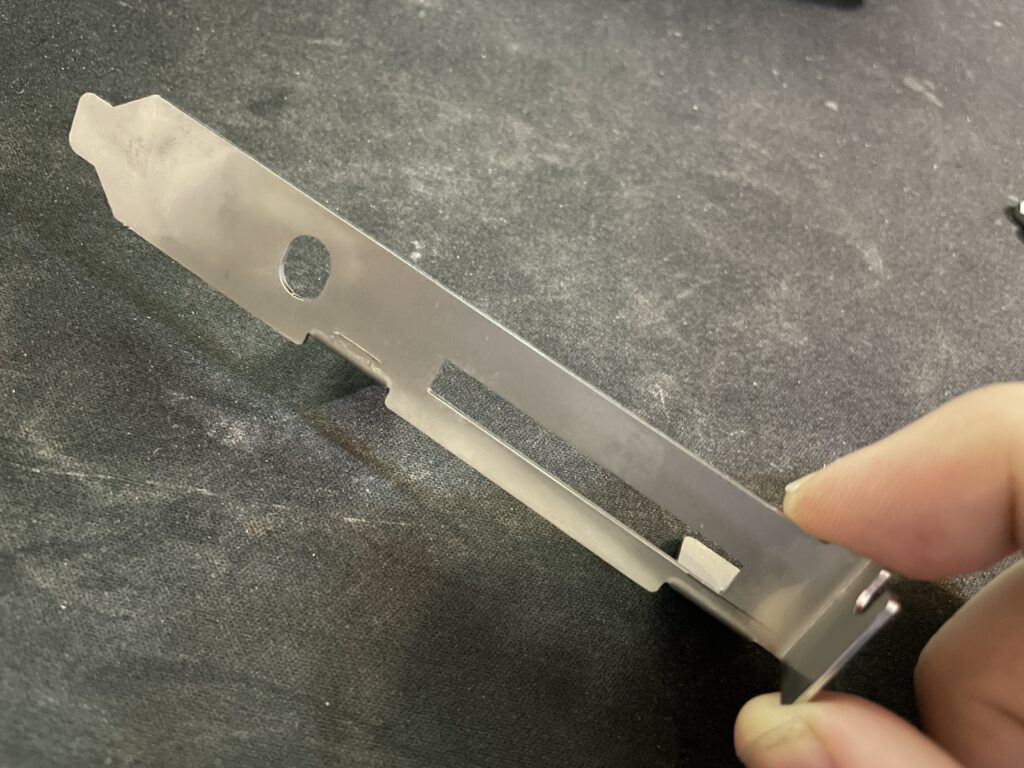
I was planning on ordering a 3D metal print of the bracket from JLC but heard of arymanx on Amibay who had made a small batch of metal brackets for the CPU card. In this hobby, you have to act fast, or the chance might never come up again so in less than a week a shiny metal N2630 Amiga 030 CPU card bracket arrived to me from UK.
If you are interested in a metal bracket for the N2630 too, feel free to contact arymanx directly about it on AmiBay.
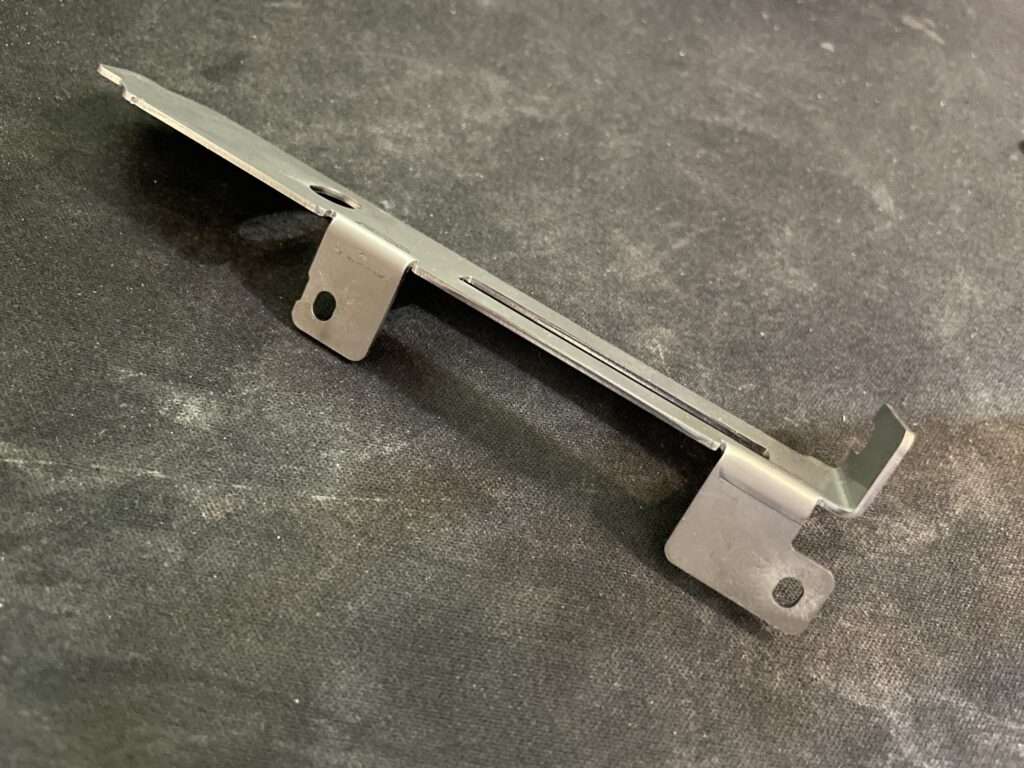
Another view of the N2630 metal bracket.
Its just a bracket, but is a great reminder of that it is the small details that makes a DIY build great.
Metal bracket mounted on to the N2630, my A2000EATX is in the background.
I mounted the bracket to the N2630 with two screws and nuts. The nuts got a drop of blue Loctite to hold them secure. Fitment was excellent.
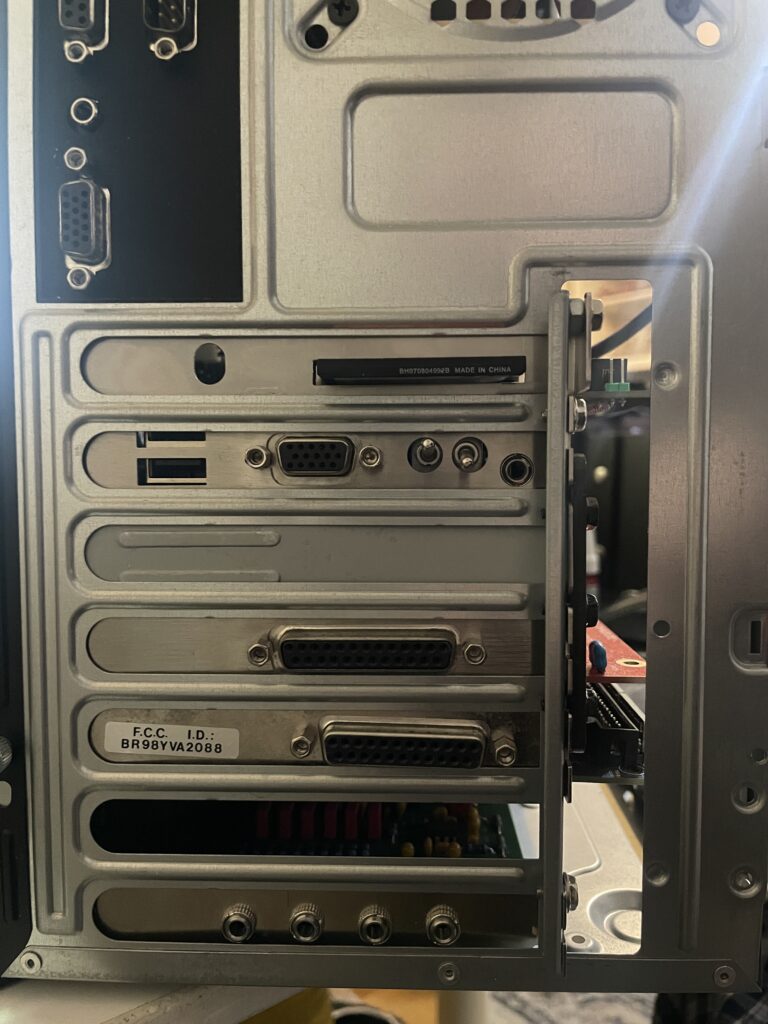
Back of my A2000EATX. One slot left for a NIC.
Not only does it hold the card better in the case it also looks better.
Pay no attention to the nut wedged between bracket and case. The CPU slot I used when building my A2000EATX motherboard was taller than a regular CPU slot used on the Amiga 2000 making the CPU card sit further out from the motherboard.
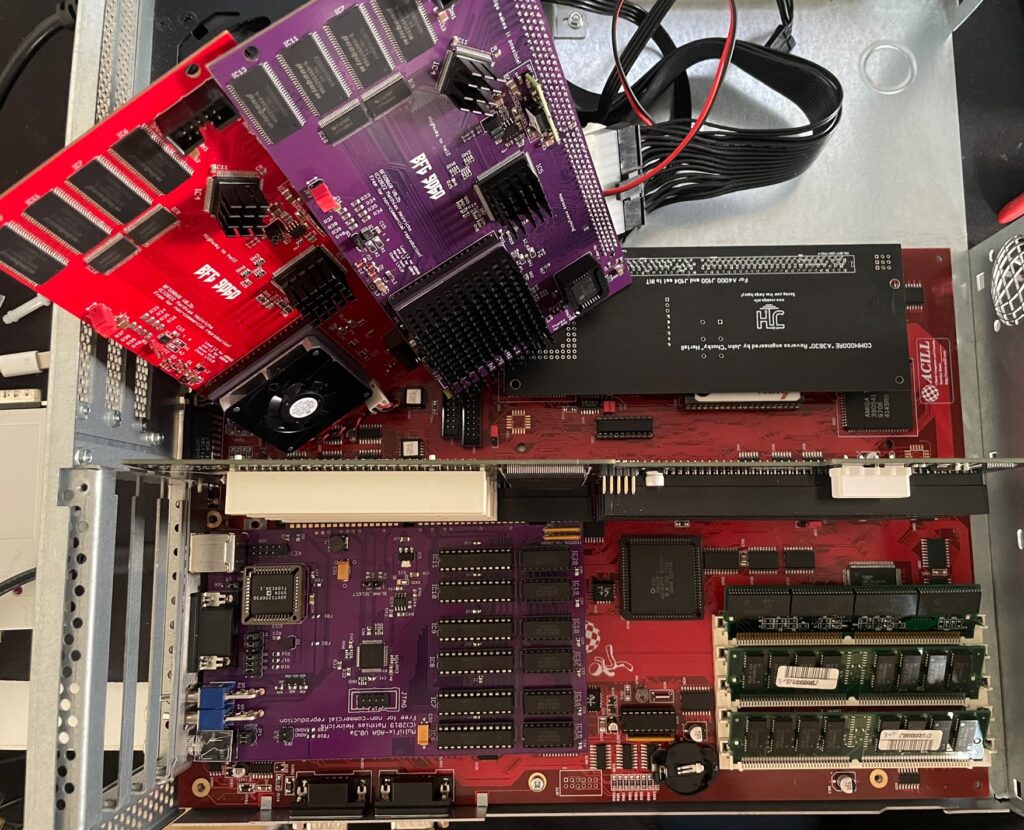
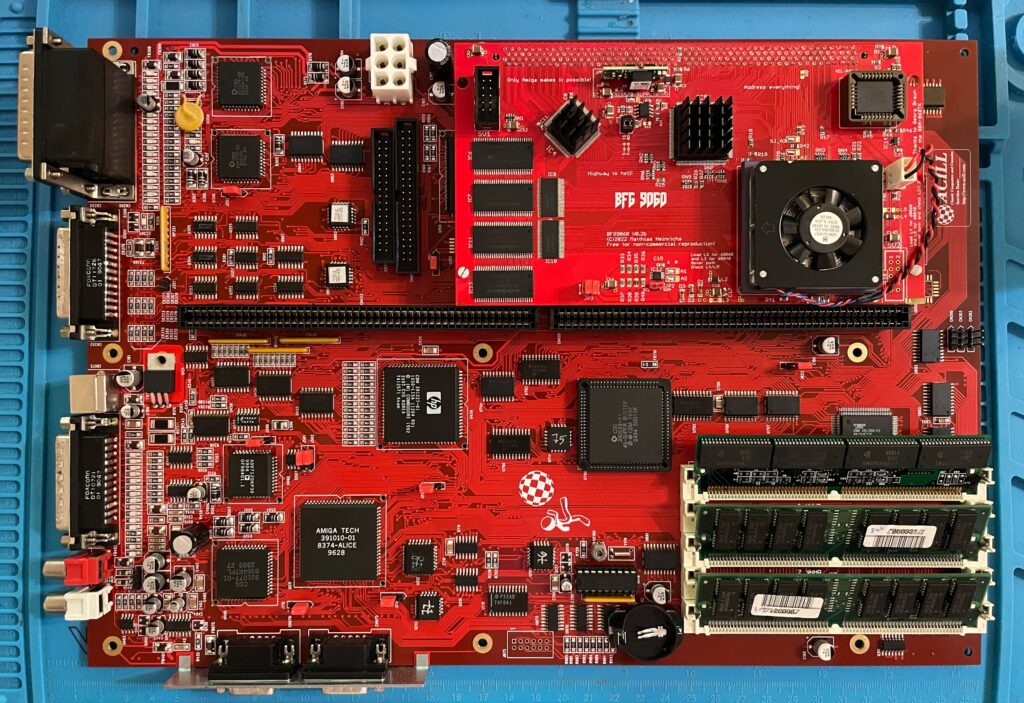
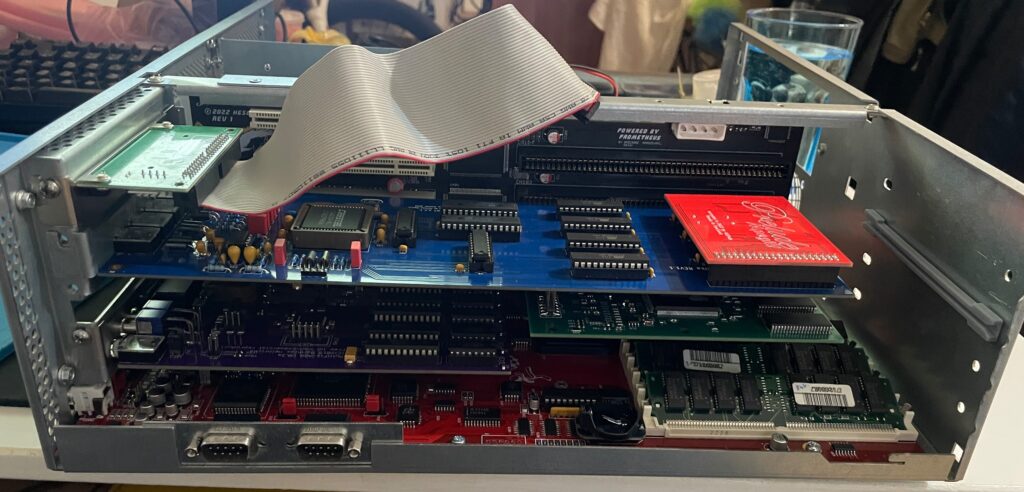
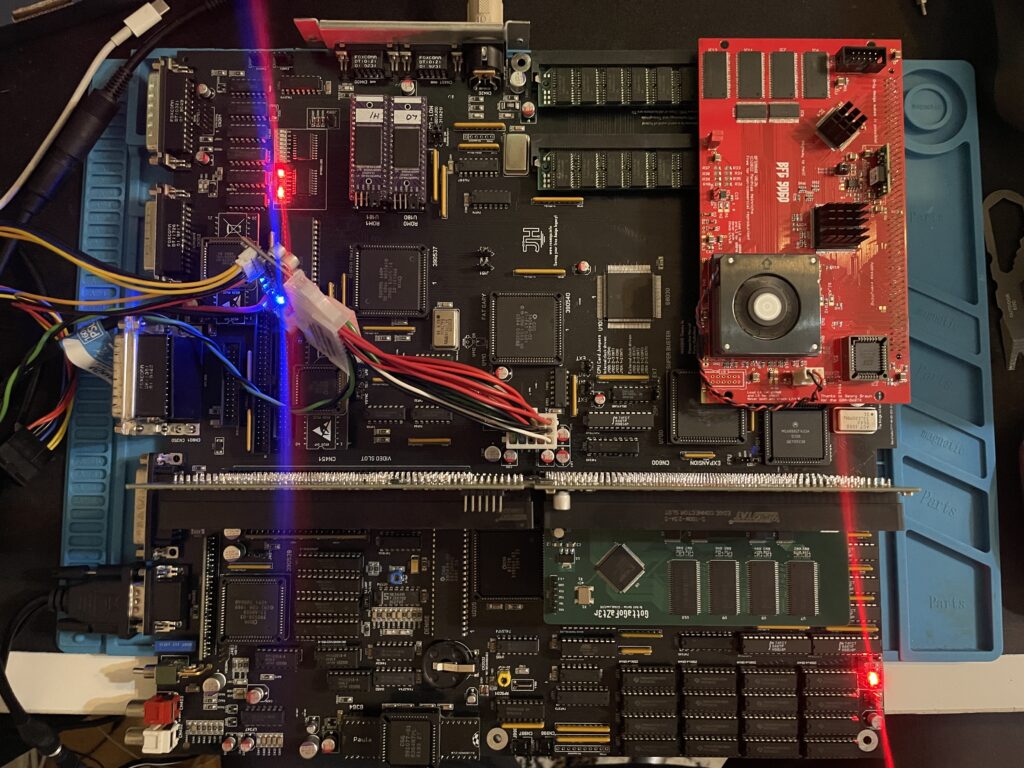
Here is my test setup: Acill A4000D motherboard with ReA3630 and two BFG9060 cards including Firestorm PCI daughterboard, Multifix-AGA and a replica A4000D case
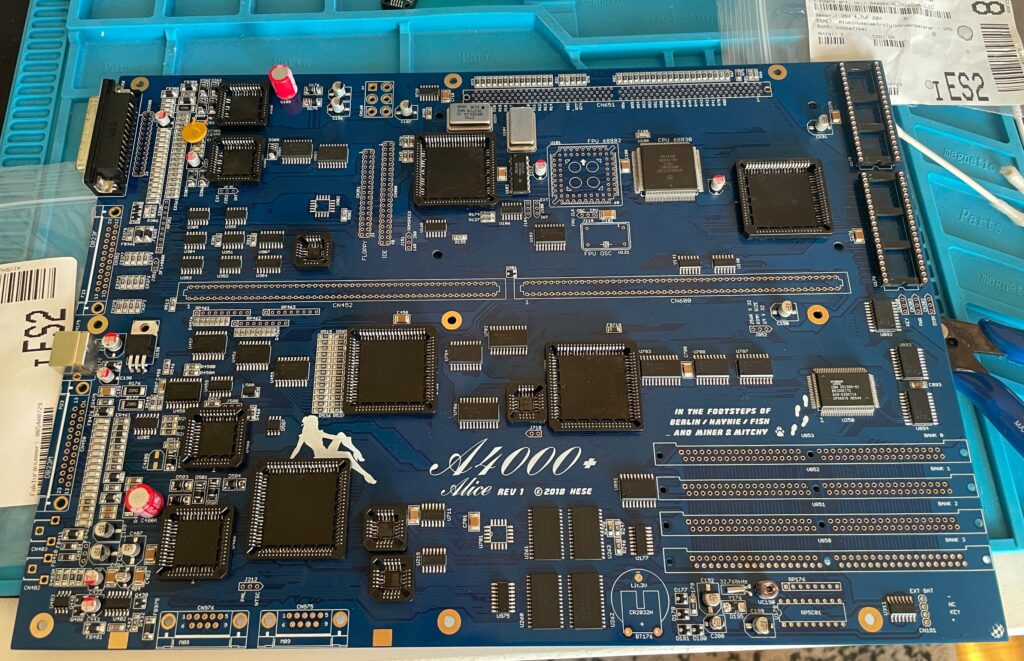
I had two summer projects this year that I recently finished. One was an Acill A4000D replica motherboard and the other was a Hese made A4000+ Alice A4000D CR motherboard replica. You could say two brothas from different mothas or something…
Both motherboards worked fine when doing basic test runs, however they both failed to run with a BFG9060. All I got when running them with a BFG9060 060 CPU card was a black screen.
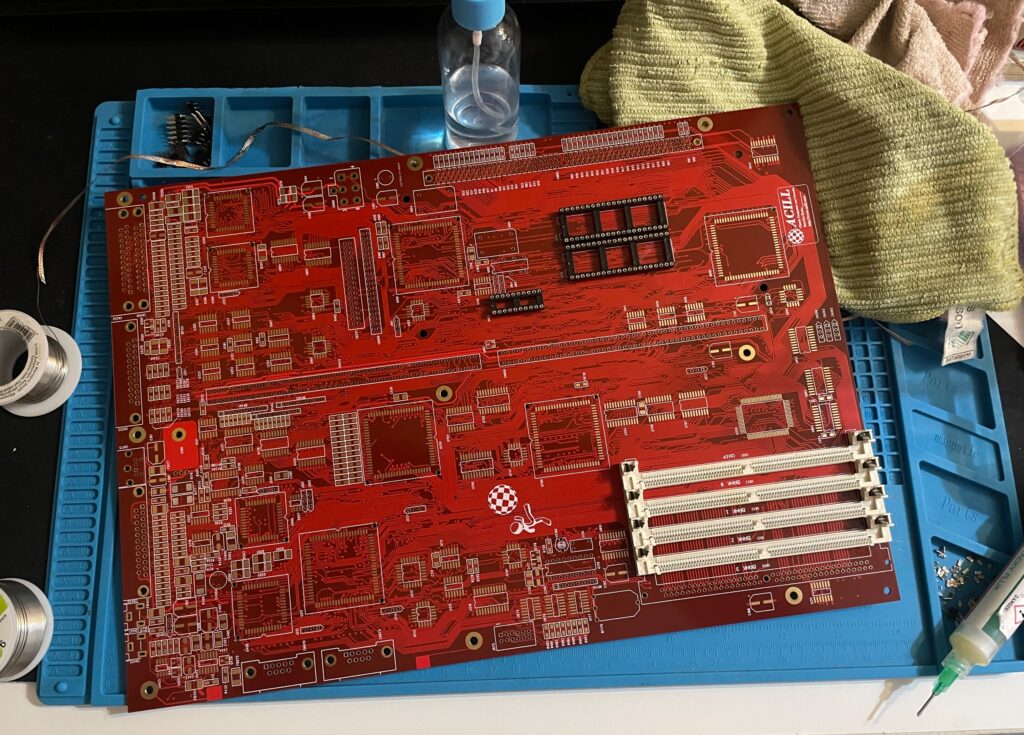
Amiga 4000D motherboard in shiny red
Anyway, as usual building them up was pure pleasure from start to finish. I even enjoyed desoldering the Acill A4000D motherboard from a few passives and pin headers someone else had a false start with. I mean, off course you want a full set of pin headers soldered to your 400+ small parts PCB (not really).
As good as it was looking it failed to run with the BFG9060. It was working fine with the A3630 CPU board I built earlier this year, but not with the 060 card. That reminded me that I had the same problem with my Alice A4000D motherboard a couple of weeks ago.
A4000+ Alice motherboard during assembly phase
The Alice A4000D has an 030 CPU on the motherboard so it does not need a CPU card. It was working fine with the on board 030.
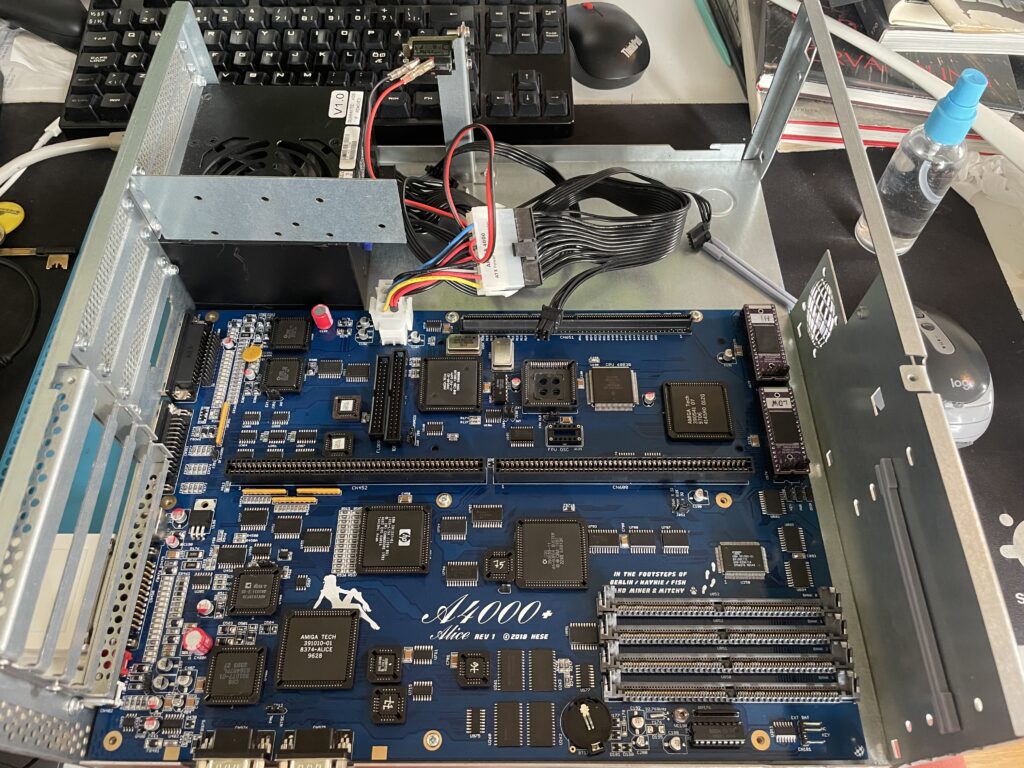
Here is the A4000+ Alice motherboard during the testing phase inside the A4000D case
I got the suggestion to try a new delay line as that could be the problem the CPU card failed to run. As the A3630 has exactly the same CPU as the one mounted on the motherboard, it is difficult to say if the A3630 was running or not.
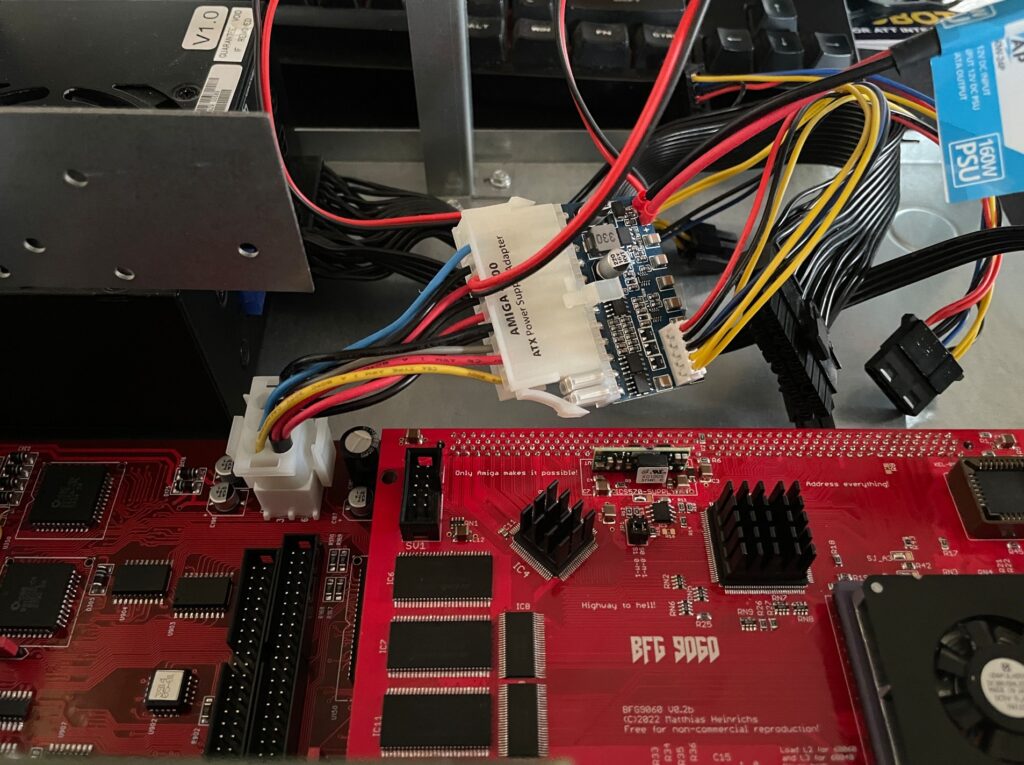
Testing the A4000D motherboard + BFG9060 with a PicoPSU
If you are in this hobby you have to grow a passion for trying all hardware combinations to find the solution. In this case, the reason for the Amiga 4000 getting a black screen when running a BFG9060 was the PSU as everything seemed to run fine with another PSU than the SFX one I had in the A4000D case.
I changed the SFX PSU that previously was working fine with the EXACT hardware setup I am running here (but different Amiga 4000 motherboard) with a small ITX PSU and suddenly DiagROM worked fine and detected the 060 CPU.
This lead me to believe that maybe the PSU was not pushed too hard as some ATX PSUs fail to run if there is a tiny load on them (or something like that). So I decided to do a final test by adding some cards to my A4000D and try the SFX PSU again.
Unfortunately it did not start with the SFX PSU and 060 card even if I loaded the machine with all Zorro slots filled, including adding an old 3.5″ harddrive.
So next step is to get a new SFX PSU. But at least I know I have to working motherboards!
Update! 20251215
Apparantly it was the Kickstart that was the problem.
You may have seen my previous post where I did a test run on my ReAmiga 3000 that I finished earlier this year. If not, check out my post about my ReA3000 that I built in April here.
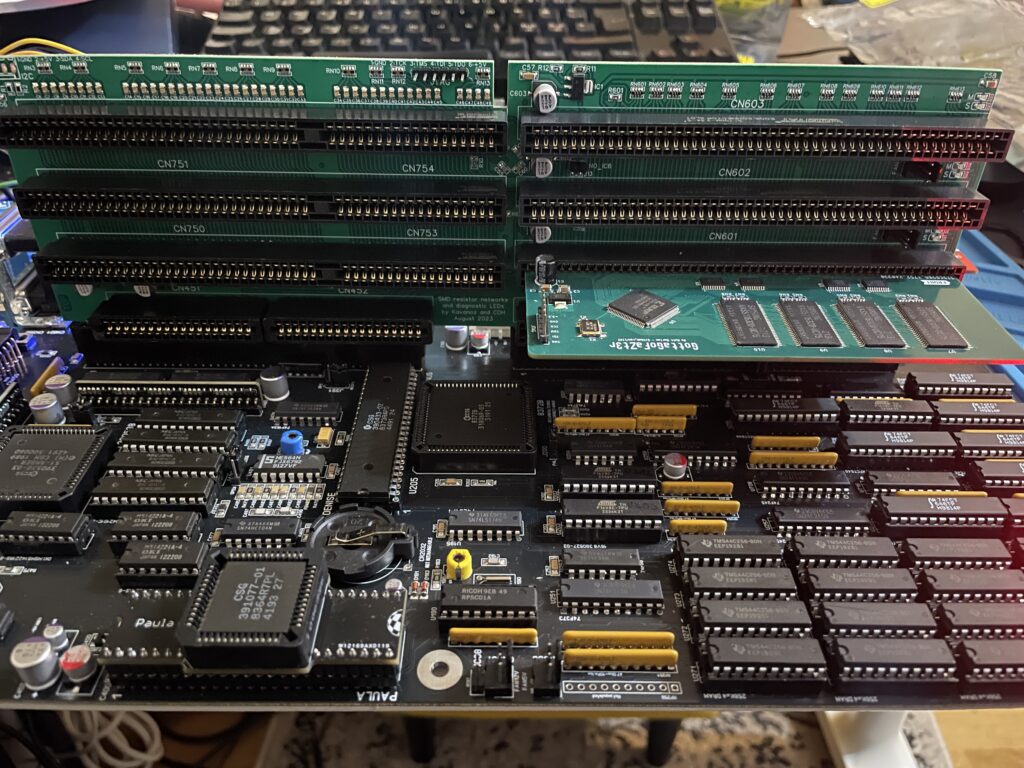
While I did do a test run in DiagROM previously I did not have a daugherboard for it so I just whent through the usual tests (successfully) and called it a day. This time I did a more comprehensive test session where I tested a Amiga 3000 daughterboard, a BFG9060, a GottaGoFaZt3r 256MB Z3 memory card, programmed and replaced the logic chips and also replaced some ICs that I had to use adapters for previously.
Amiga 3000 daughterboard
Front of the Matze Amiga 3000 DB
While my ReAmiga 3000 started up fine in DiagROM it failed to run with a Kickstart rom. I was puzzled about this since it was running fine in DiagROM. No matter what I tried I ended up with a black screen. Problem was solved by adding the daughtercard. Now Kickstart boot screen came up.
Backside of the Matze A3000DB, here is where the I2C circuit resides
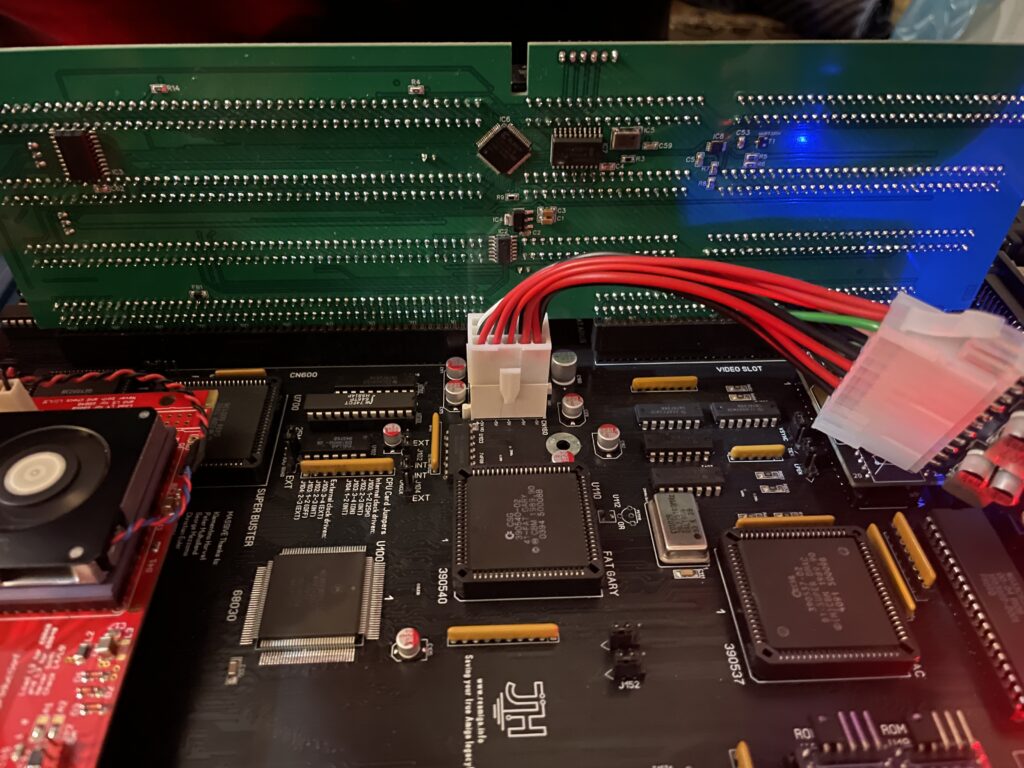
I am using a Matze A3000DB, more info on it here. This is just like a regular Amiga 3000 daughterboard but it also has I2C functionality so you can monitor temps. More info about I2C here, the added functionality is based on that project. So to be honest, I have not really fully understood I2C, perhaps I will do a deep dive in the future. I have an CPLDICY card I built last year and its neat to see temps. I am thinking this could be interesting to monitor if running a tight A3000 case with bad cooling.
Another note, this is a version of the Matze A3000DB with some added functions by kavanoz & CDH, see more here about this specific version of the daughterboard.
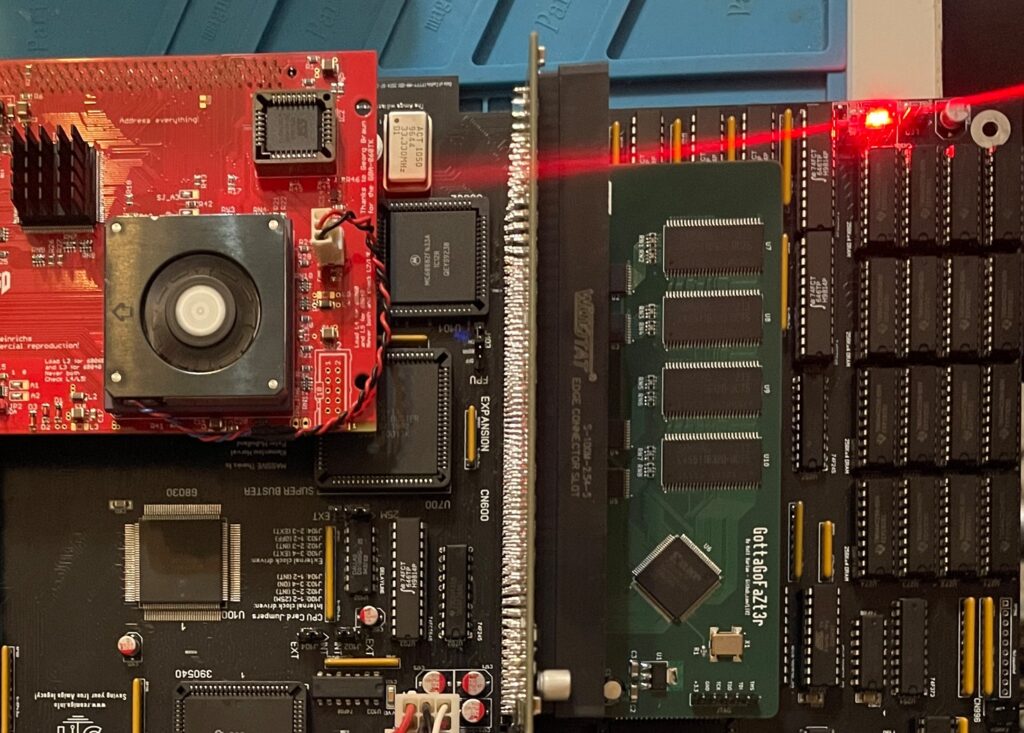
A GottaGoFaZt3r 256MB Z3 memory card was inserted and it was detected by DiagROM.
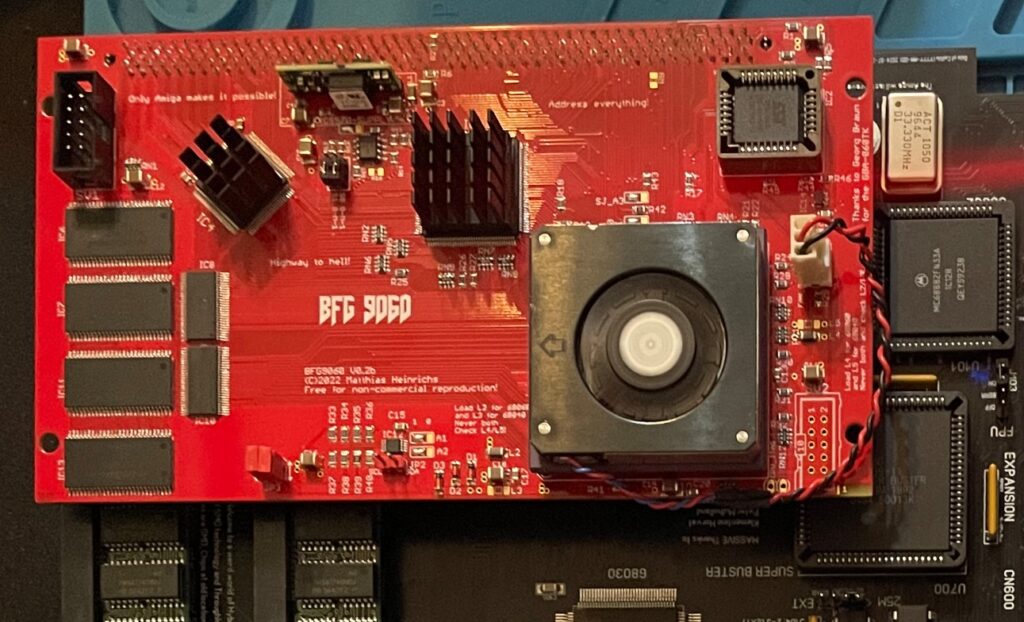
ReAmiga3000 + BFG9060 test, success?
The low profile heatsink/fan on the BFG9060 blows in the wrong direction, another thing to fix in the future…
Recently I built an A4000D that failed to run with a CPU card. That motivated me to test my older builds with a CPU card to make sure they work properly with a faster CPU. The only issue I had was to figure out how to jumper the motherboard, then it was smooth sailings.
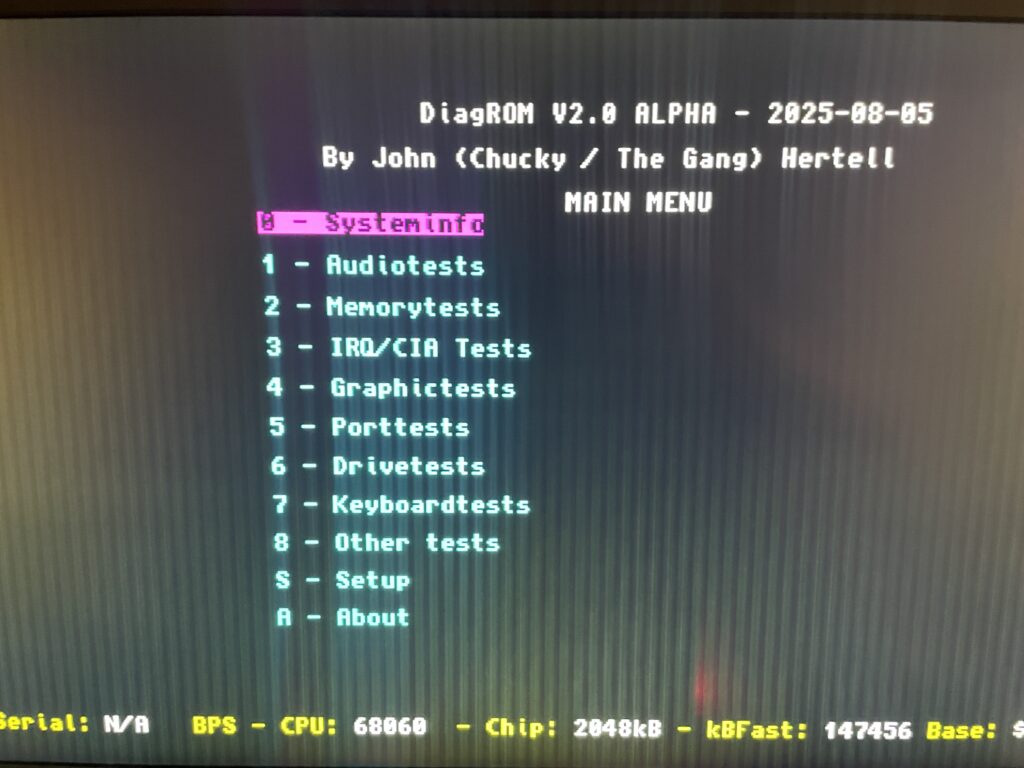
68060 is detected in DiagROM (as is fast ram)
DiagROM identified the 060 and also the fast ram. Now I need to do a 6 hour fish render and stability will be tested (something to do for the future).
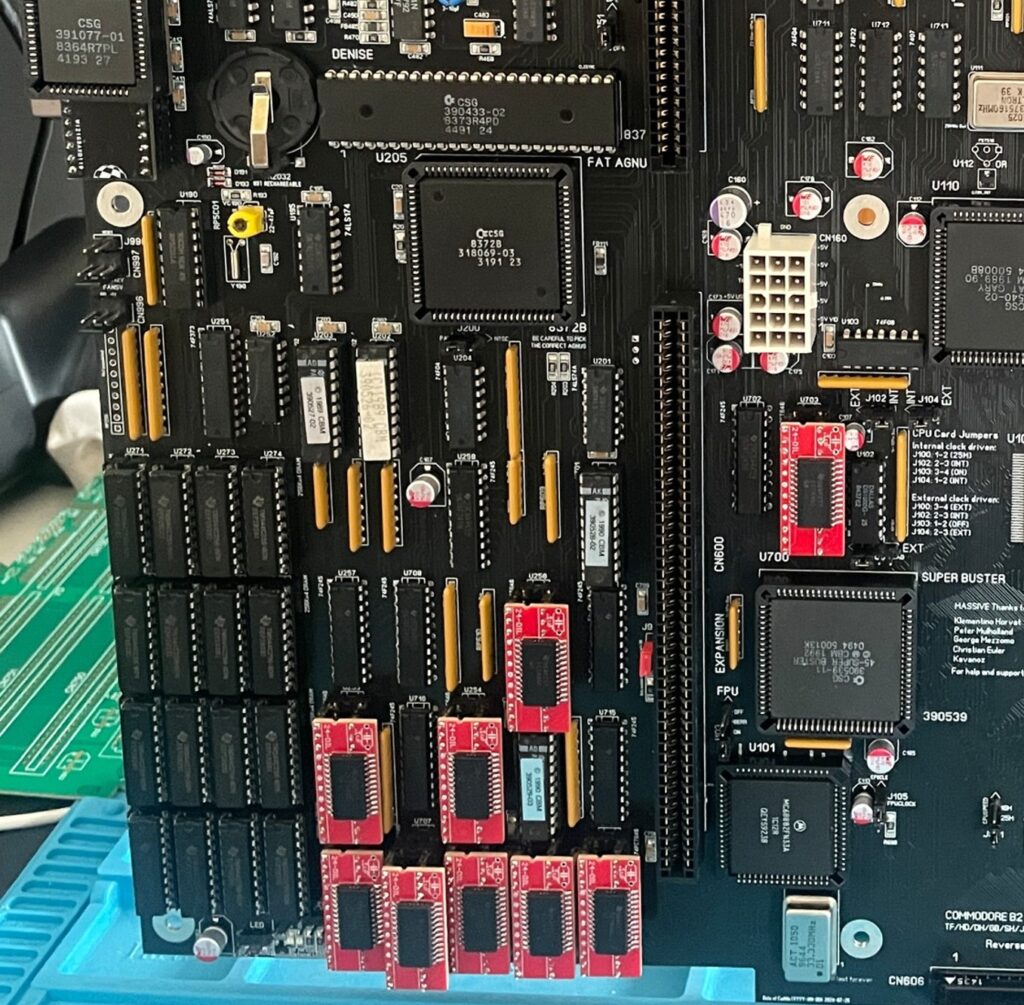
74FCT646 chip replacement
SOIC-24 to DIP adapters are the red mini PCBs. Also notice the original Commodore logic chips
If you look at the BOM for the ReAmiga 3000 you can see that Chucky recommends replacing the 74F646S with 74FCT646. Currently 74FCT646 can only be found in SOIC-24 from Mouser and Digikey and not in DIP so you need a SOIC-24 to DIP adapter to use them. While the adapter worked fine I just felt it would look better to run DIP chips instead. I had an UTsource order going for my A2386SX order in the pipeline so I added eleven 74FCT646 chips to that order from UTsource. Why 11 when the A3000 only needs 9? Well two of them is going to my A2386SX boards.
No more SOIC-24 adapters for a cleaner look!
The 74F646S chips actually runs hot, especially when there is 9 of them, that is something I noticed when using them from my donor machine. So it was a nobrainer to replace them with cooler running chips.
As I put in sockets for all the 74FCT646 chip adapters I am thinking of removing the sockets in the future and solder the chips directly to the motherboard for an even cleaner look. The ground plane in an A3000 is brutal though, not sure I wanna wrestle with this board desoldering stuff again. Desoldering the KEL 200 pin CPU slot was a nightmare.
Programmed and replaced logic chips
There are four logic chips on the Amiga 3000. About 15 years ago I had the oppportunity to buy a broken Amiga 3000 cheap because it had a broken display output. Turned out it was because one of the logic chips was broken, so it was an easy fix to just replace one of the chips with a new one.
So to future proof this ReAmiga 3000 build I replaced the logic chips I got from the donor A3000 with modern alternatives and got the JEDEC files to program them with from here.
Next step
I hope I can find a case for this build, they are difficult to come by but occasionally you can find one. Actually wish I had one now as I would like to set it up to a running system!
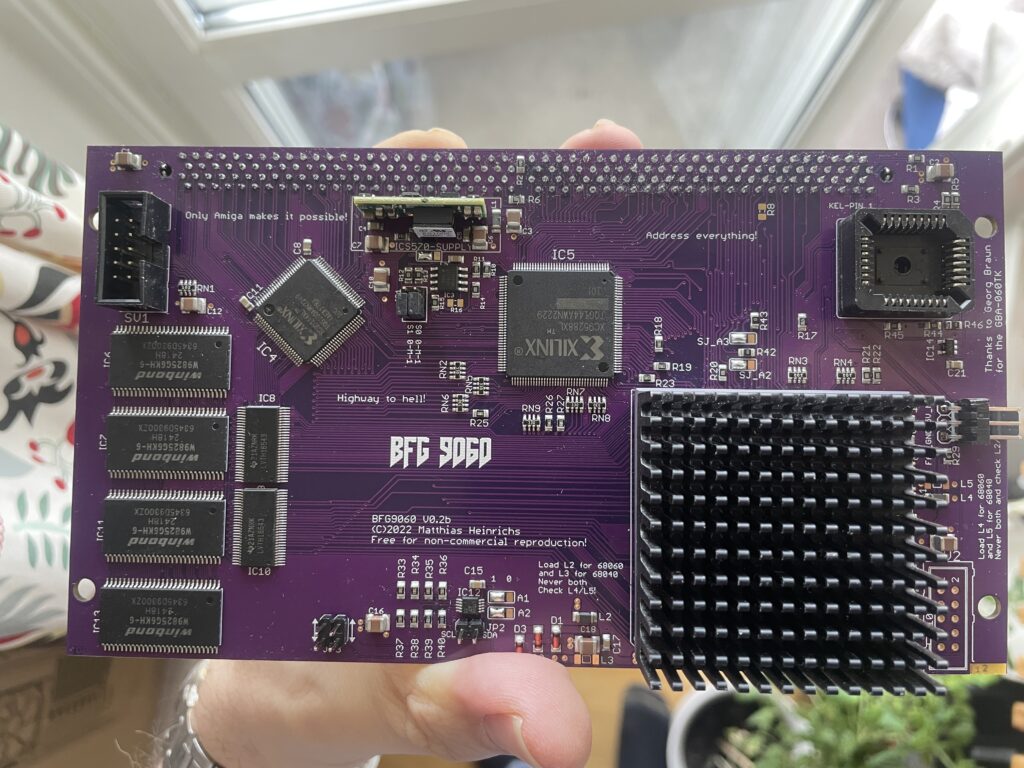
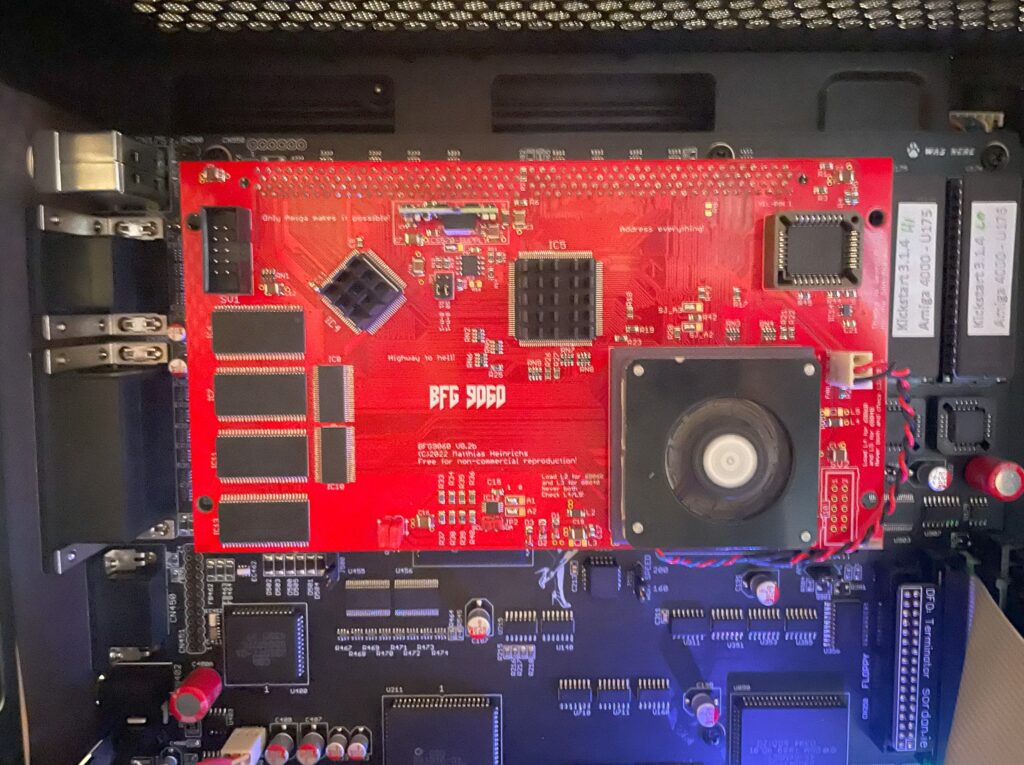
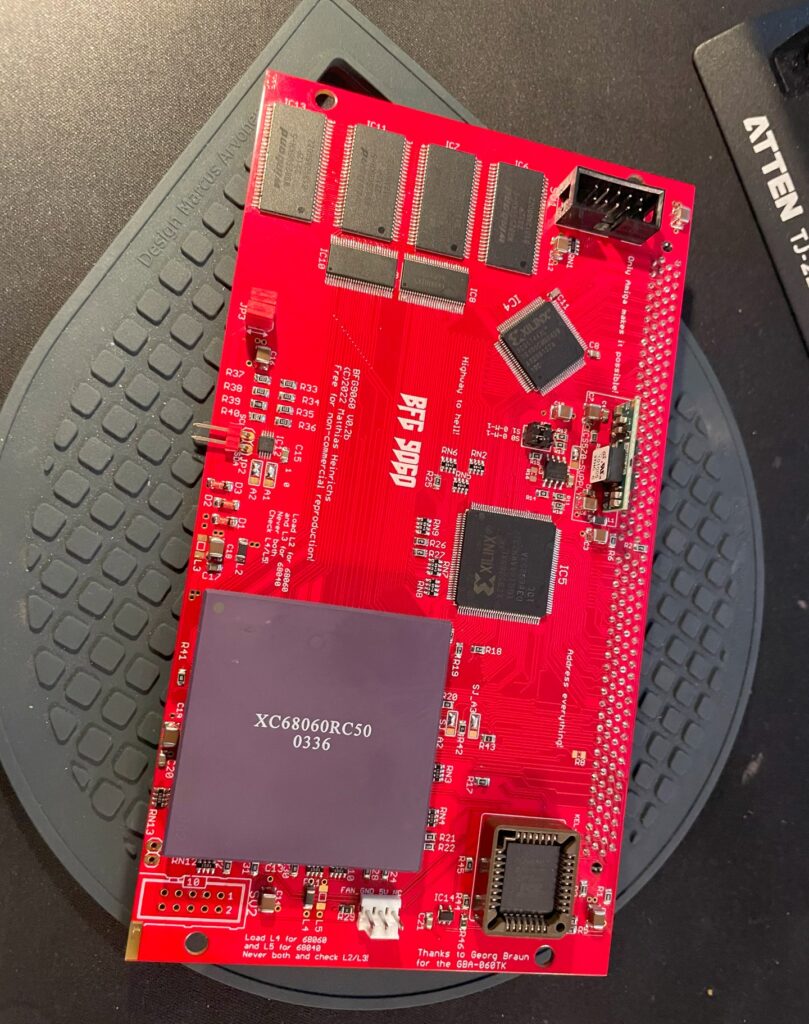
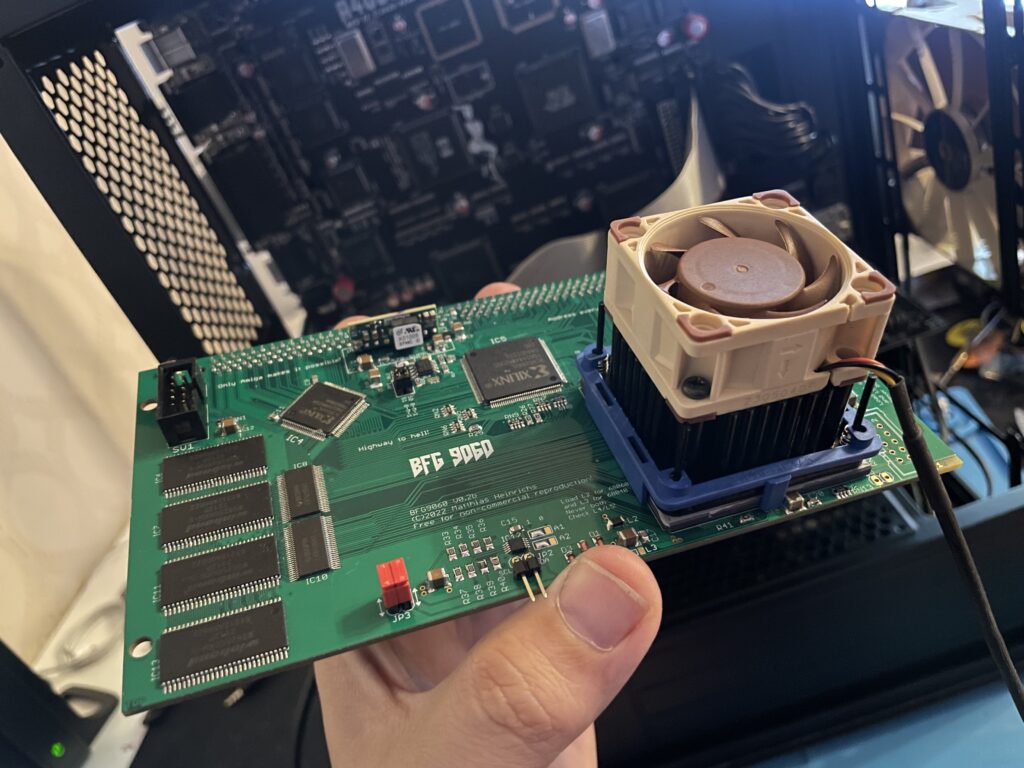
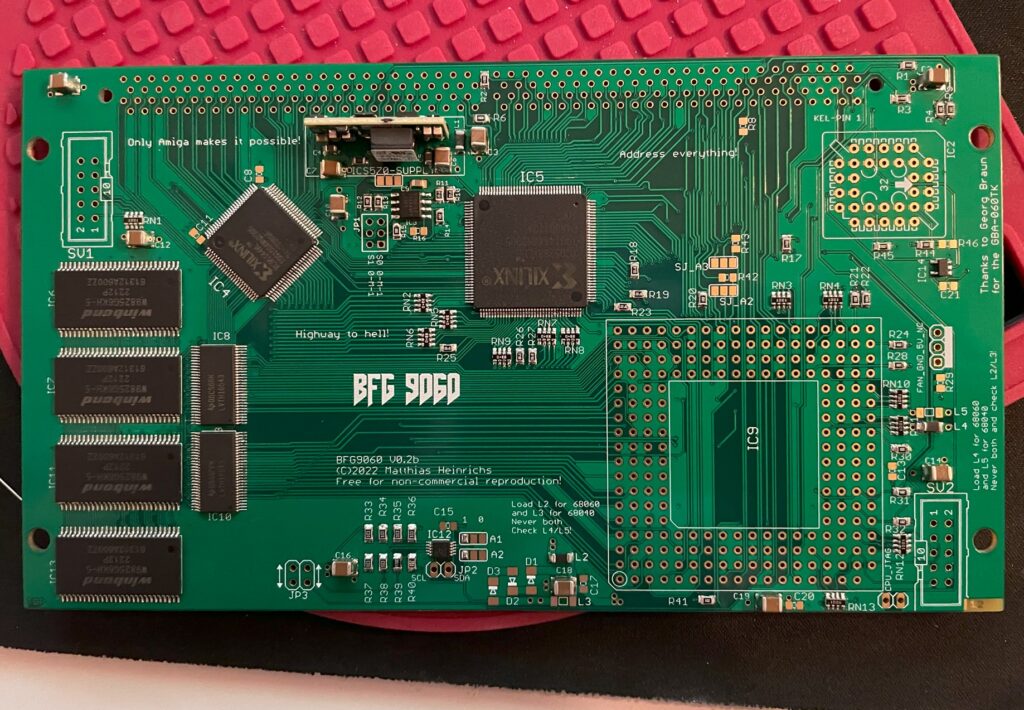
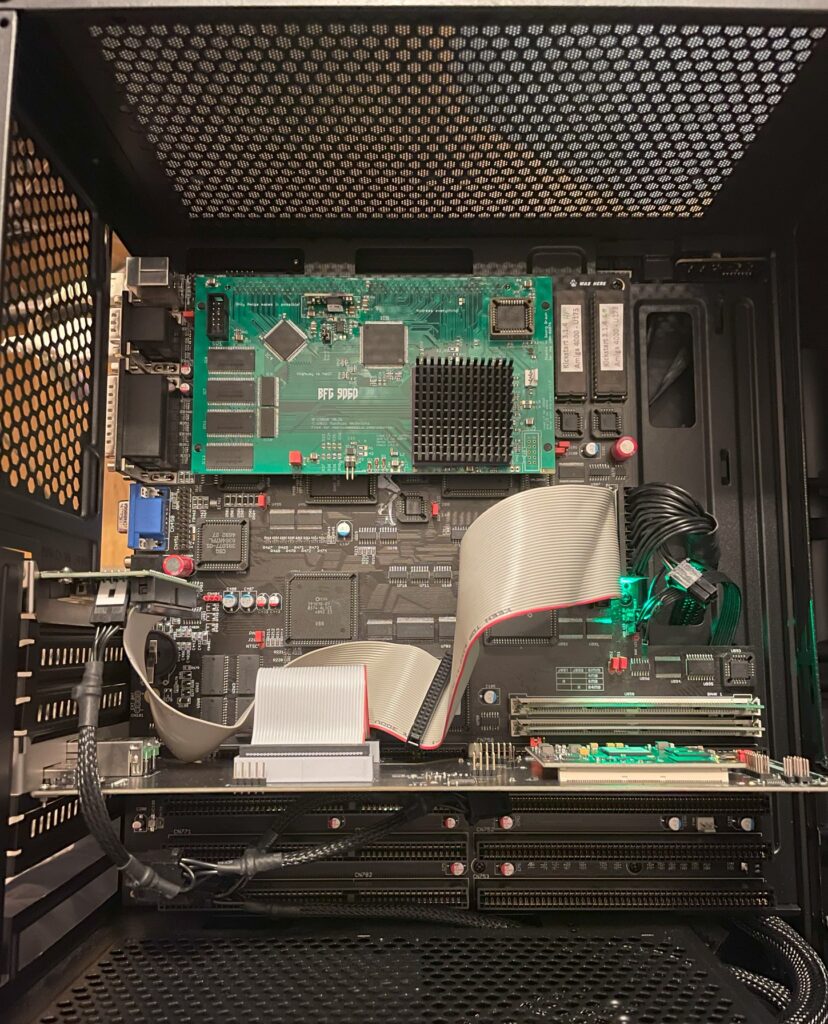
I just finished building this beautiful purple PCB BFG 9060 accelerator card for the Amiga and thought I would share a picture of it. As it was mostly already finished it just took an hour to solder on the KEL connector, fan header and voltage thing (regulator I think?).
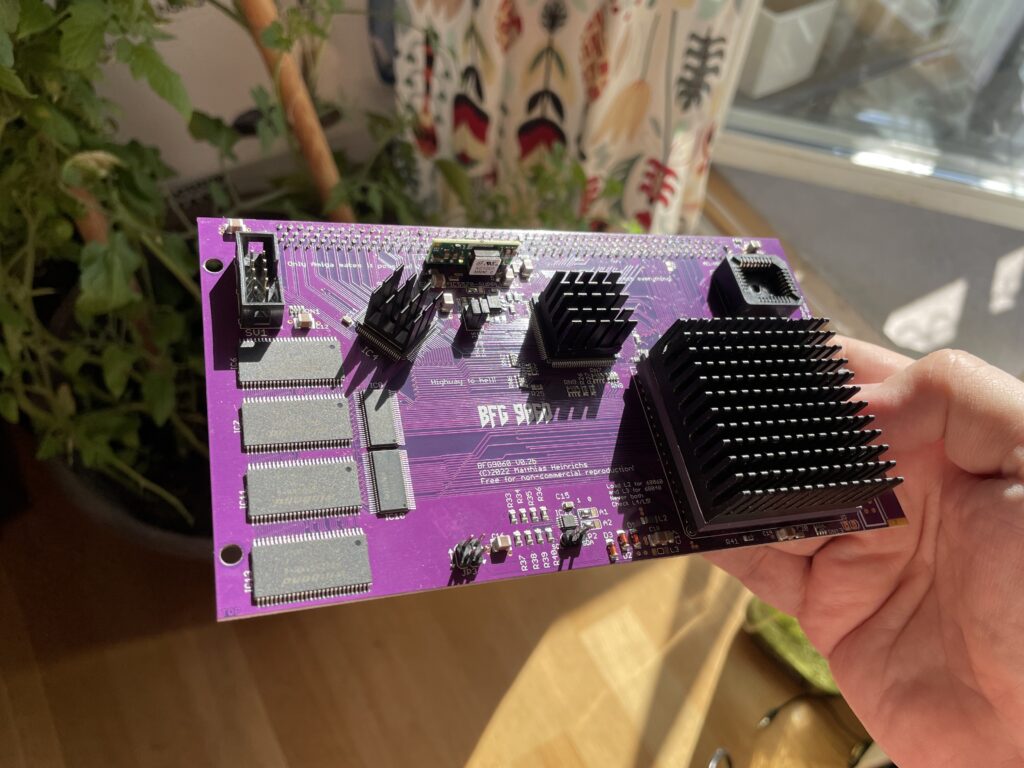
I finally get to use the original spec Motorola 040 CPU heatsink that came from an old 040 C= 3640 CPU card I had 20+ years ago. Just have to get some thermal tape, will also add heatsinks to the CPLDs. This card will not be overclocked as it is fitted with a rev 5 68060.
Updated picture of the BFG9060 with heatsinks added
I would like to take the opportunity to thank everyone involved in making this project a reality!
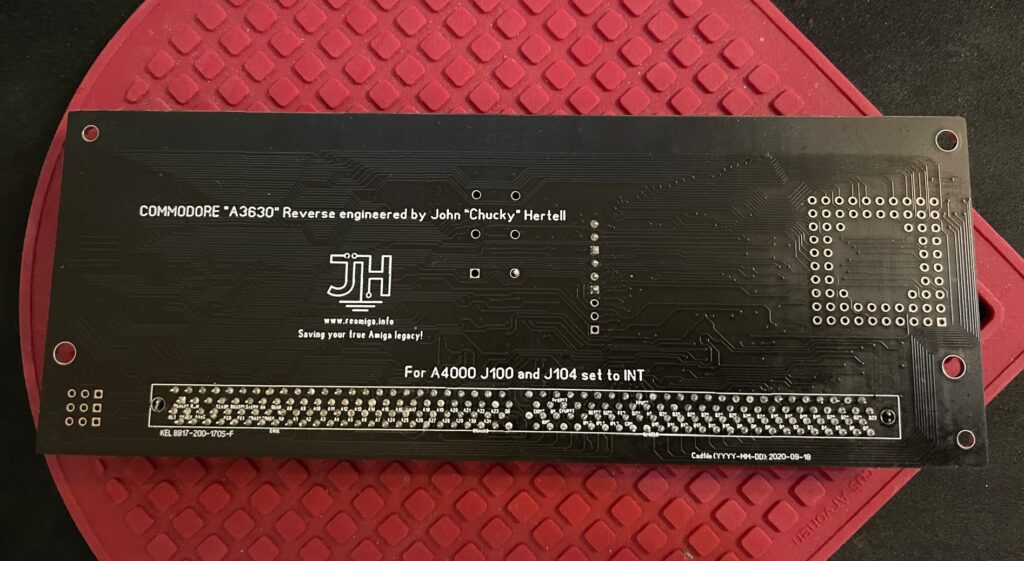
This is actually the underside of the A3630 030 CPU card
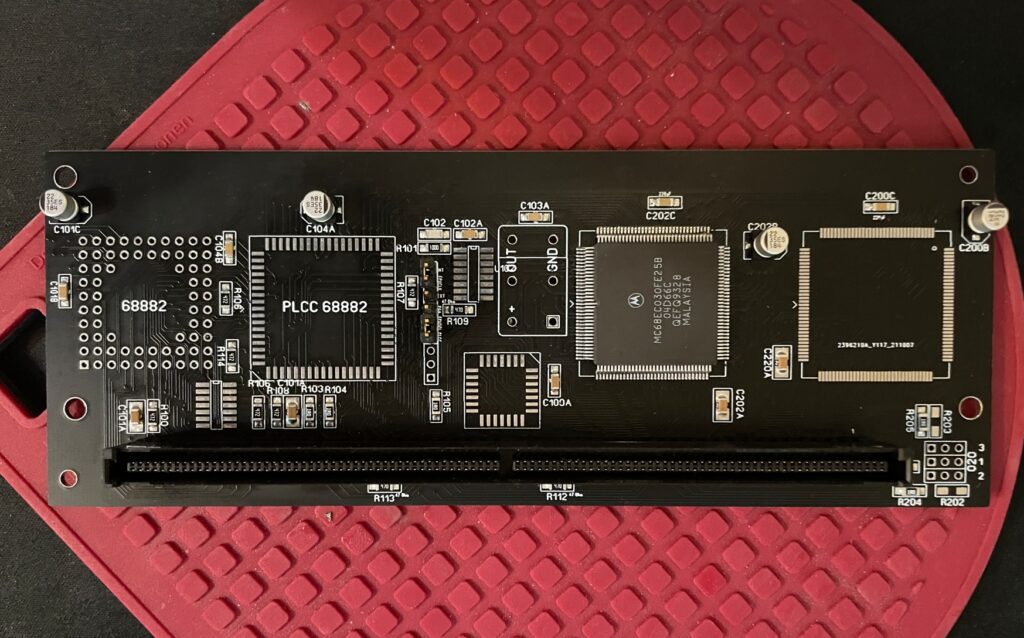
Today I built a replica of the A3630 030 CPU card. The A3630 CPU card came with non CR Amiga 4000D models (the card works on the A4000T and on the A3000D/T also). The CPU card replica PCB is made by Chucky, read more about it here if you are interested in getting one yourself!
Top side of the A3630 contains no parts.
I got an (original Commodore made) A3630 in 2005, mainly for testing purposes. It was placed in storage for 15 years and I failed to check the capacitors on it. Sure enough the capacitors had leaked, the board had a fishy smell to it.
When I recapped the genuine C= A3630 board one solder pad lifted off the PCB (very common if capacitor have leaked for a long time). Sure, that is not a big issue, can be fixed quite easy with a bodge wire. But I thought rebuilding the A3630 it with a new ReA3630 PCB was a better option.
I decided to use the CPU and the KEL male edge connector from my current card instead of wasting a new mint in box unobtainium KEL connector from my stash on such a low end card. I removed the CPU from the card by using a hot air rework station. I used a desoldering gun to remove the KEL connector by desoldering each of the 200 solder points for it.
As you can see it is a quite simple card, especially if one do not mount the socket for the FPU. Since my main usage of this card is for testing purposes, the 33MHz FPU and crystal will be used on my ReA3000 instead.
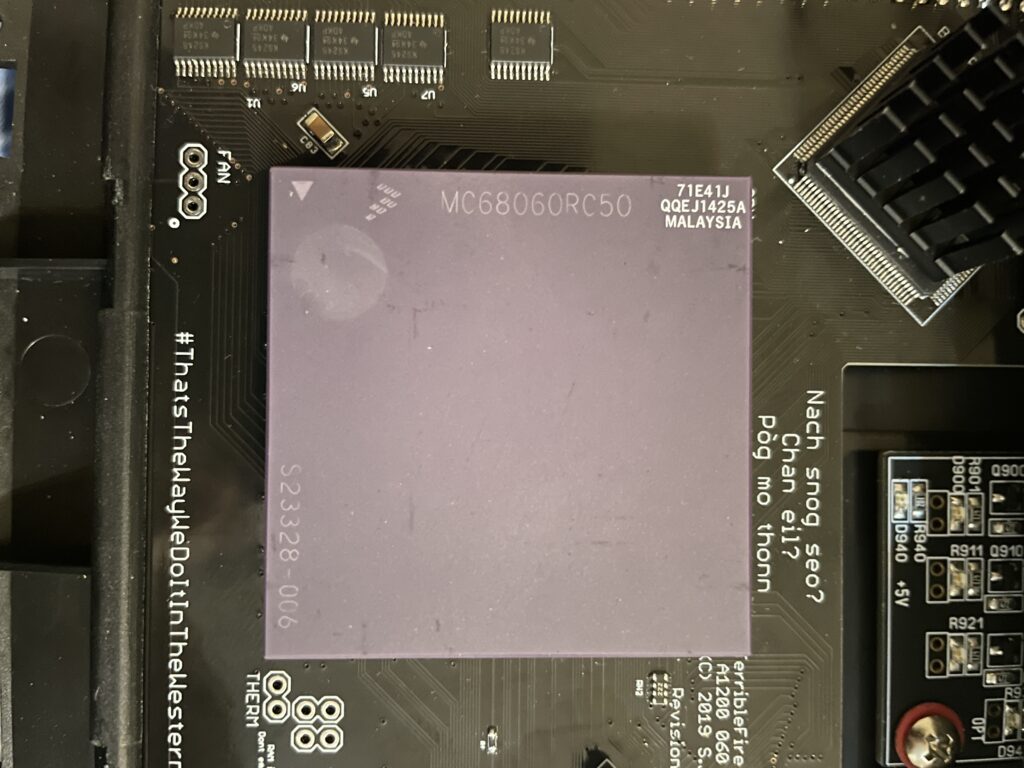
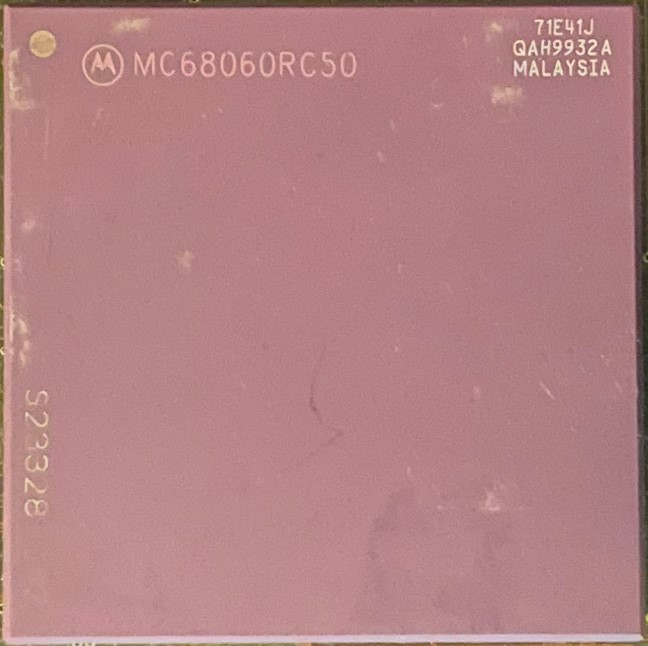
I bought a 68060 revision 6 (71E41J) recently for a very good price. The rev. 6 CPU can usually do a really good overclock, often reaching 100MHz or more, which makes them very sought after and sometimes fakes are offered as the genuine version of the CPU. As I was already running an 060 in my Amiga 1200 I was not sure if it was worth swapping CPUs to gain more megaherts. The rev. 5 68060 I was running could do a 66MHz overclock but ran very hot. And a 50MHz 060 is not a slow CPU (in the world of Amiga).
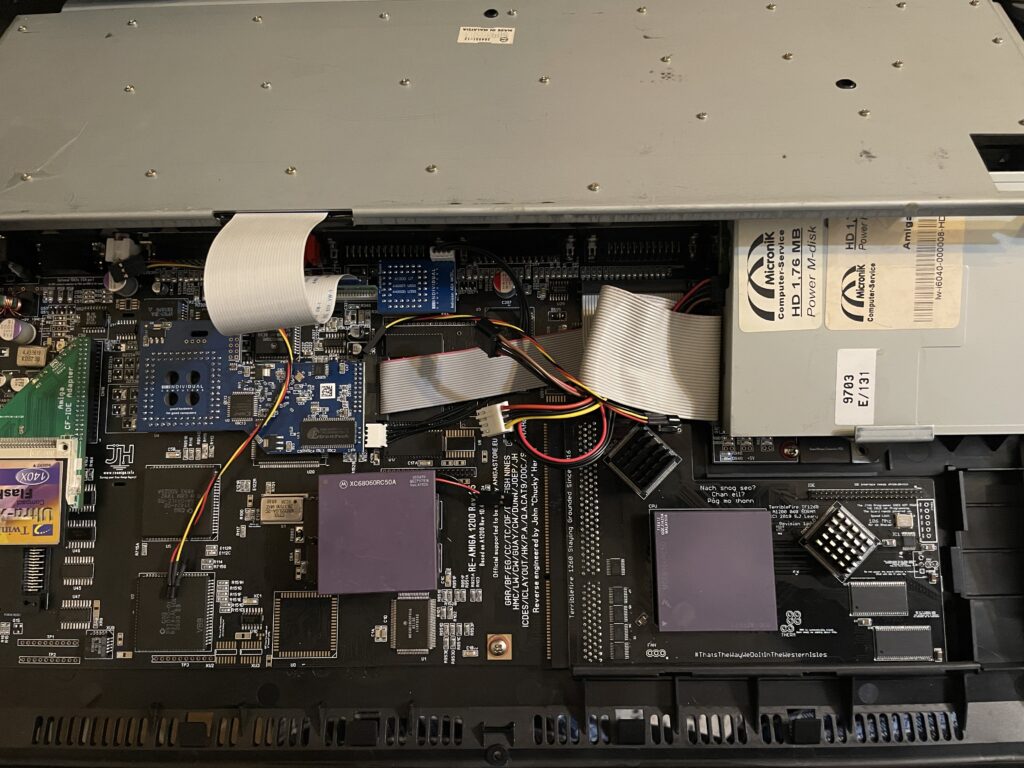
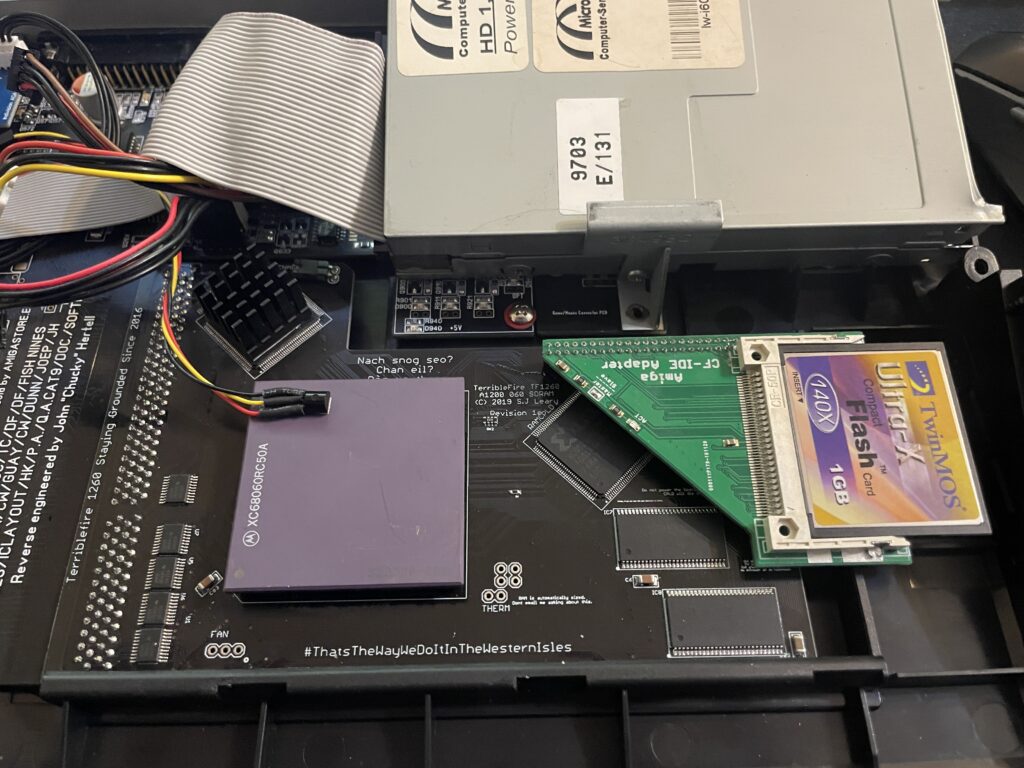
Swapping 68060 CPUs in my Amiga 1200
I decided to swap CPUs because I wanted to test performance of an Amiga without a graphics card but with a fast CPU and high resolutions (like HighGFX and highres laced). Luckily removing the CPU was not a difficult task, prying on the corners of the socket it was out in less than 5 minutes ready to go into another one of my systems. Once the rev. 6 CPU was inserted into the Terrible Fire 1260 I was eager to do a test. Sure enough, it did not complain anything running at 100MHz!! (keep in mind I had a heatsink on the CPU when doing tests). Next time I will try 106MHz!!
Is there actually a noticeable difference between a 50 and a 100 MHz 68060?
Would I be able to detect any difference between a 50MHz 060 and a 100MHz 060 or would it only be noticeable in a benchmark program?
I was not too sure – When I had overclocked my 060 in my Amiga 4000TX from 50 to 100MHz I could feel that icons loaded faster, drawers just popped up, Workbench was just smoother and more responsive. But I was not sure if it was my imagination or reality.
With that said, I was surprised that my 100% non scientific mean of measuring the difference between a 50 and a 100MHz CPU in the following AGA Amiga Workbench screenmodes highres, highres laced, HighGFX @ 1024×768 (all screen modes in 64 colors) proved that there really was a difference!
Workbench had become even faster and more responsive. Running 3.1 with the stock Commodore 4 color icons, icons did not load anymore, they just popped up, almost all at once, drawers opened up instantly. The system speed by at such a high rate I had only witnessed something like this in WinUAE. What an amazing experience!
I changed background colors to 256 colors and could sense little to no slowdown from a 64 color screenmode. Sure, I have to test this more, but the early results are great, this is what base level Amiga should be like! Lets bring on 200MHz 060 (lets crowd fund it lol).
Cooling problems
Before I permanently run this computer at 100MHz I have to figure out a good cooling solution for the CPU. This rev.6 68060 runs cooler than the old rev. 5 I had in it before. But overclocking it makes it run slightly hotter. I suspect its above 50 degrees but not more than 60. I have some ideas on how to cool it down but will have to sleep on the ideas a little more before I pull the trigger on the stuff I need to build one..
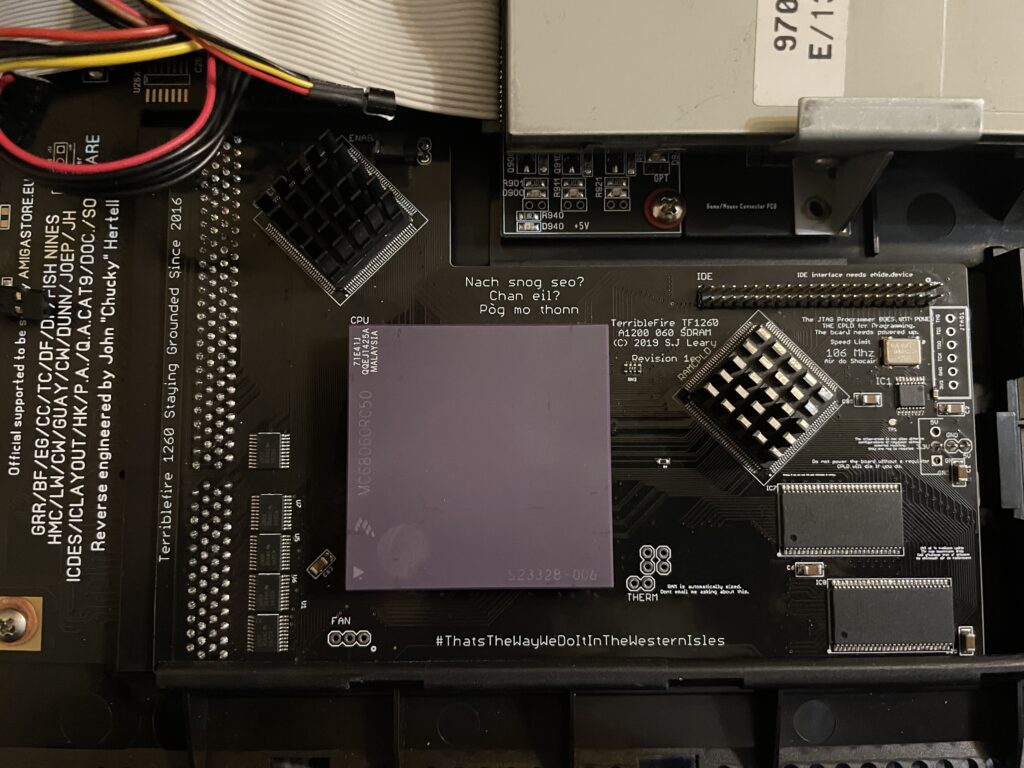
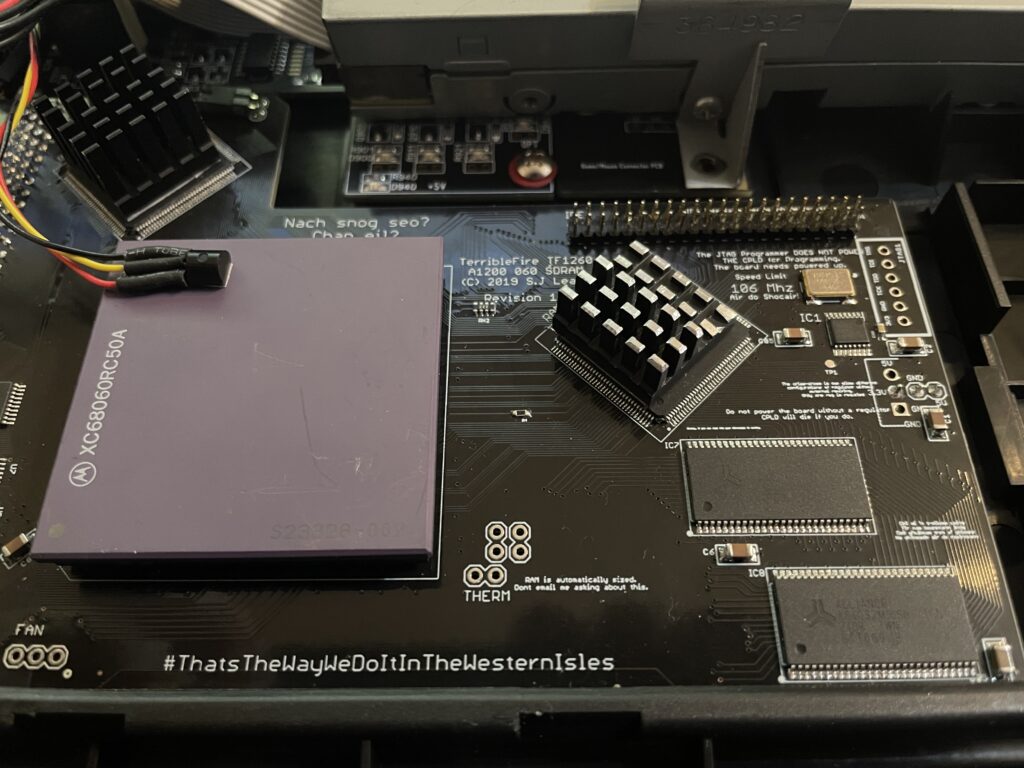
I have a Terrible Fire TF1260 in my Amiga 1200. I used to have an Apollo 1240 upgraded to 060 in it and was very happy with that card (despise what other said about the card, it was very stable for me). Time marches on though and the TF1260 started to look more and more impressive, so I built one last year. The TF1260 supports overclocking by software. One comment I read was that the chances of a good overclock improved if you put heatsinks on the two CPLD chips.
Keep in mind that I had a heatsink on the 060 when doing overclocking tests. But the space between the 060 and keyboard is so tight it was very difficult finding a heatsink in my stash that would fit with the keyboard installed. I have actually not solved this yet, thus I just focused on the CPLDs and will try to solve the 060 heatsink some other day, until then it will run at 50Mhz.
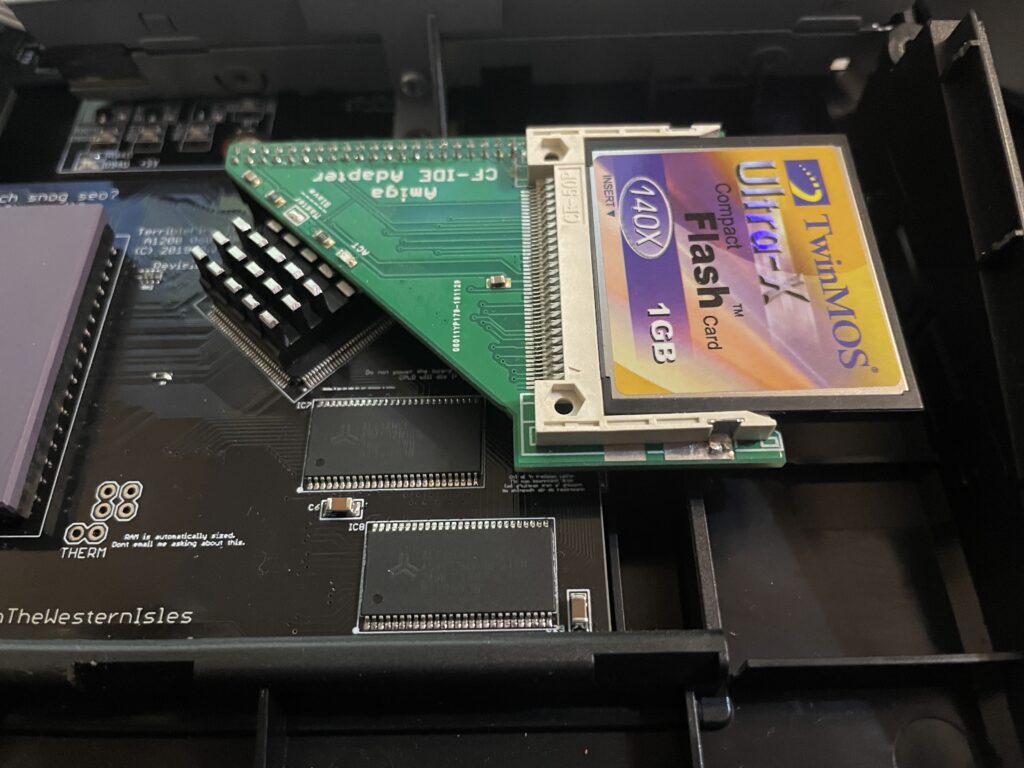
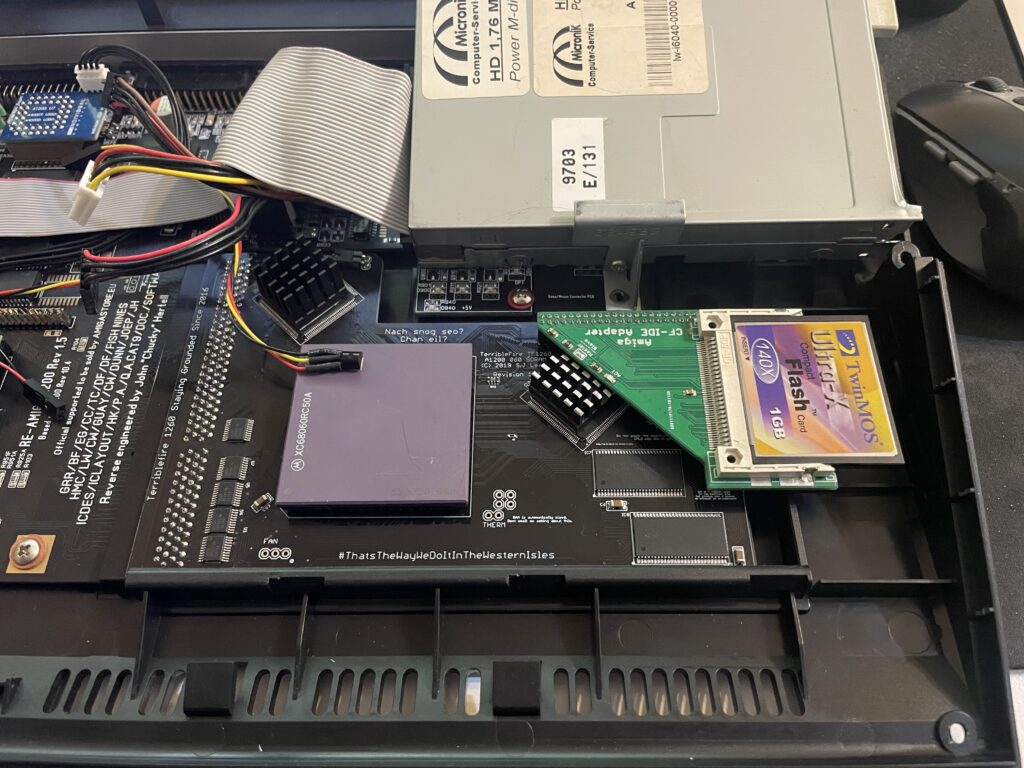
The problem with the CPLD cooler is that the right CPLD need a short heatsink if you want to run a compact flash adapter over it. As you can get an impressive speed boost for the CF card by using the IDE port on the TF1260 this was off course something I would need to consider.
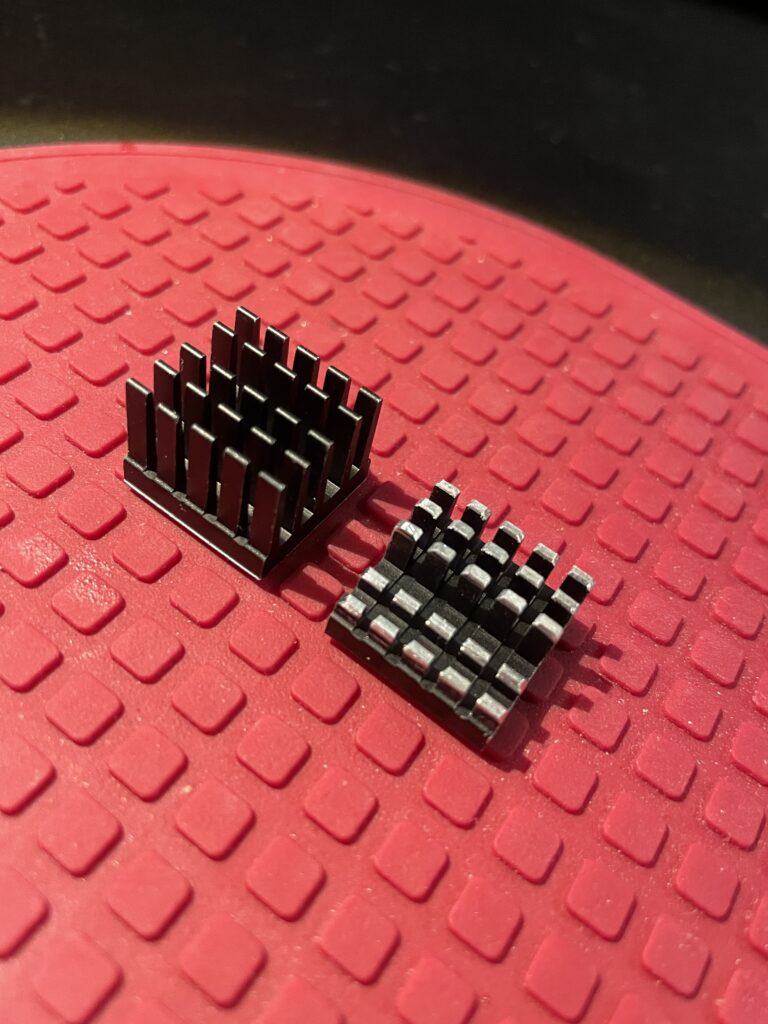
I had ordered these 18x18x20mm heatsinks for this exact CPLD before. The left one is the original form and the right one is the heatsink cut down and modified. I dont like to do fabricating as it gets so messy and difficult to get good results with hand tools. I will probably order a new heatsink in the correct height in the future.
Here I am test fitting the heatsink.
And here it is secured to the chip. I use a thermal pad from AlphaCool that I cut to fit myself. The thermal pad from AlphaCool is somewhat thicker than what you usually get when you order heatsinks from Aliexpress. The thicknes is 0.5 mm, the thermal pad is also softer and more gooier than regular flat thermal pad. Once secured with the AlphaCool thermal tape, these pads wont go anywhere, they are secured very firmly. I highly recommend these AlphaCool thermal tape and would use them even on the 060 with a large heatsink without no problem or worry that the heatsink would fall off (even if mounted vertical!)
So here we are, everything fits now. But to use the IDE port on the TF1260 I need to burn a custom Kickstart with ehide.device, more on that when I will get to it.
And about finding a solution for cooling down the 060? I have not got a clue, I will probably need to cut down a thin copper plate and place a heatsink on it offsett from the CPU. Not ideal, but better than nothing. A small heatpipe cooler leading heat to fins over the top of the cards close to the floppy drive would be ideal, but prototyping a cooler like that would take weeks and lots of money. I will see what I will come up with.
BFG9060 with rev 1 68060 under testing in my A4000TX
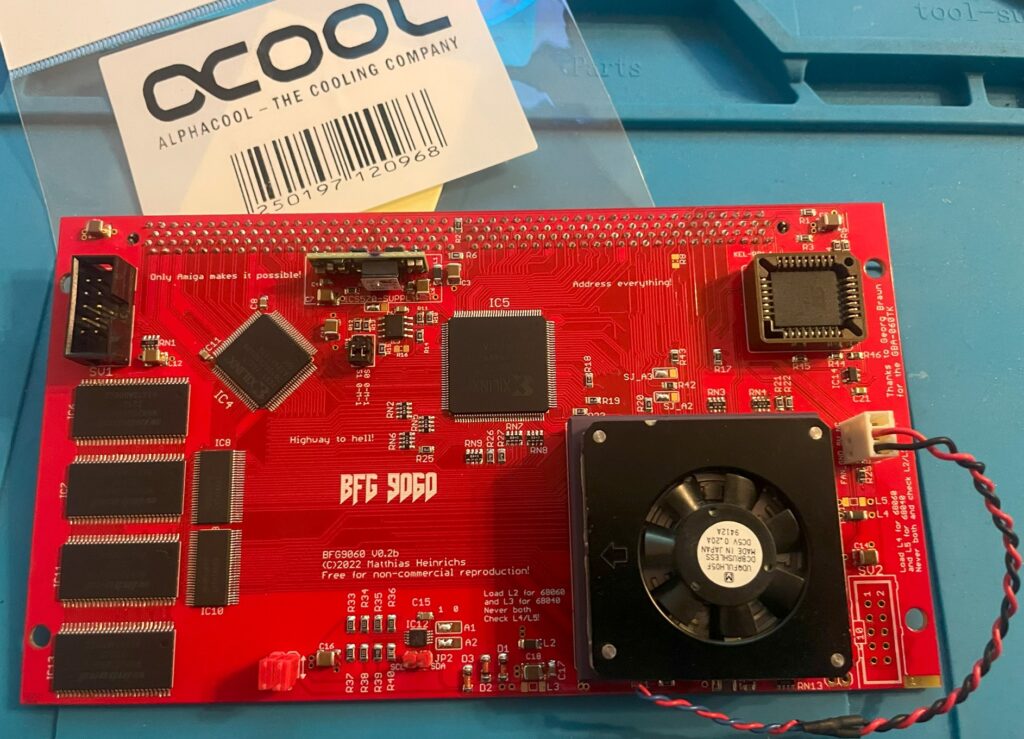
I built a BFG9060 060 turbo card last year that I could clock to 100Mhz, this is the second BFG9060 I have built and it is in a cool red PCB color. Thanks to the Xilinx programmer I got I could finally program the CPLDs on it but did not have time testing it fully. Now that I have tested it I can finally confirm that it is working 100%.
Actually, I just ran Quake for an hour with it mounted in my primary Amiga, my A4000TX daily driver, and the card performed just fine. Once I have it permanently installed in one of my big box Amigas I will do a proper 24h POVRay fish render test. But as it is now, I am happy with how it performed!
Mystery 68060 CPU
I got this 68060 chip from Vesalia years ago (probably 12+ years ago), and for a really good price too. It was a deal too good to pass on even though I did not know what to do with it. Well I am happy that I kept it but for all these years I wondered three things:
Did it work?
What kind of 060 was it?
Is it a fake? Why did it have these strange markings and not the typical Motorola markings?
The answer to those questions are:
Yes the 68060 works fine! And it does not get that hot either (though I have a heatsink/fan on it).
It is a rev 1 68060.
It is not a fake 060 – It came from a Phase 5 turbo card – Phase 5 used to add this text to the 060s on the turbo cards.
While the CPU works, it is a little bit of a bummer that it is a rev 1 as that revision has bugs. But there are work arounds for that so it does not really matter. Unfortunately, as its rev 1, that means no 100Mhz overclock. But to be honest with you, I am glad just having another full (MMU/FPU) 060 on a big box Amiga turbo card.
68060 low profile 5v cooler
I was afraid that the CPU I had was going to run too hot so I went into my stash of heatsinks to look for a suitable cooler for it. I found this thin 5v laptop cooler that I must have kept in my stash for more than 20 years. I got it from an old Acer Celeron laptop I found in the trash at a job I had and I was glad I finally found a use for it.
It is a thin radial fan that sits on an aluminium bottom plate that acts as a heatsink. I have not found modern alternatives in this size for a good price so I guess they have become rare these days.
I used thermal adhesive tape (also called “frag tape” BITD) to secure the heatsink to the CPU. Believe me, this thermal double sided adhesive tape has insane stickiness, there is no chance of the heatsink falling of the CPU if mounted vertically.
I can confirm, according to tests done with my finger, that the CPU does not run hot at all with the heatsink/fan on it. I am starting to wonder that maybe it was overkill, but if I end up using it in an A3000D case it might come in handy as that case has poor cooling performance.
I built my second Amiga 2000 EATX last year, it is a beautiful clone of the Amiga 2000 remade into a standard extended ATX format so it can fit a standard EATX case. You can be sure that I will add an article about that motherboard here in the future. The author of that project has also made the n2630 project, its a clone/reimplementation of Commodores 030 card for the A2000, the Commodore A2630.
To be honest, I wish there was a modern 060 or 040 card we could build for the A2000 since I think 030 is just too slow these days – at least for my modern Amiga standards. To be fair while the A2630 was 25 Mhz this one runs at 50 Mhz, so its a little bit faster. 040 runs so hot, but would be a perfect fit for the A2000EATX because of the improved case airflow (and having an 040 in one of my machines could be interesting to compare performance with 060 machines).
Anyways, I should be glad with what I have and I am thankful that we can build this cool modern 030 card for our A2000 computers. And the n2630 is such a nice compliment to the A2000 EATX motherboard having IDE/CF slot built in.
Building the n2630 for my A2000EATX
I decided to build my n2630 card earlier this year with 128 MB fast memory. There was an option to go for 256 MB fast memory also but thought it was not really worth it, maybe I will regret it in the future. Otherwise this build was very straight forward. It uses three CPLDs and six memory chips.
There was some parts that was difficult to find, first it was the 030 CPU socket. I actually got the parts number for one that was availble on Mouser after asking around, surprised about that. The CF slot at the back of the card needs to be the right one to fit solder points on the board, ask on the Discord if you wondering what type you should get if you are building one. Other than that it was an easy build. There are also two eproms you need to have and program, but as usual, most stuff that is rare can be found with some patience.
I have since mounted an FPU to the card and I also got a 3D printed bracket so I could secure it in my regular ATX tower that was converted to EATX. I ran out of black pin stripes that is why I used yellow and green (it was also a joke about obsessing over the color syncing of hardware).
The BFG9060 is a modern 060 turbo card for big box Amigas. It works with either a 040 or 060 CPU and has 128MB RAM. The card is occasionally available as a fully built card either with or without an 060 on Amibay or on Amiga store – or you can order a PCB and build a card yourself. Read more about the card and who made it here.
I decided to build my two BFG9060 cards myself as I enjoy building hardware and they would compliment my A4000 systems well (that I also built as kits). I have also read a lot about the BFG project and like the openness of the project and the wide user base.
I will now move on to writing about the first out of two cards I built and also my attempt at overclocking it to 100MHz.
Building the BFG9060
The BFG 9060 card is under construction
There are some parts that are difficult to find if you want to build your own card. That means
The most difficult parts to find for the BFG9060 IMHO is the CPU (I thought), the CPU socket and the edge slot (KEL connector).
Difficult to find 68060s
060 CPUs do not grow on trees (anymore), however I still think that they are surprisingly easy to find on the second hand market (in both crippled non FPU versions and full version) and all things considered they can still be had for a reasonable price. The 060 can actually still be found for a relatively “good” price, between 2-300 euro (or cheaper if you go for revision 1 which is perfectly fine in most cases).
An option is to go for the FPU less 68060s, these can be had very cheap. Keep in mind to treat your 060 board as a very fast 030 if you go this route as most 060 programs expect to find a full 68060.
68060 socket
The 68060 CPU socket is difficult to find but not impossible, I got one from a friend in the hobby (as well as the KEL connector) but decided not to use it in this build. Instead I opted to solder the CPU directly to the BFG card, more on that later.
“Impossible to find KEL connector”
The KEL connector is difficult to find but there are some builders of these cards that might have a spare one to sell. You can actually order KEL connectors from the factory, but you have to order in a higher volume than one or two. So it is not really an impossible to find part, but you wont find it on Mouser or Digikey.
Other difficult to find parts
Keep in mind that the CPLDs are EOL and will be difficult to find in the future (for a good price). Other than that its mostly a straight forward build.
Rev. 6 68060 CPU
Apollo 1240 upgraded to an 060 card
I have an old Apollo 1260 that I got for a great price back in 2008. I have been running it in my main A1200 and it has been great during those years, I love an 060 in an Amiga, makes the whole system much more fun to use.
The Apollo card had a rev. 6 68060 on it which the seller claimed could easely do 75MHz when he sold it to me.
I never tried overclocking on the Apollo turbo card but thought that some day I would, that never happened though since the years just marched on and I felt satisfied with the stock speed.
Since the BFG9060 supported a 100 MHz overclock I thought it was an excellent idea trying the CPU on that card instead and finally find out how much I could push this chip.
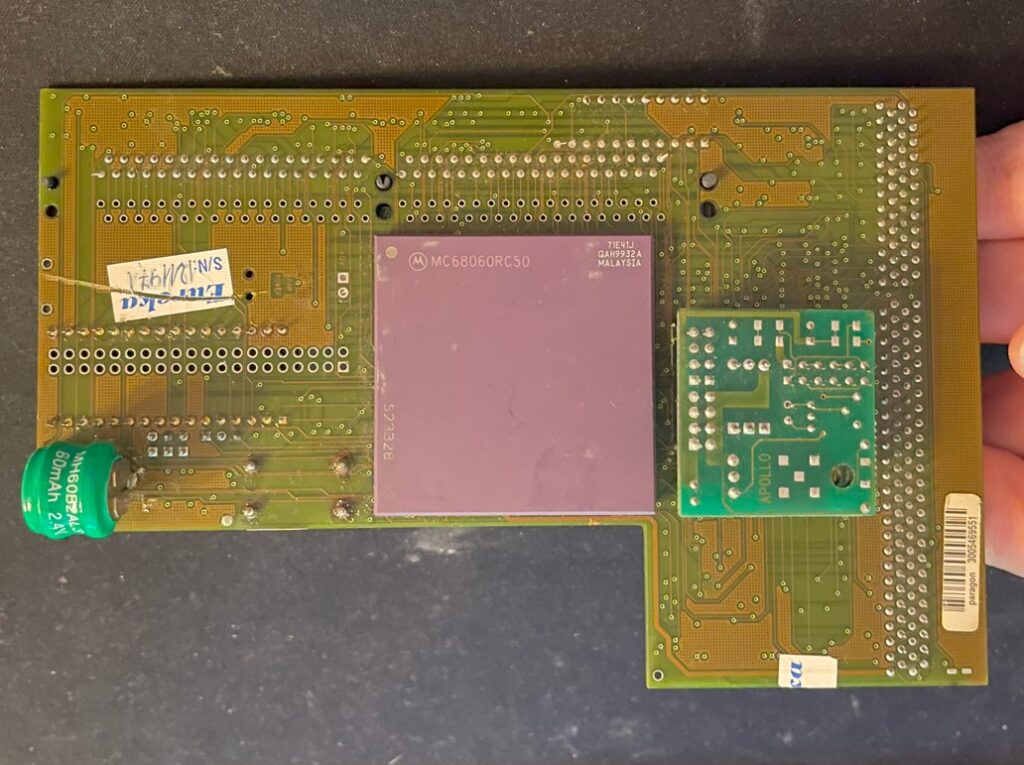
The main problem was that the rev. 6 68060 CPU was soldered to the Apollo 1260 card, some legs where also snipped off on the bottom of the CPU to not interfere with the 72-pin SIMM memory.
Backside of the Apollo 1260
I sent the Apollo card to a electronic repair company to have the 060 CPU professionally desoldered, it was soldered directly to the Apollo card. My hobby grade desolder station could not handle the job and to be honest, I was far too unexperienced in desoldering a part with that many contact points.
So, instead of putting it on a socket on the BFG card I soldered it straight on to the card once I got it back. It would have taken a lot of time to clean and straighten the legs out to get it to fit a socket – if it was possible at all since some of the pins where shortened down.
Overclocking the BFG9060
Revision 6 68060 71E41J, capable of 100+MHz (hopefully)
So after the BFG 9060 card was built it was time to program the CPLDs and test the card in an Amiga. While it worked fine at 50MHz after first test runs, I was sure I wanted to try to get it running at 100MHz.
The later revision of the 68060 (71E41J) is famous for being able to be overclocked and running happily at 100MHz or more all day long (and night), the BFG only supports up to 100MHz though, but a 50% overclock was fine for me!
BFG9060 testing session with temporary heatsink (an old official 040 heatsink)
It is here I found a problem. The card refused to start when jumpered to 100MHz. I could feel the CPU getting warm but my A4000TX never booted to Workbench. However, I could get into the early startup menu with the BFG set to 100MHz – That was promising!
Turned out I had to overvolt the card slightly by replacing a resistor that increased the voltage for the CPU.
Keep in mind this was still in line within the specifications of the 68060 even when overvolting the card so it is in reality not that dramatic at all even if it sounds like it.
After I had replaced the resistor R9 with a 2.87K resistor, bumping voltage up from 3.3V to 3.4V, the BFG9060 happily booted at 100MHz and ran stable playing the famous Quake demo for hours!
So on the BFG9060 the resistor R9 controls the output of the voltage regulator, acording to the info I got the corresponding resistance of the resistor on the left side below would correlate to the voltage on the right side below:
3.16K = 3.3V (default)
2.87K = 3.4V
2.55K = 3.5V
2.32K = 3.6V
I was initially worried I would be running the card very hot when it was overclocked, but that proved to be false.
I dont have any data, but the turbo card and the CPU did not feel hot at all when I briefly touched it with my finger.
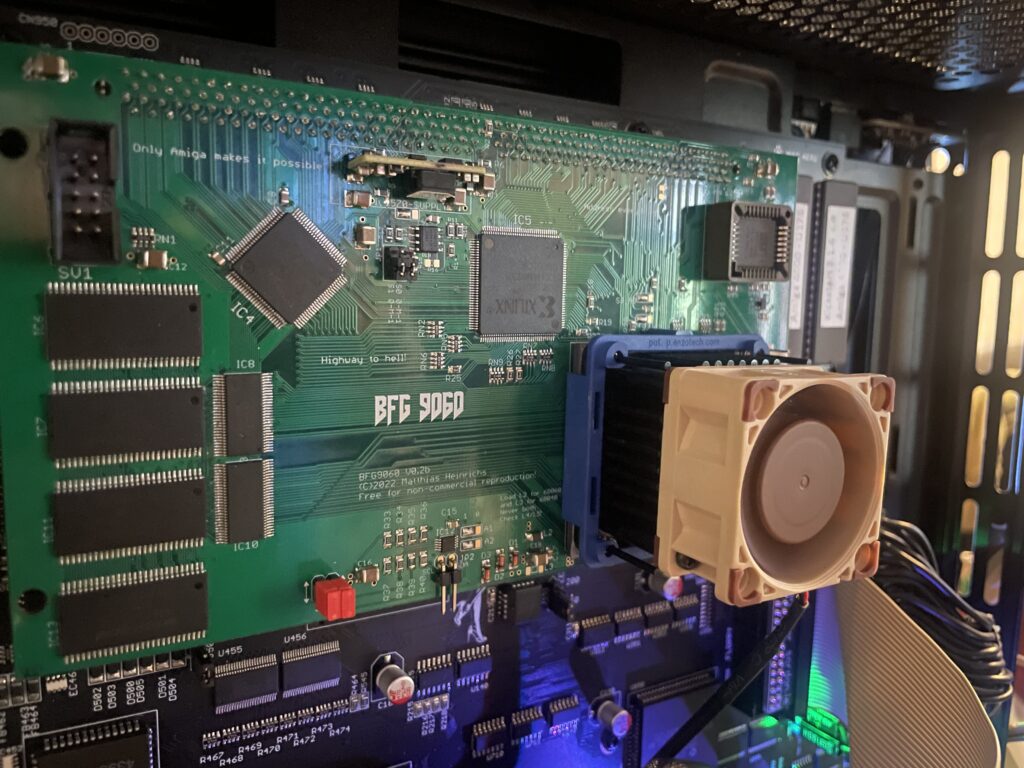
Even if it felt safe to run without active cooling I thought it would be a wise choice to add a heatsink and fan anyway. To keep the card safe I added a tall heatsink (Enzotech) with a 2 cm tall Noctua 40 mm fan helping to keep the CPU cool.
I have forgotten the exact part number for this cooler but it fits the 060 as a glove and clips on the CPU. The two CPLDs got black heatsinks attached with thermal conductive tape (after I took the pictures below). I am running this card in my A4000TX that is installed in a tower, it has a 120 mm Noctua fan blowing in from the front. The whole system runs very cool!
Conclusion
Trucking on in 100MHz!!!
My overclocked card has been stable for more than a year (as has the Amiga it is running in). My A4000TX is a dream to use at 100MHz together with a zz9000 graphics card.
Do you really notice the speed increase?
Yes, I feel that Workbench is more responsive and off course classic 3D games such as AmigaQuake runs and feels much faster at 100MHz. I have not had a single crash that could be attributed to the CPU card (in either overclocked or non overclocked state) which proves (for me) that the BFG in my A4000 is a very stable and dependable CPU card. Great job everyone involved in making this card and who decided to release it open for anyone to build!