I got the opportunity last year during fall to purchase a GBAPII++ mini graphics card with all passives already mounted. Only thing it did not have was the Cirrus Logic chip, memory chp and the CPLD (and some small components). The mini version of the GBAPII++ is the same card functionality wise as the regular one. You can read about the regular GBAPII++ here, you can read about the mini version of the card here.
As I was going to build the regular version of the graphics card in parallell I got lazy when I put together the BOM and assumed that the voltage regulator was the same for both of the cards. I was wrong, the GBAPII++ mini uses another voltage regulator, which explains why I could not program the CPLD and why the voltage regulator was running very hot on the card once I had built it.
Having received another shipment of components from Mouser late last year in December with the correct voltage regulator, I was anxious to find out if I had fried the card or if it was going to work. Happy to tell you the card in the picture is working fine after I swapped the voltage regulator to the correct one!
Whats the point of such a small Amiga graphics card?
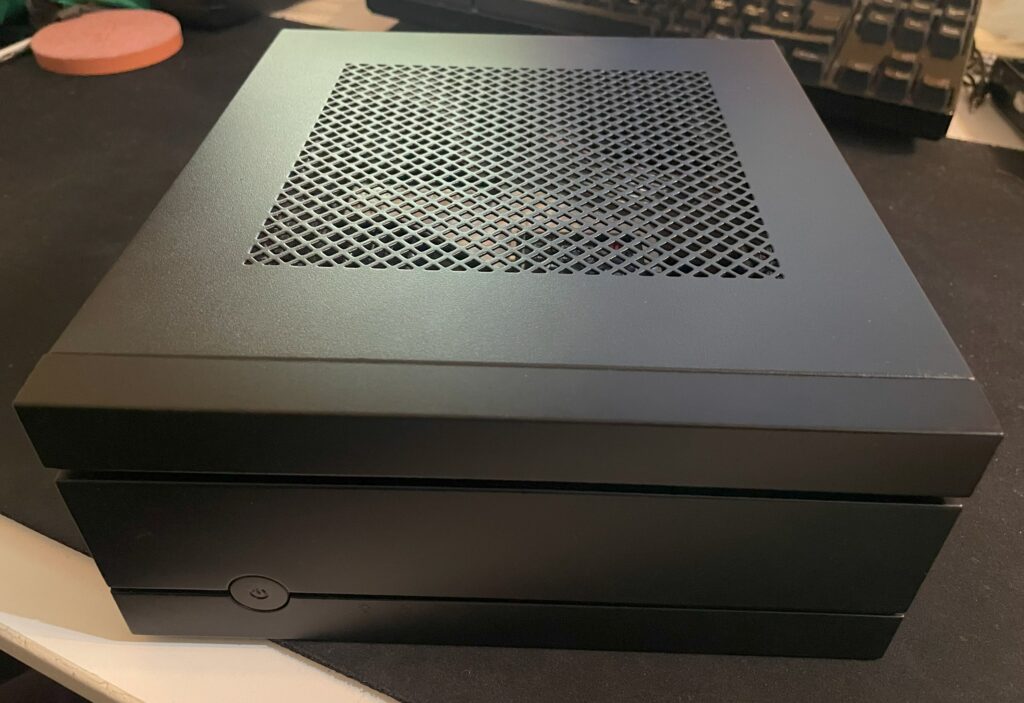
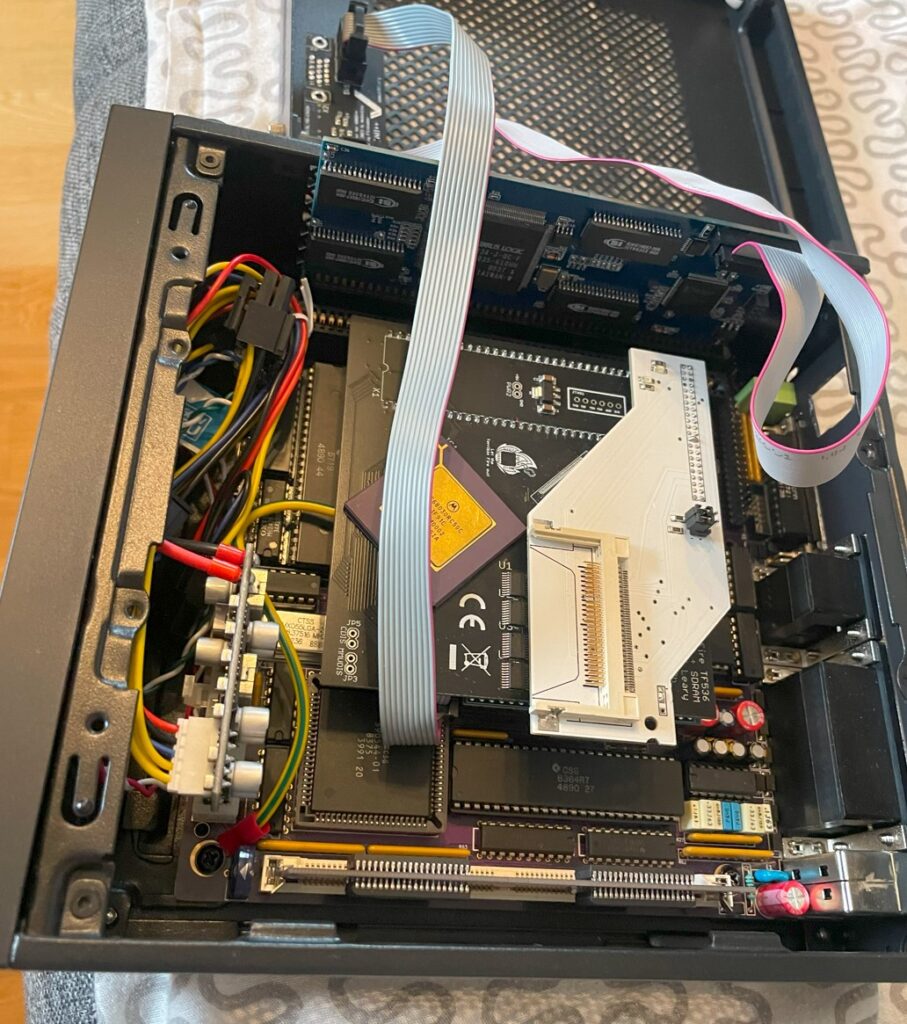
I use my other GBAP2++ mini card in my Mini-ITX Amiga Denise but I think I will use this one in another big box Amiga. As you can see the Denise is installed in a very low profile case – The tiny card makes it possible to use a small case. If anyone is wondering what case I am running, it is a Chieftec IX-01B Mini-ITX case but it has the CD/DVD addition stacked on top of it to make room for the graphics card (Chieftec MK-35DV).
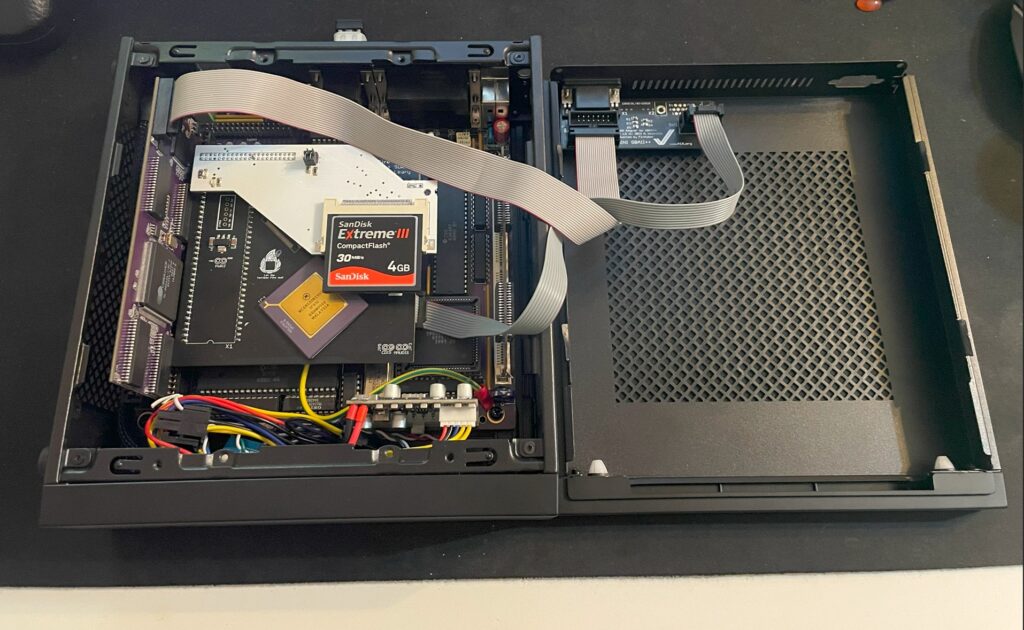
This Amiga is based on the Denise Mini-ITX A500+ clone motherboard. It has a TF356 68030 turbo card with 64MB memory, a 4 GB CF card and an Indivision ECS MK3, it also has a GBAP2++ mini graphics card. The video output from the VGA connector is beautifully switched from native ECS to P96 output (and vice versa).
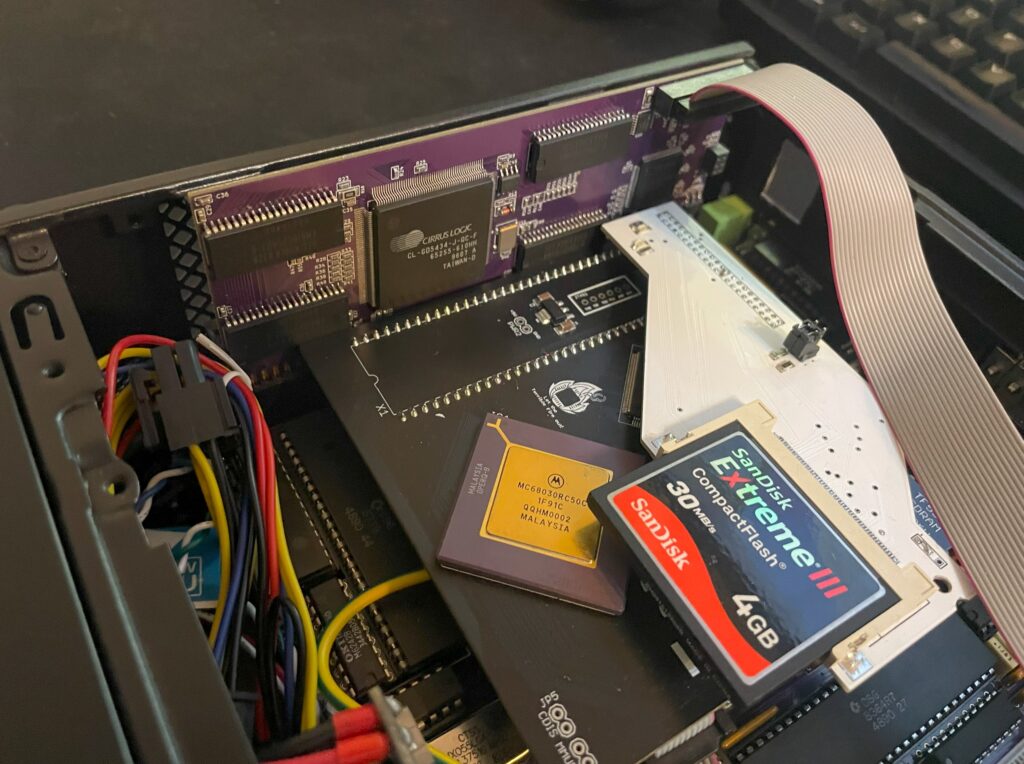
Here is another closeup of the card running fine in my Denise Amiga clone.
I built a ReAmiga 1200 late last year using a black PCB. Once built I knew I wanted a backup ReA1200. I usually build systems in pairs, one for usage and one for backup or testing purposes. I always have a purpose for stuff I get since I do not believe in hoarding up stuff for hoarding purposes only. I am not into this just to build a huge collection to gather dust.
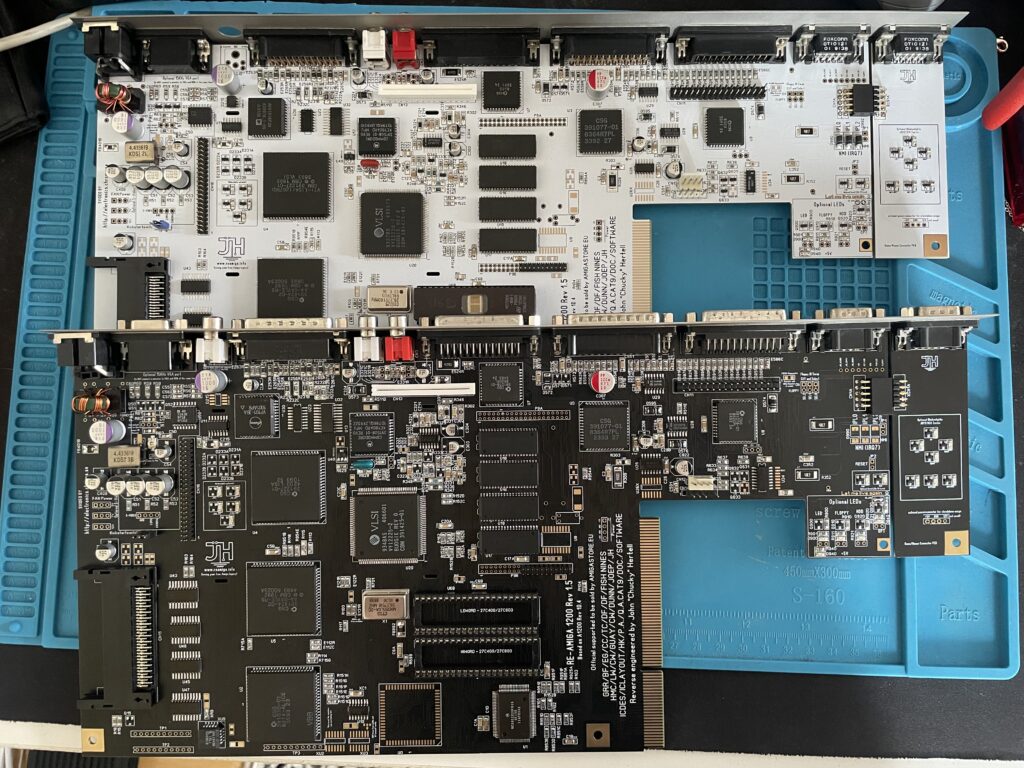
The first ReAmiga 1200 I built had a black PCB and is running in a black A1200.net case so I decided to go for another color than black this time. The only color I found, since I did not want to order a batch of PCBs myself, was white so thats what I got.
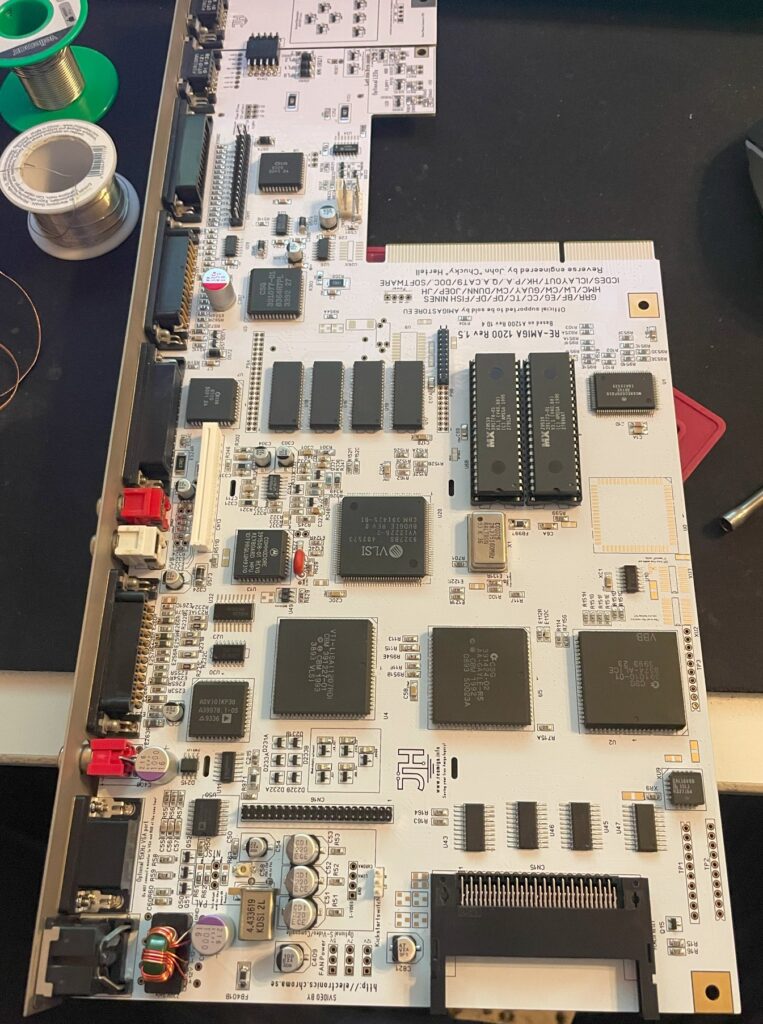
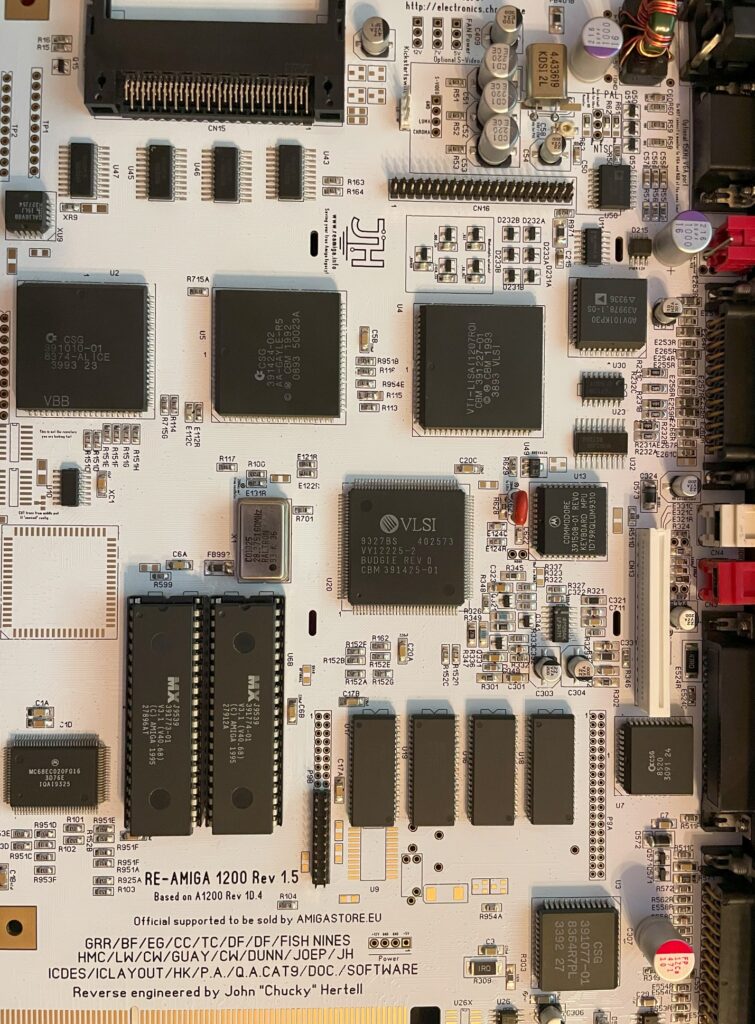
Closeup of the white ReAmiga 1200 motherboard
As with the last ReAmiga 1200 PCB I built this build went really smooth. I used components from a broken A1200 PCB that I desoldered with an hot air rework station. I also got connectors from that donor board. Other stuff like the PCMCIA connector and the odd chip here and there was ordered from AliExpress, Sordan and from ebay.de.
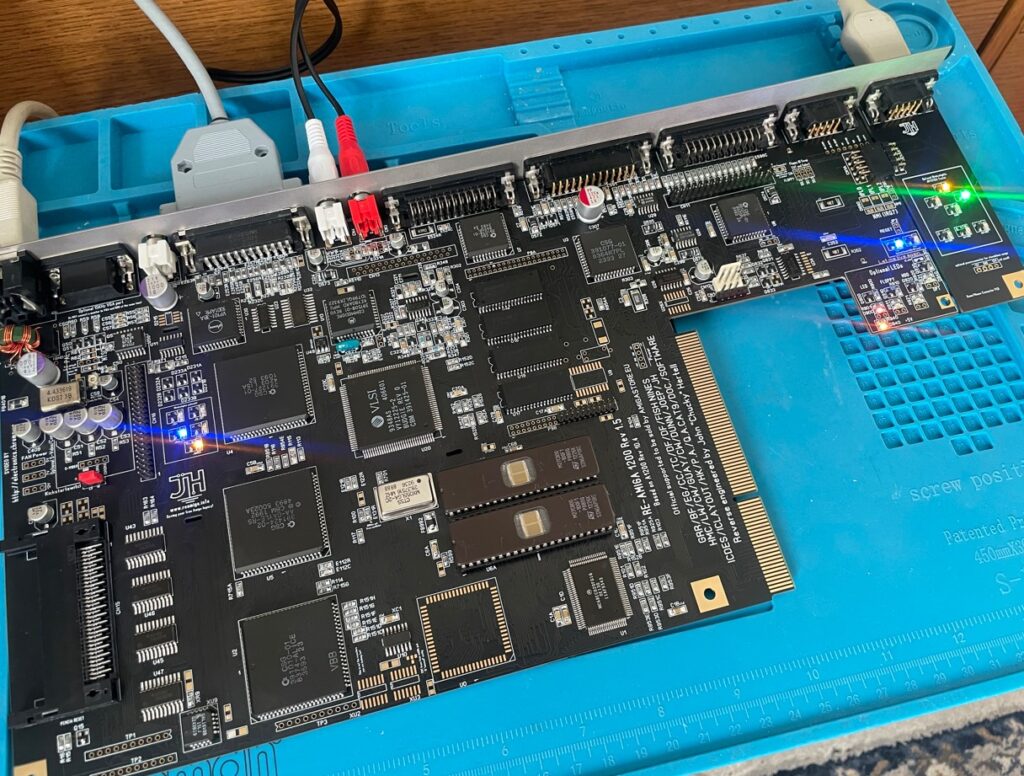
Of course the majority of passives and some chips came from Mouser. This time I used the same color for all LEDs -green- unlike my last one that has a mix of different colors. I sort of wish I got red LEDs instead of green, perhaps if I build a third one (j/k).
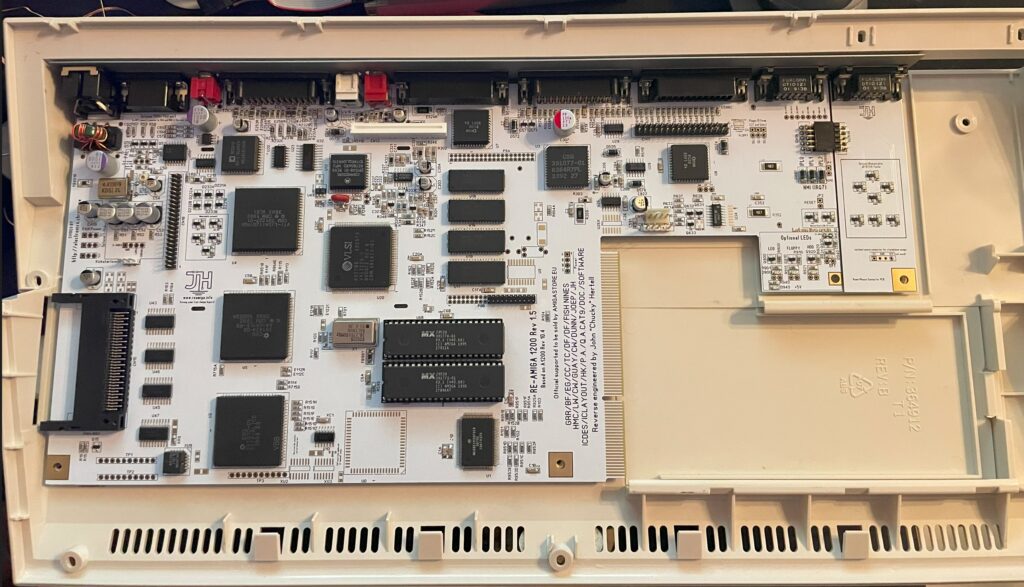
The ReA1200 motherboard is installed in the original Commodore A1200 case
I was thinking of keeping this PCB in storage or getting a white A1200.net case but then I remembered that I had a genuine Amiga 1200 case I got before. Most A1200 cases are in bad shape these days but this one was actually in relatively fine shape. Notice the Centurion tech backplate that I used instead of the metal shield. It looks much better than the flimsy original shield.
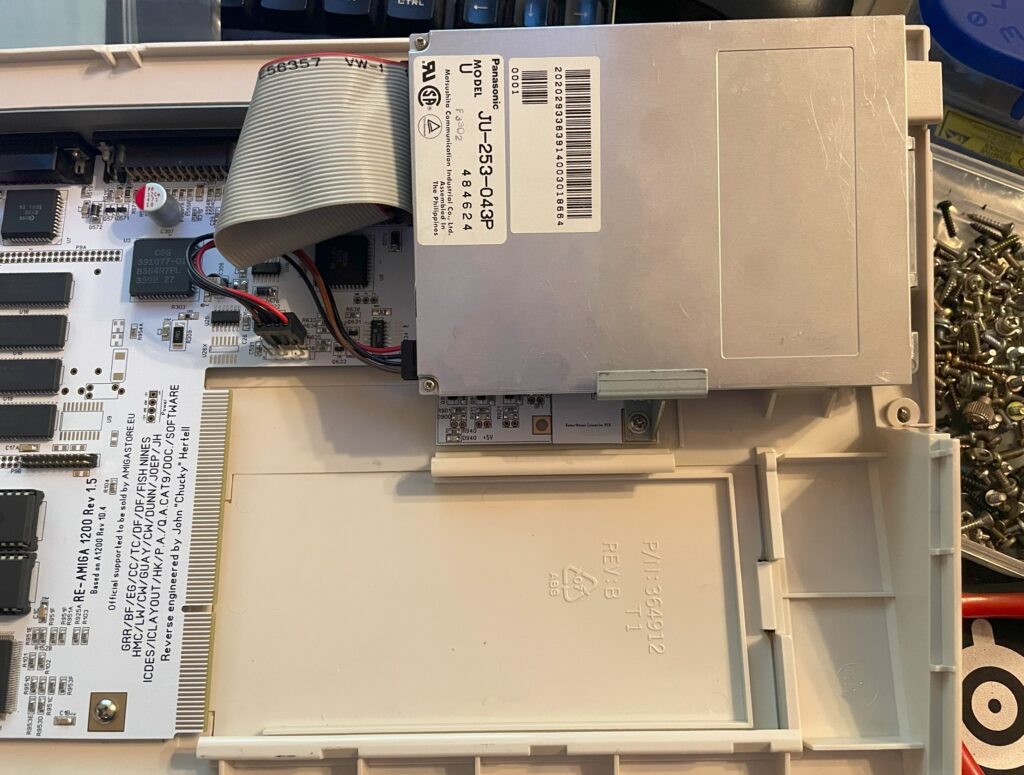
Even the floppy drive and cables was original (not the screws though)
As a bonus, that case had all the parts to make it a full A1200. The floppy drive, cables, LED lights for HDD, floppy and power and the keyboard.
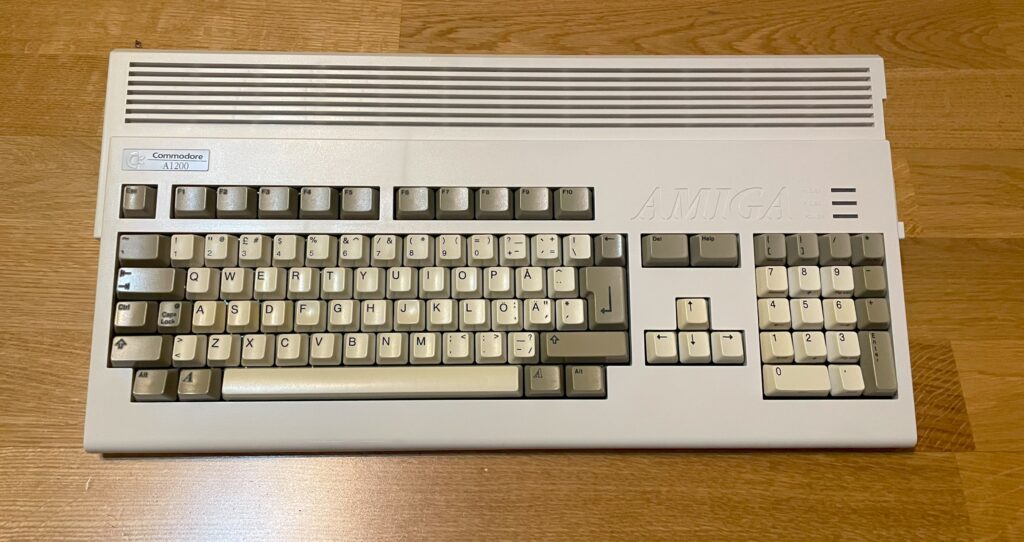
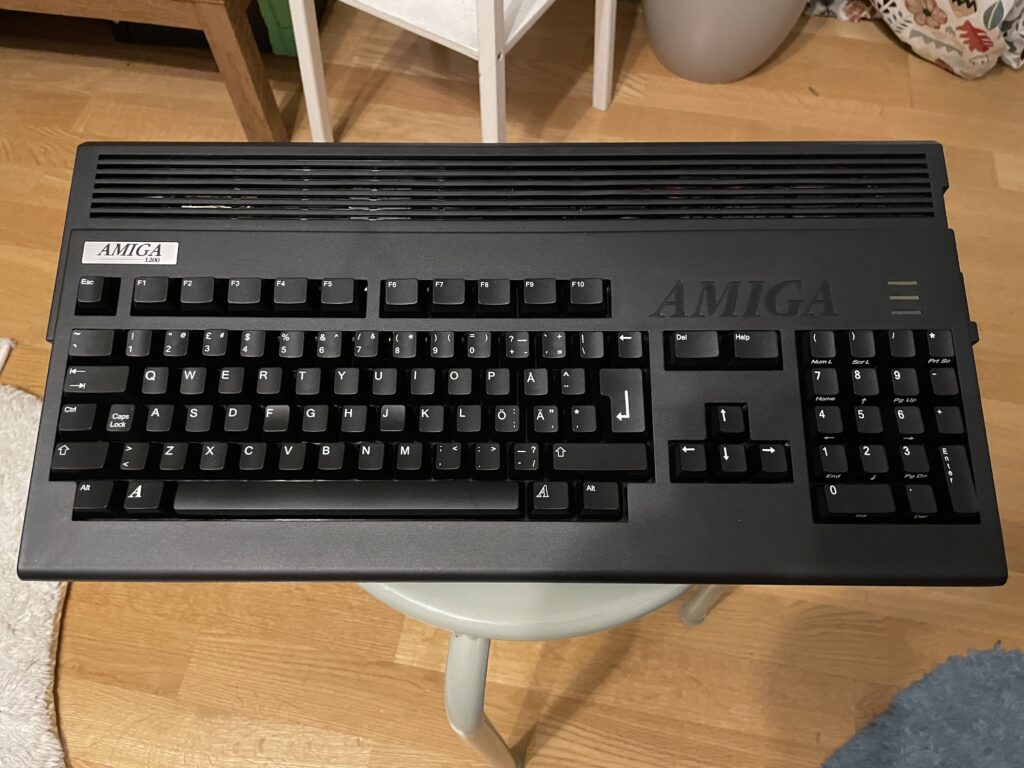
Here is the ReAmiga 1200 fully built in the Commdore A1200 case with orginal keys.
And believe it or not, the plastic threads for the screws was not stripped or cracked. The keyboard was relatively white too and had not gone too yellow over the years. Testing the system (there is no HDD inside it) it works fine and I actually did have a plan for this system, sometimes in the future when the scandoubler arrives for the PiStorm32 I will try PiStorm32 on it. But as it stands right now its going into my storage.
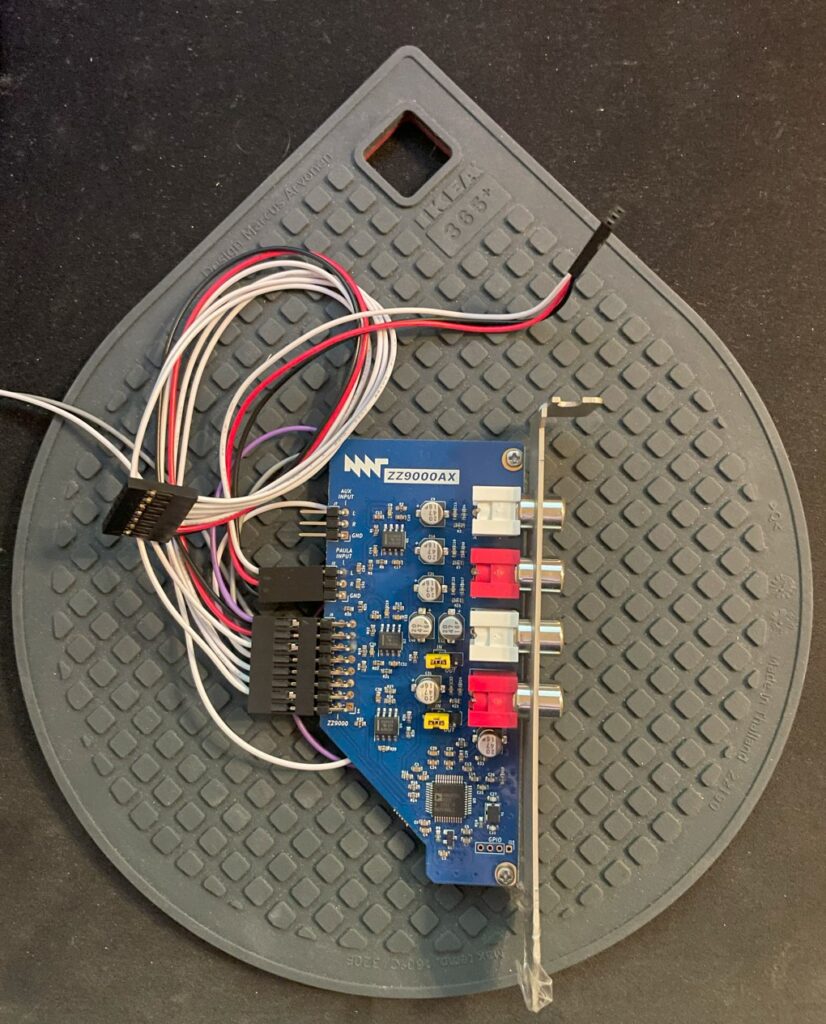
There is a sound card for the ZZ9000 Amiga graphics card called the ZZ9000AX. It is a small soundcard that is attached directly to the ZZ9000 Amiga Zorro slot graphics card.
I had some problems with the ZZ9000AX
Keep in mind that I am running the card on an unofficial Amiga motherboard (A4000TX). So the reason for me having problems might be because of that and not the fault of the soundcard.
I got A ZZ9000AX last year but had massive problems getting it running well. The ZZ9000AX seemed to be picking up noise off the bus and had a disturbingly loud background buzz that never stopped. Paula sound is passed through the ZZ9000AX from the ZZ9000 through a three wire cable.
When Paula output was passed through the ZZ9000AX it just sounded horrible. Sometimes distorted, sometimes just totally blurred in background noise. Sound output so far from the regular crystal clear Amiga sound output I was used to.
I contacted MNT about the problem and I was sent a replacement card from MNT – But it did not fix the problems, just introduced different sounding problems. As I was running it in my A4000TX which is a non standard Amiga model (with no public schematics) it is difficult to say where the problem lies. There might be some kind of difference between an A4000D CR (that the A4000TX is based on) and an A4000TX that introduces these problems into the audio output.
I am going to test my card on my other Zorro 3 machines in the future to find out if it is the fault of the A4000TX or not (will update this text). But the card was sadly unusable for me in my A4000TX.
Finding a solution
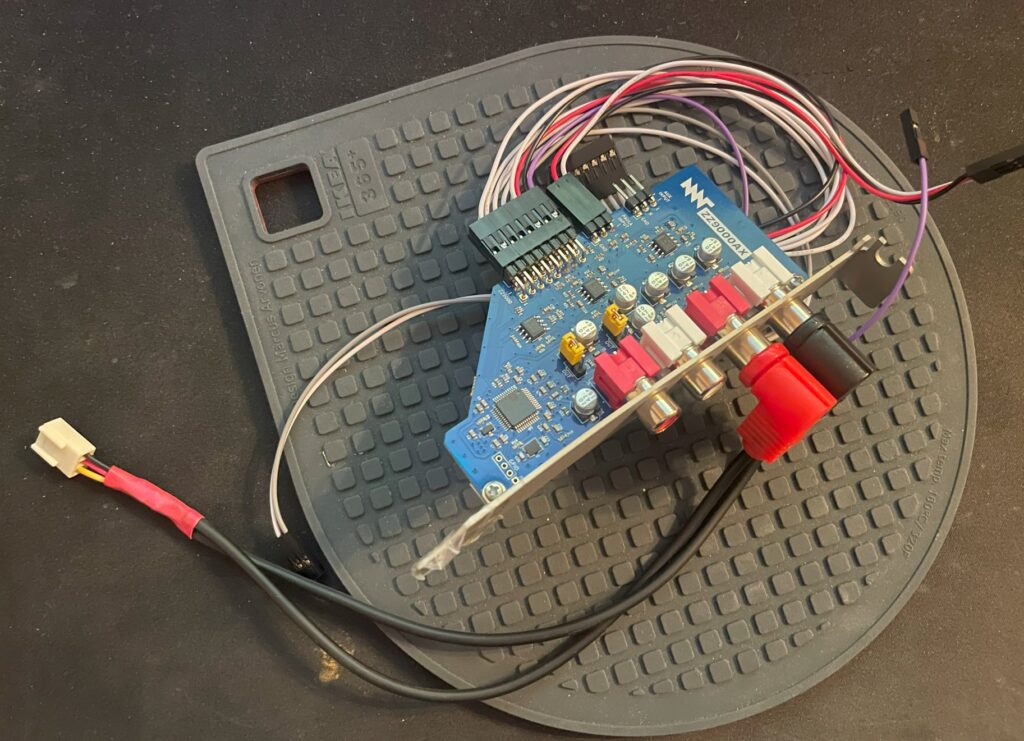
ZZ9000AX with external to internal cable
Playing around with the card I noticed that if I removed the three wire cable that connected Paula audio output into the ZZ9000AX (you can see it attached to the card above) the card was beautifully silent, no bus noise, no irritating static and no weird noises. Playing MP3s worked fine as they where being played on the ZZ9000AX and not on the Paula.
The A4000TX is a clone of the Amiga 4000CR and shares the same features, one which is a input header on the motherboard originally meant for CD audo to be merged with Paula output.
So I got an idea to remove the three cable wire that connects the ZZ9000AX to the ZZ9000 altogether and route the output from the ZZ9000AX into the input header on the motherboard instead.
That means that the output of the soundcard was mixed into the sound jack of the A4000TX.
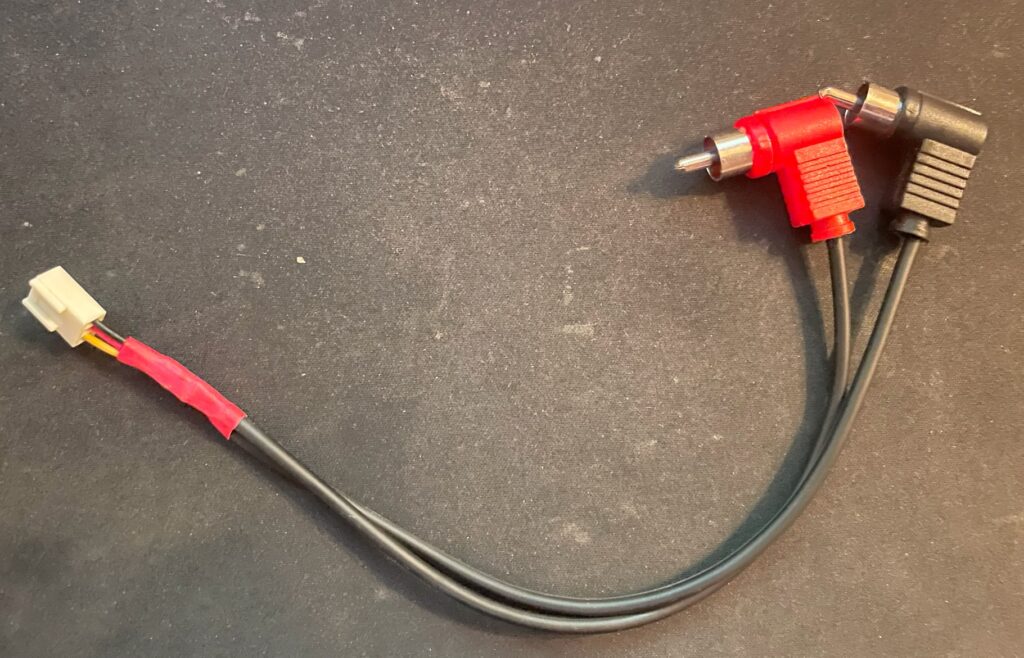
Cable in detail, it is just a simple cable, nothing special to be honest
I created this little cable just to prove if it could work. I will make a nicer looking cable in the future. The A4000D and the A4000TX (that is based on the A4000D CR) has a audio in input on the motherboard, likely for CD-ROM input or for AV purposes.
It is connected to line in on the A4000TX motherboard so it gets mixed into the output for the sound socket.
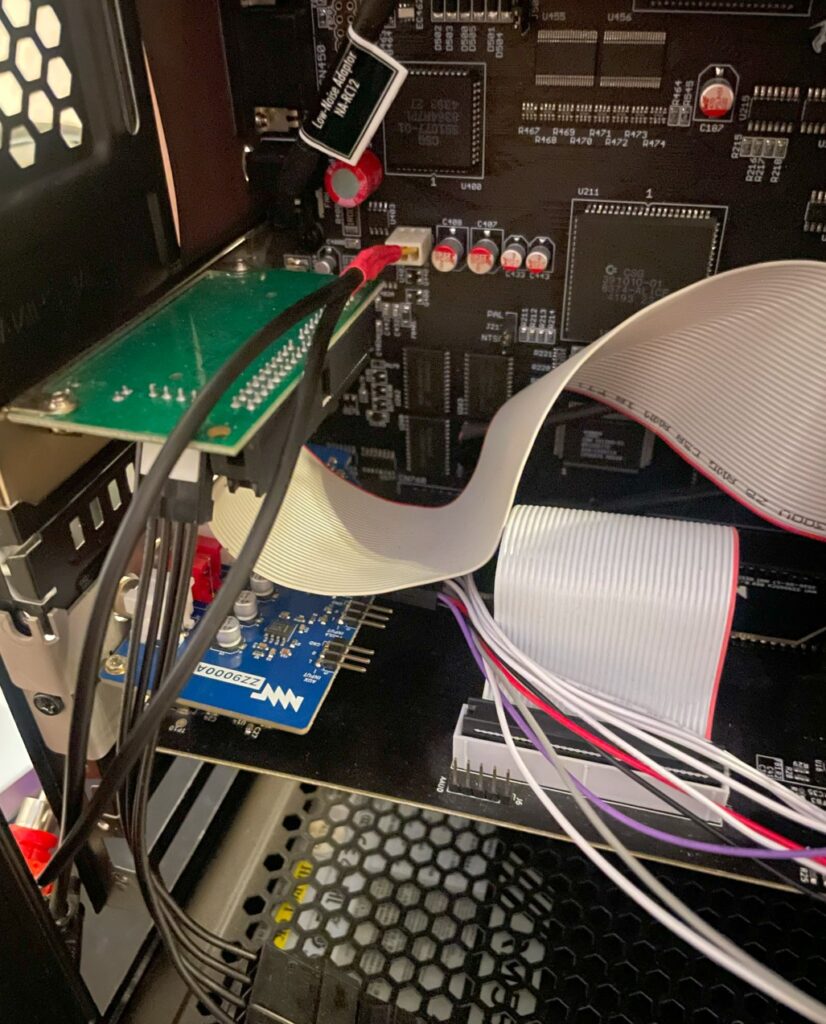
You can see the cable connected to the audio input header on the image above. It is a messy setup, but the system is in a state of work in progress at the moment.
The cable is just a nasty quick hack, I will do something better here in the future
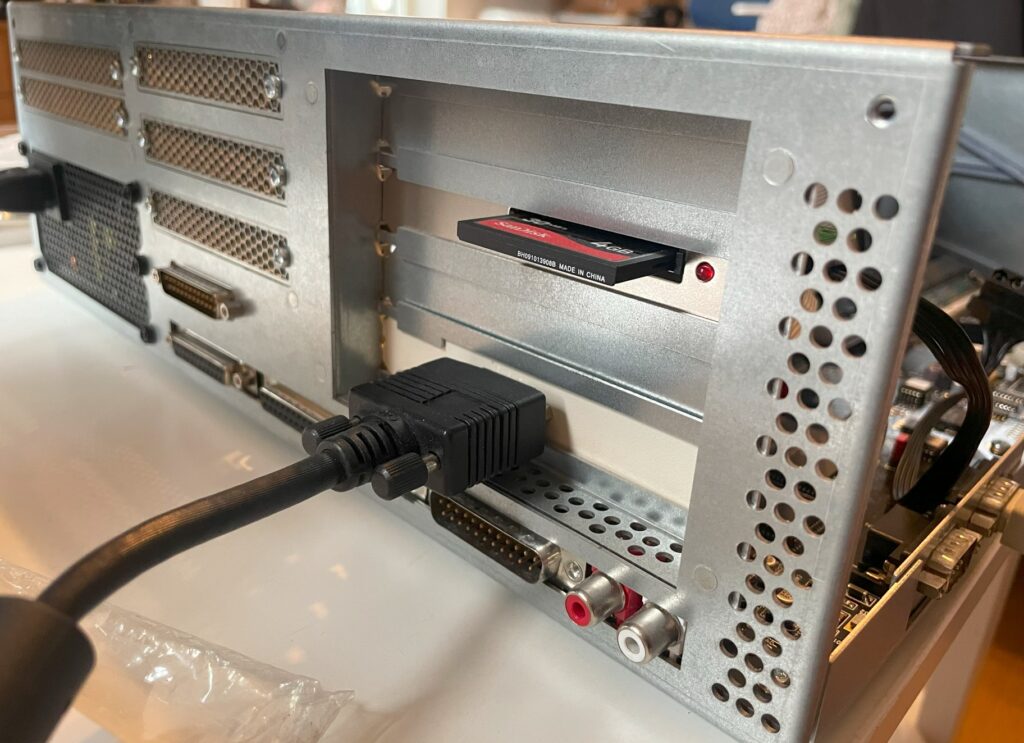
Here is the backside of the A4000TX and how I route the cables to the internal audio input. No doubt I will create a more neat solution in the future, but for now this will do.
Does the fix work?
Yes it does, I have configured AmigaAMP to use the MHI drivers for MP3 playback. Both MHI and AHI works fine. There is no bus noise and no ringing noises in the background. The sound output is dead silent when the Amiga is not producing any sound – Just as it was meant to be and how I expect it to be. And best of all, playing modules in an module player sounds crystal clear. Playing MP3s on my Amiga sounds just as they do on my PC now!
There is just one little problem
There is one disadvantage of this setup, and that is that the audio input header on the Amiga 4000 motherboard lowers the noise a bit compared to Paula output. I have not found a fix for this yet. One fix would be to run a separate mixer that mixes ZZ9000AX and Paula audio into one, however that just sounds too messy, so I will stick with this solution and just increase the audio level a bit whenever I run something on the ZZ9000AX card.
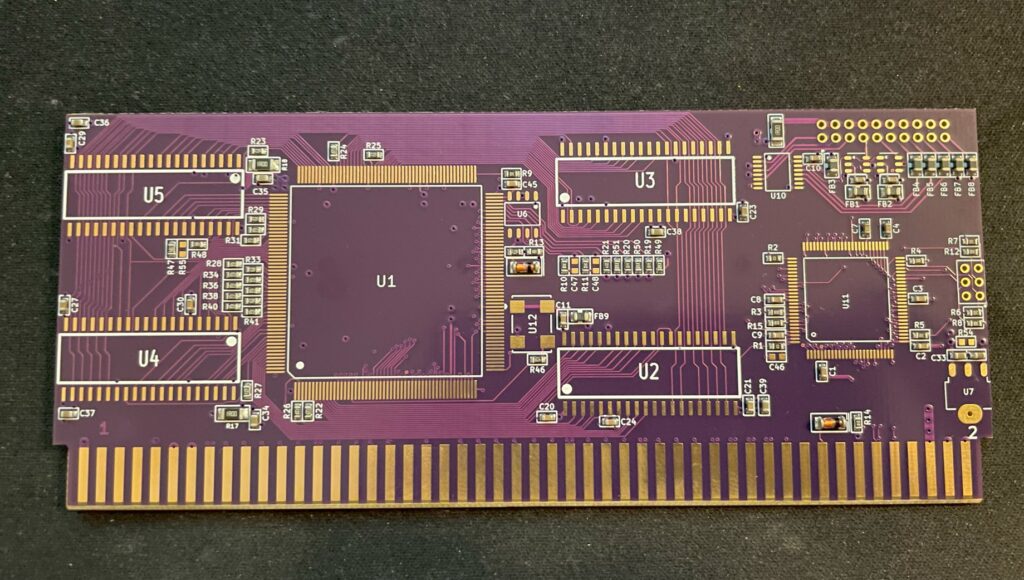
Today I picked up a small parcel that was sent to me, the parcel contained a GBAPII++ mini Amiga graphics card PCB. The GBAPII++ is a half size Zorro 2 Amiga graphics card based on the Cirrus Logic GD5434 chip, you can read all about that project here. This is a smaller version of that card – It is intended to be used with the Denise A500+ clone (Mini-ITX) but can be used on all Amiga systems with Zorro slots. You can read all about the mini version of the graphics card here.
Specification of the GBAPII++ card
This is a Zorro 2 card, it has 2 MB memory and is comparable with the Picasso 2 graphics card in performance (give or take performance in some tests). It is a perfect match for Z2 and 030+ systems IMHO but is not really a competitor with the zz9000 regarding performance (in a Zorro 3 system).
Lets take a look at the GBAPII++ card
Front side of the GBAPII++ Amiga Zorro 2 graphics card
Usually I prefer to build projects from scratch but in this case I did not mind a version where the passives where already pre-installed. The GBAPII++ mini version uses mostly 0603 component sizes. That is 1.6 x 0.8 mm in size, not impossible to solder, and to be honest not that challenging, just very tedious. Especially if you do not have a proper workshop with microscope.
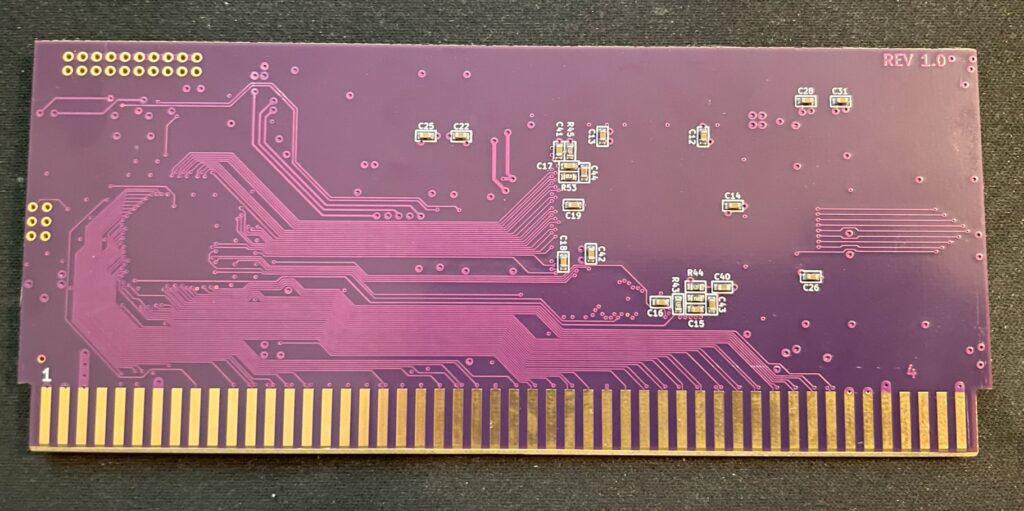
Here is the back of the graphics card, not much happening just some 0603 parts
The missing components are 2 MB memory consisting of four chips, SOJ40 (this is the same memory type that is installed in an Amiga 1200 rev 1.4d). The card needs one CPLD, two ICs, crystal and the GD5434 chip. The Cirrus Logic chip can be taken from a PC graphics card. Occasionally NOS chips show up on Ebay from time to time. Expect to pay 25-40 euro for the graphics chip alone (and more for the full graphics card).
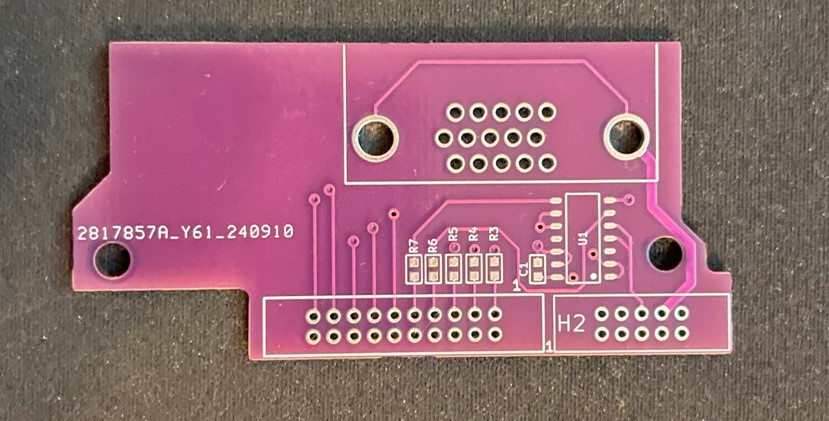
I also got this little VGA out PCB that hooks up to the graphics card and fits neatly at the back of the Denise Amiga 500+ clone.
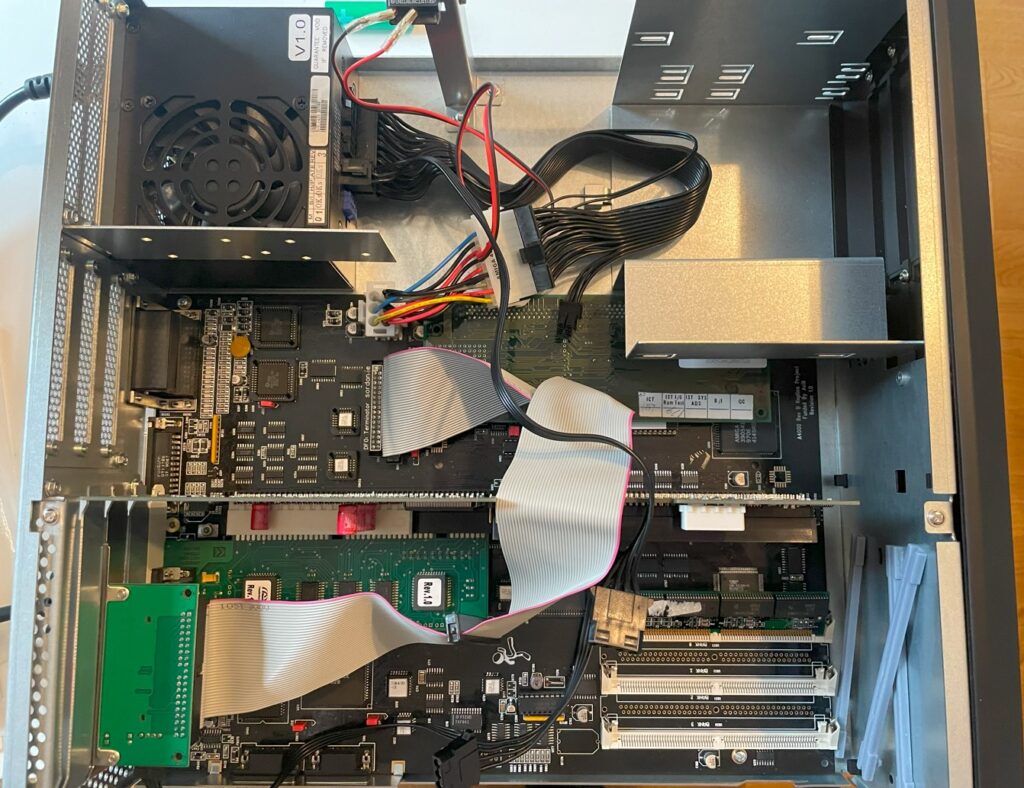
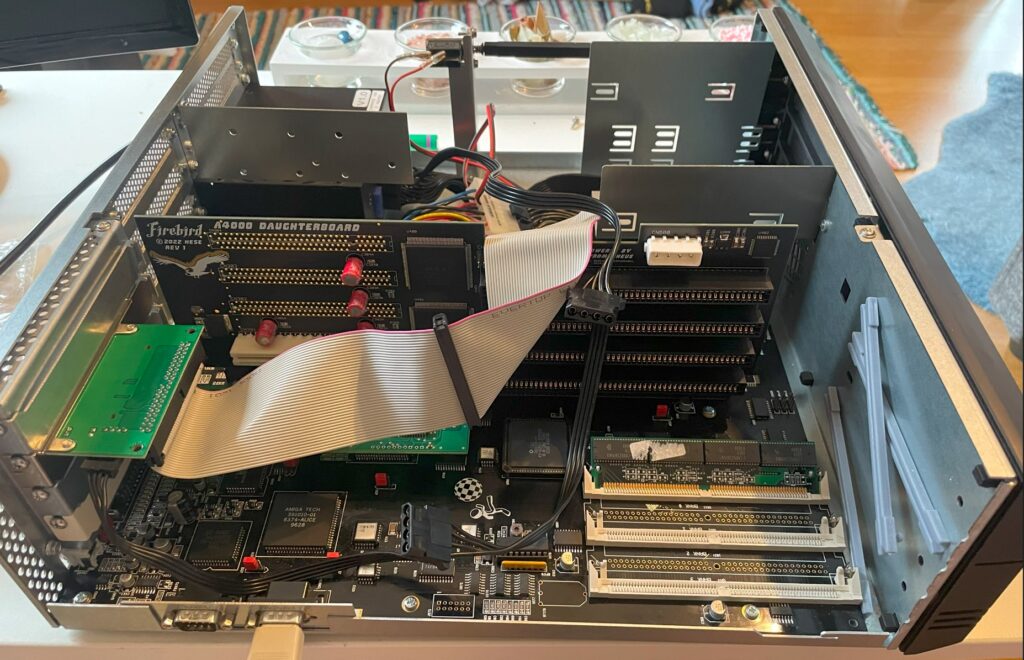
I have an Amiga 4000D that is in a work in progress state. I am in no rush to get it finished and I enjoy the process of setting it up. It is an Acill A4000D motherboard that built last year. It has a Firebird PCI daughter card, a MicroniK scandoubler and a C= 030 CPU card. Everything is mounted in a replica black A4000D case with a 3D printed A4000D front (incl. covers). Final state of this Amiga 4000 will probably look a lot different but for testing purposes, this will be fine.
Adding a IDE-CF interface to the Amiga 4000D
Today I added a slot bracket mounted Compact Flash card adapter to it so I could test out a couple of 72-pin SIMM slots. I do not have a floppy drive in most of my Amigas so I had to run Workbench of off a CF card to be able to see total memory. Thankfully I still have old school 40 pin IDE cables in my parts stash.
I used the Workbench installation from my Denise ITX Amiga 500+ clone by simply borrowing the CF card from it. I will post some more info on this beautiful little Amiga computer later sometimes.
With the CF card inserted in the Compact flash adapter my A4000D booted happily of off the WB 3.1 installation on the CF card. Having the CF card accessible from the outside of the Amiga is a must. I often find myself mounting the CF card in WinUAE to take backups and to install and transfer software.
Testing 72 pin SIMM memory
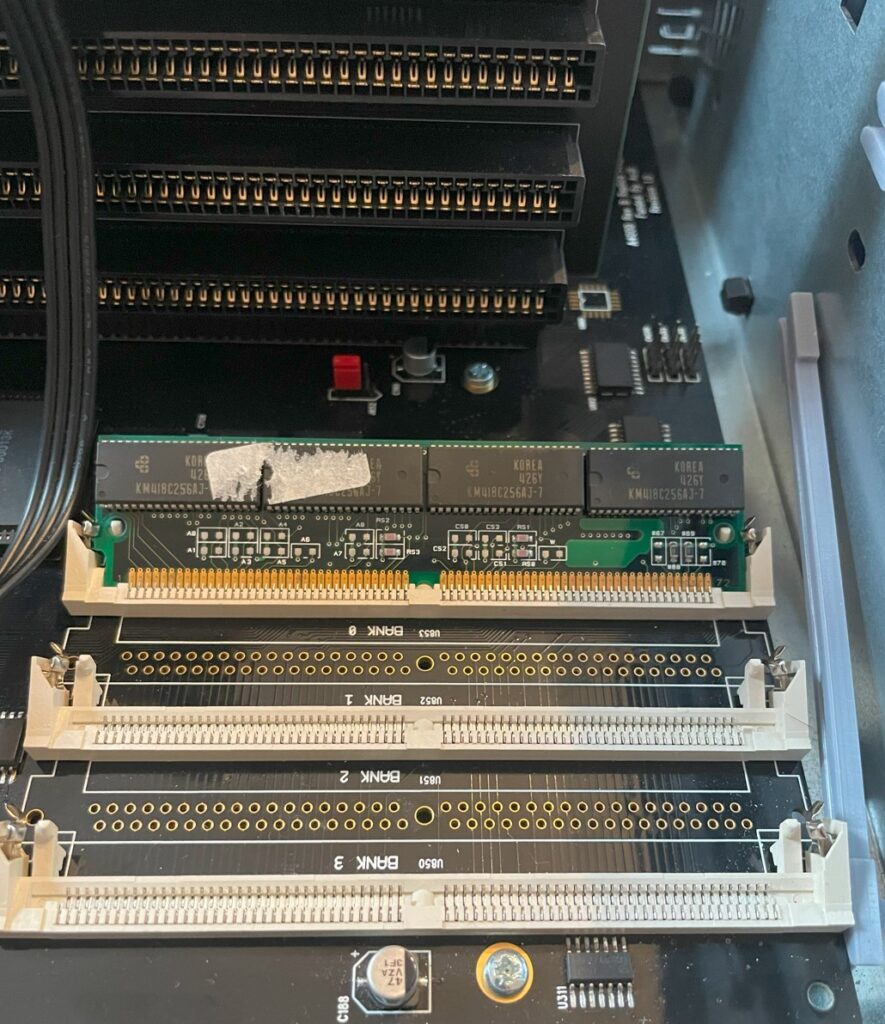
The first thing I wanted to do was to remove the 32 MB SIMM I was using in the Chip memory socket and replace it with a genuine 2 MB SIMM. All fine, the 2 MB 72 pin SIMM worked fine as chip mem! 2 MB 72 pin SIMM memory is getting more difficult to find these days unfortunately – hopefully there will be more DIY options in the future.
The A4000D supports up to 16 MB fast memory on the motherboard, either through four 4 MB memory modules or through two 8 MB memory modules. You can see that I built the A4000D motherboard with only two 72 pin sockets for fast memory, so I need two 8 MB modules to get 16 MB.
Unfortunately, I did not have any 8 MB SIMM memory (all I had was 16 and 32 MB modules) so the maximum memory I could add was 4 MB (one 16 MB SIMM becomes 2 MB in the socket). 72 pin memory modules rarely indicated memory size so it was necessary to test them in a computer. Now this is not really a problem since I will be running either a BFG9060 or a TF 060 card in this computer. But it is always nice to max out memory if it is possible to so.
Conclusion
I added a new thing to my todo list, find some 8 MB SIMMs.
I also flagged some things on the todo list as finished, CF card adapter + chip mem is working.
I built my second Amiga 2000 EATX last year, it is a beautiful clone of the Amiga 2000 remade into a standard extended ATX format so it can fit a standard EATX case. You can be sure that I will add an article about that motherboard here in the future. The author of that project has also made the n2630 project, its a clone/reimplementation of Commodores 030 card for the A2000, the Commodore A2630.
To be honest, I wish there was a modern 060 or 040 card we could build for the A2000 since I think 030 is just too slow these days – at least for my modern Amiga standards. To be fair while the A2630 was 25 Mhz this one runs at 50 Mhz, so its a little bit faster. 040 runs so hot, but would be a perfect fit for the A2000EATX because of the improved case airflow (and having an 040 in one of my machines could be interesting to compare performance with 060 machines).
Anyways, I should be glad with what I have and I am thankful that we can build this cool modern 030 card for our A2000 computers. And the n2630 is such a nice compliment to the A2000 EATX motherboard having IDE/CF slot built in.
Building the n2630 for my A2000EATX
I decided to build my n2630 card earlier this year with 128 MB fast memory. There was an option to go for 256 MB fast memory also but thought it was not really worth it, maybe I will regret it in the future. Otherwise this build was very straight forward. It uses three CPLDs and six memory chips.
There was some parts that was difficult to find, first it was the 030 CPU socket. I actually got the parts number for one that was availble on Mouser after asking around, surprised about that. The CF slot at the back of the card needs to be the right one to fit solder points on the board, ask on the Discord if you wondering what type you should get if you are building one. Other than that it was an easy build. There are also two eproms you need to have and program, but as usual, most stuff that is rare can be found with some patience.
I have since mounted an FPU to the card and I also got a 3D printed bracket so I could secure it in my regular ATX tower that was converted to EATX. I ran out of black pin stripes that is why I used yellow and green (it was also a joke about obsessing over the color syncing of hardware).
I just finished building my black Amiga 1200 that is based on a ReAmiga 1200 motherboard and a TF1260 turbo card and I am very happy with it!
System specifications:
ReAmiga A1200 v1.5 (black PCB)
TerribleFire 1260 (black PCB)
Indivision AGA MK3
Micronik 1.76MB floppy drive
Hard keyboard membrane
4GB compact flash card
A1200.net replacement case, black
A1200.net replacement keycaps, black
Custom metal backplate
Comments on the build
Terrible Fire 1260
I like to run either 030 or 060, preferably 060, in my Amigas. Previously I had an Apollo 1260 in my old A1200 so I replaced it with a TF1260 that I built. The Terrible Fire1260 supports easier overclocking than the Apollo 1260 did and also has more memory, 128 MB.
Indivision AGA MK3
A scandoubler is a must have in the Amiga IMHO and the Indivision is a great option for that since it hooks up to HDMI directly. I got the first version years ago but sold it. Both versions has been proven to be reliable and good solutions, but price for it has went up a lot in 15 years.
Case and keyboard
The case and keys came from a1200.net. I got a hard keyboard membrane which worked great after the I had wiped the rubber key bottoms on a paper to make them conductive again. I also got a metal backplate from CenturionTech, it is a nice replacement for the ugly metal bottom shield, makes the whole system professional and fresh.
Other
I had an old MicroniK HD floppy drive and used that in the build. No idea where I got it from and I will probably never use it, but an A1200 does not look right without a floppy. I dont use old ball mouses anymore, so I got a MouSTer DB9 to USB adapter so I can use a wireless mouse.
Building the ReAmiga 1200
I built the ReAmiga A1200 from an empty motherboard PCB myself. I used parts from a broken Amiga 1200 motherboard. Halfway in the build I decided to build a second one as a backup so I got a white motherboard and built them both back to back. Both motherboards are tested and fully working. They are equiped with full LEDs. The white one has all green LEDs while the black one reminds of a christmas tree when its powered on.
The build was farily simple, as with most replicas close to original C= designs the amount of passives that has to be soldered is a lot, although not as insane as an A4000D/T.
I decided to build my motherboards without any sockets. There are two primary reasons for this, I can not professionally clean the motherboard, and cleaning flux from sockets is very difficult for me without an ultrasonic bath. The motherboard acts as a heatsink and it is more efficient if the chips are soldered to the motherboard IMHO. For example, Alice gets very hot (as does Lisa). Off course it is also more reliable, I have yet to find a socket that is not reliable though.
You can see the LEDs in action on the picture
Summary
If I had to chose to keep just one Amiga it would be difficult not to chose this A1200, it is fast thanks to having an 060 CPU. HDMI output is a nice luxury and with high resolution monitor drivers running at 1024×768 (in 8 colors) it almost feels like you had an RTG graphics card in it when you are in Workbench.