Amiga 4000D maintenance

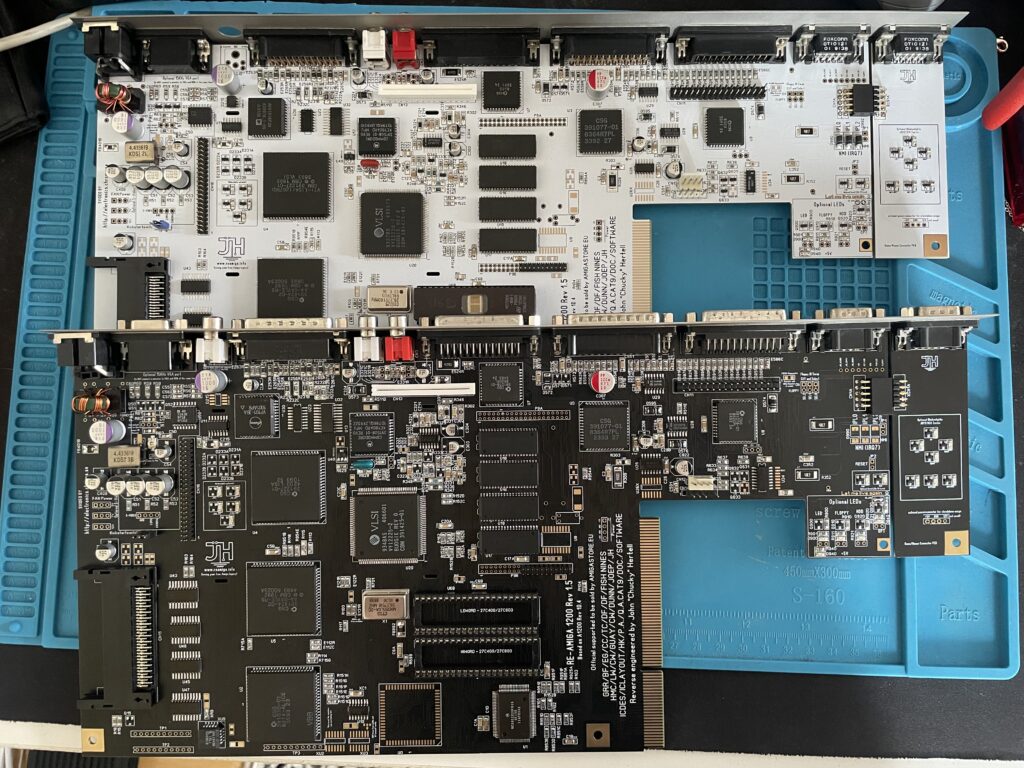
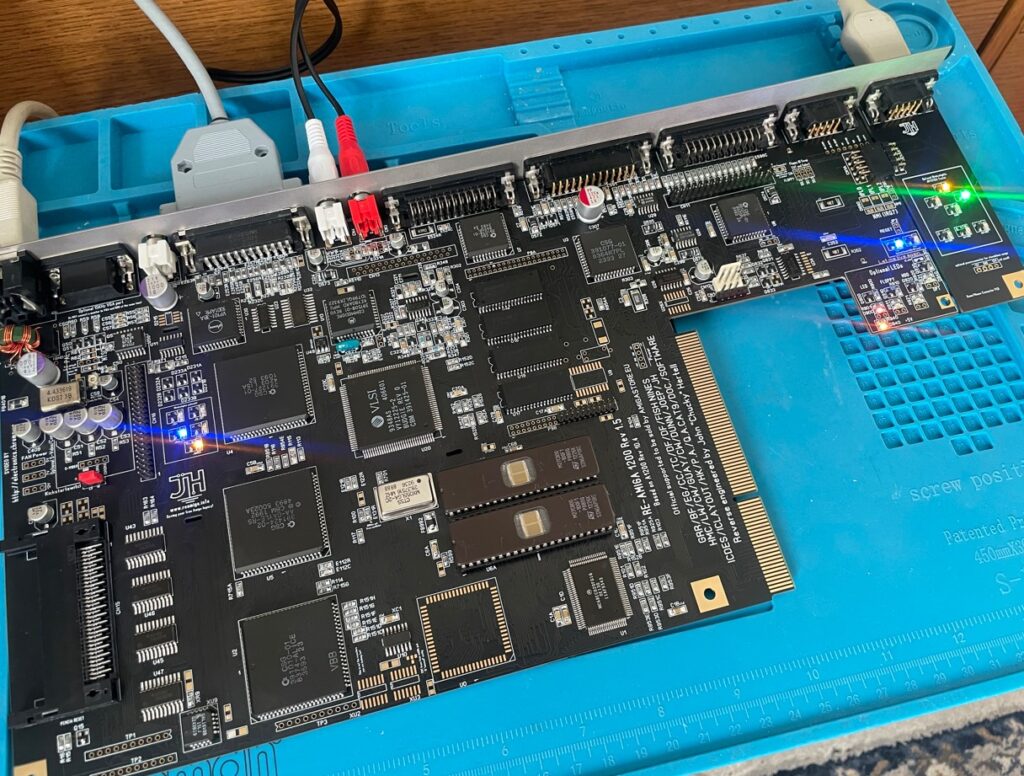
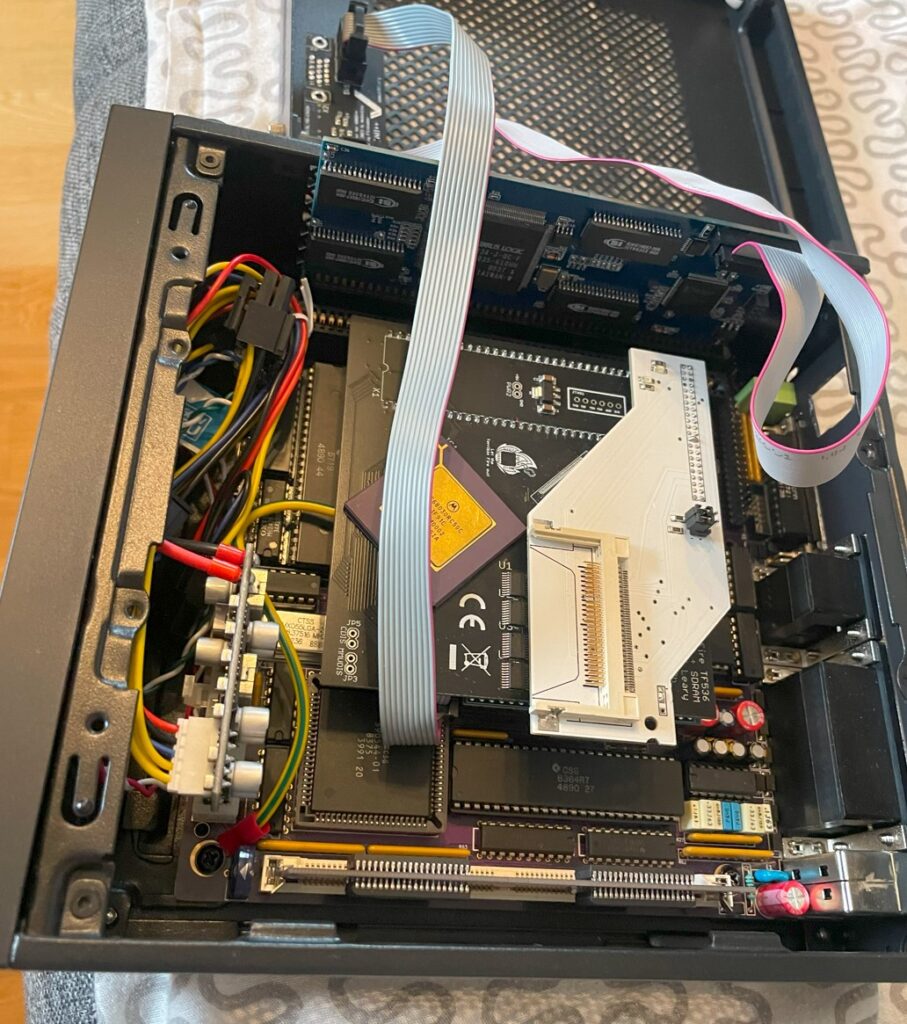
I have an Amiga 4000D that is in a work in progress state. I am in no rush to get it finished and I enjoy the process of setting it up. It is an Acill A4000D motherboard that built last year. It has a Firebird PCI daughter card, a MicroniK scandoubler and a C= 030 CPU card. Everything is mounted in a replica black A4000D case with a 3D printed A4000D front (incl. covers). Final state of this Amiga 4000 will probably look a lot different but for testing purposes, this will be fine.

Adding a IDE-CF interface to the Amiga 4000D

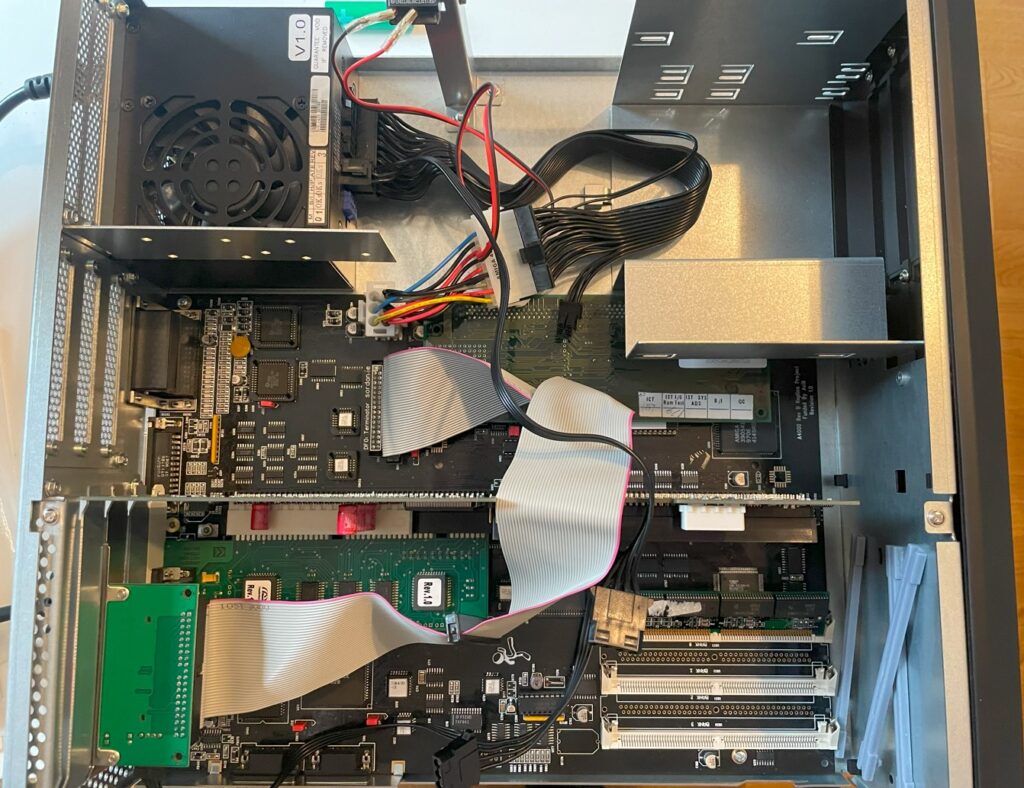
Today I added a slot bracket mounted Compact Flash card adapter to it so I could test out a couple of 72-pin SIMM slots. I do not have a floppy drive in most of my Amigas so I had to run Workbench of off a CF card to be able to see total memory. Thankfully I still have old school 40 pin IDE cables in my parts stash.

I used the Workbench installation from my Denise ITX Amiga 500+ clone by simply borrowing the CF card from it. I will post some more info on this beautiful little Amiga computer later sometimes.

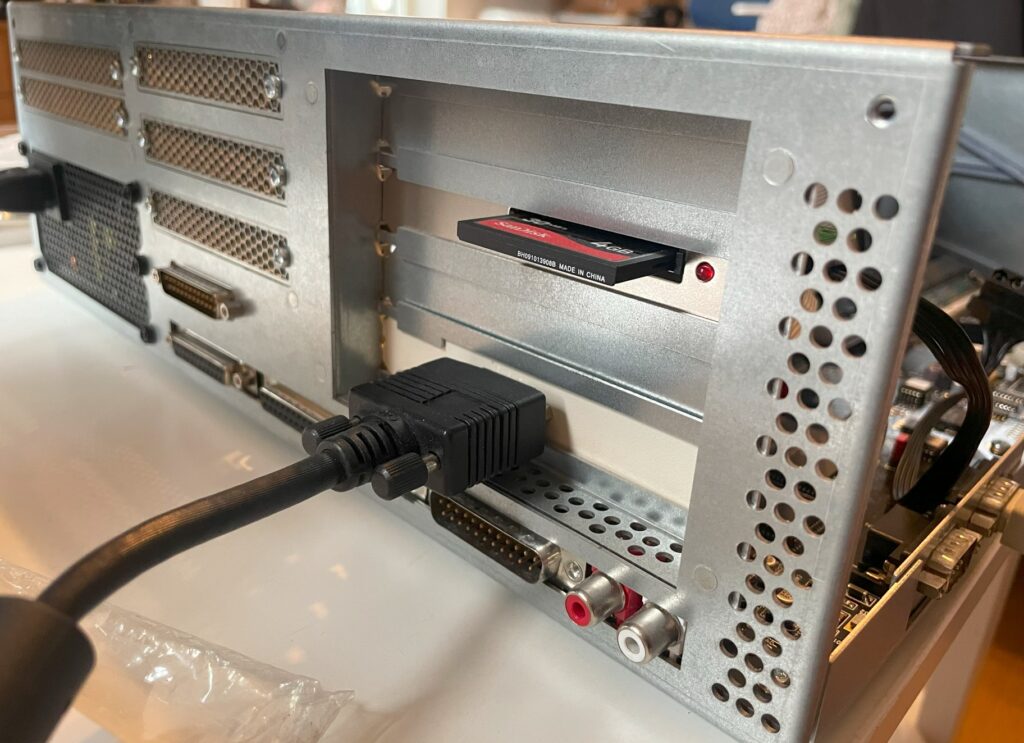
With the CF card inserted in the Compact flash adapter my A4000D booted happily of off the WB 3.1 installation on the CF card. Having the CF card accessible from the outside of the Amiga is a must. I often find myself mounting the CF card in WinUAE to take backups and to install and transfer software.

Testing 72 pin SIMM memory

The first thing I wanted to do was to remove the 32 MB SIMM I was using in the Chip memory socket and replace it with a genuine 2 MB SIMM. All fine, the 2 MB 72 pin SIMM worked fine as chip mem! 2 MB 72 pin SIMM memory is getting more difficult to find these days unfortunately – hopefully there will be more DIY options in the future.

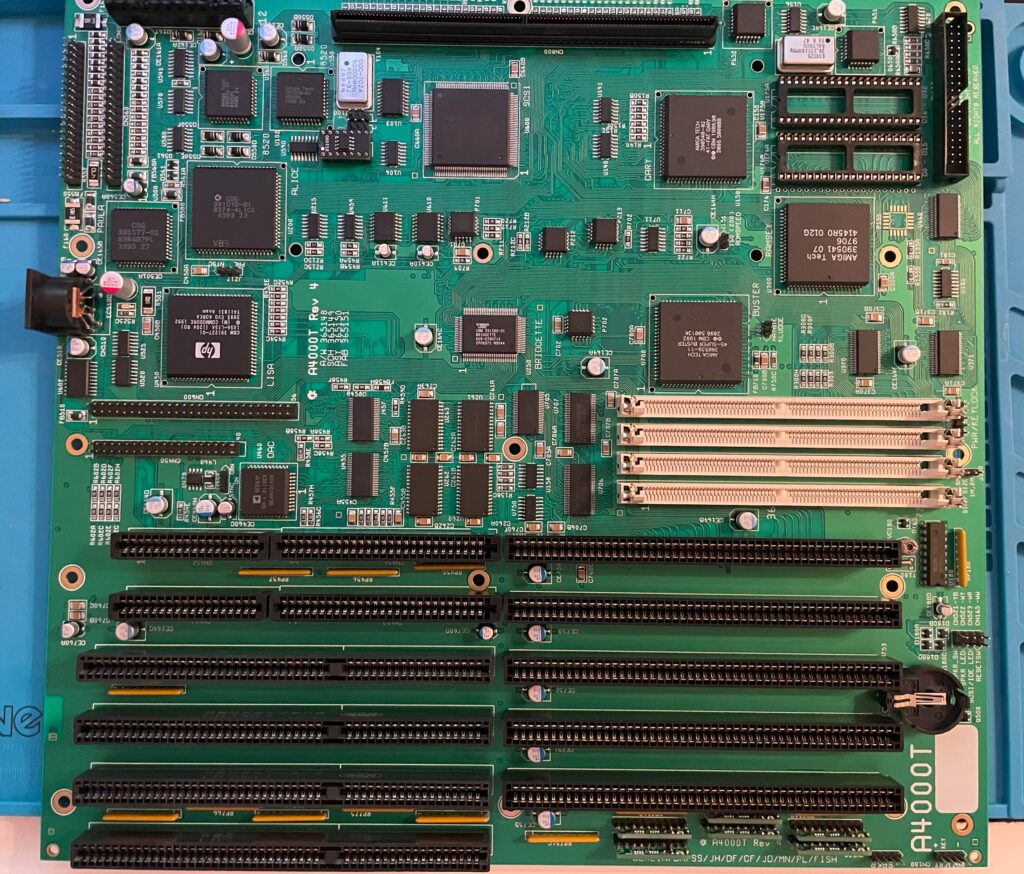
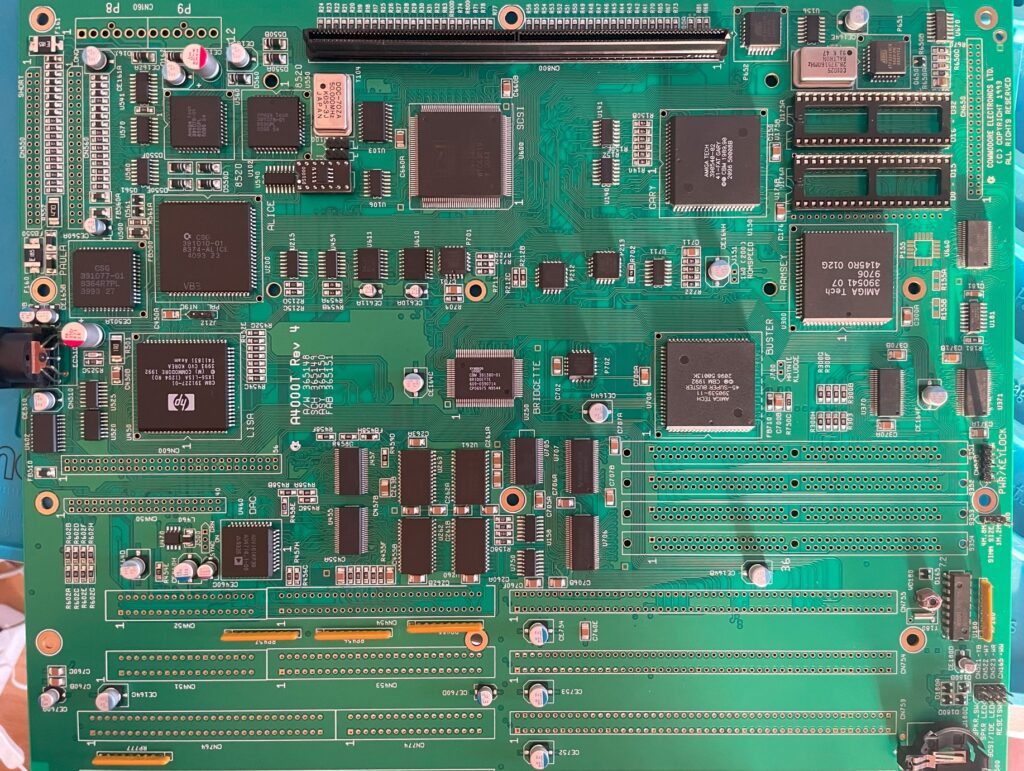
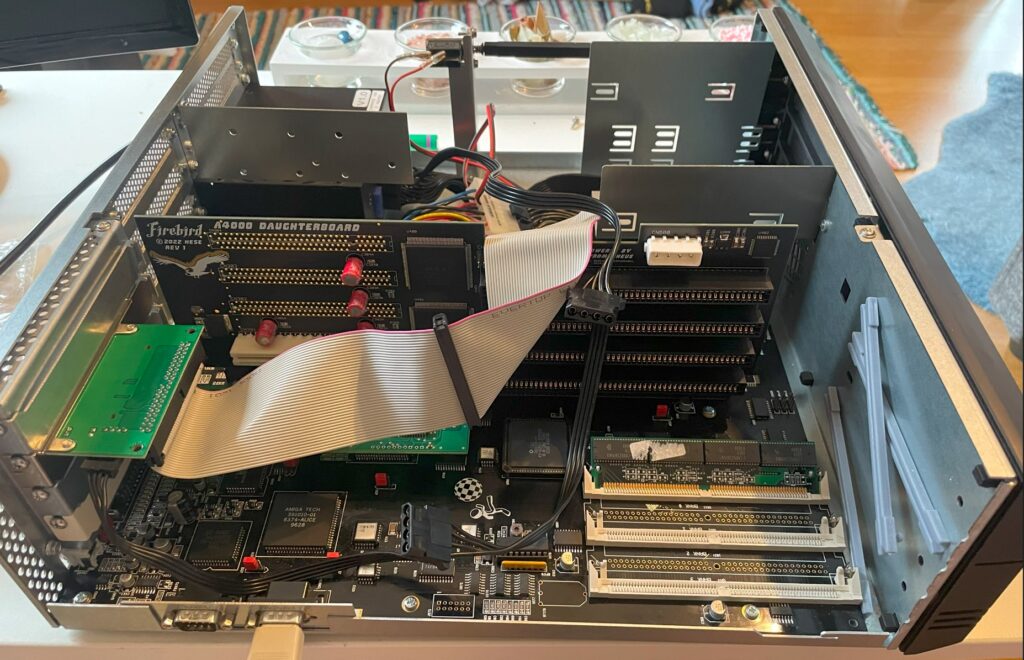
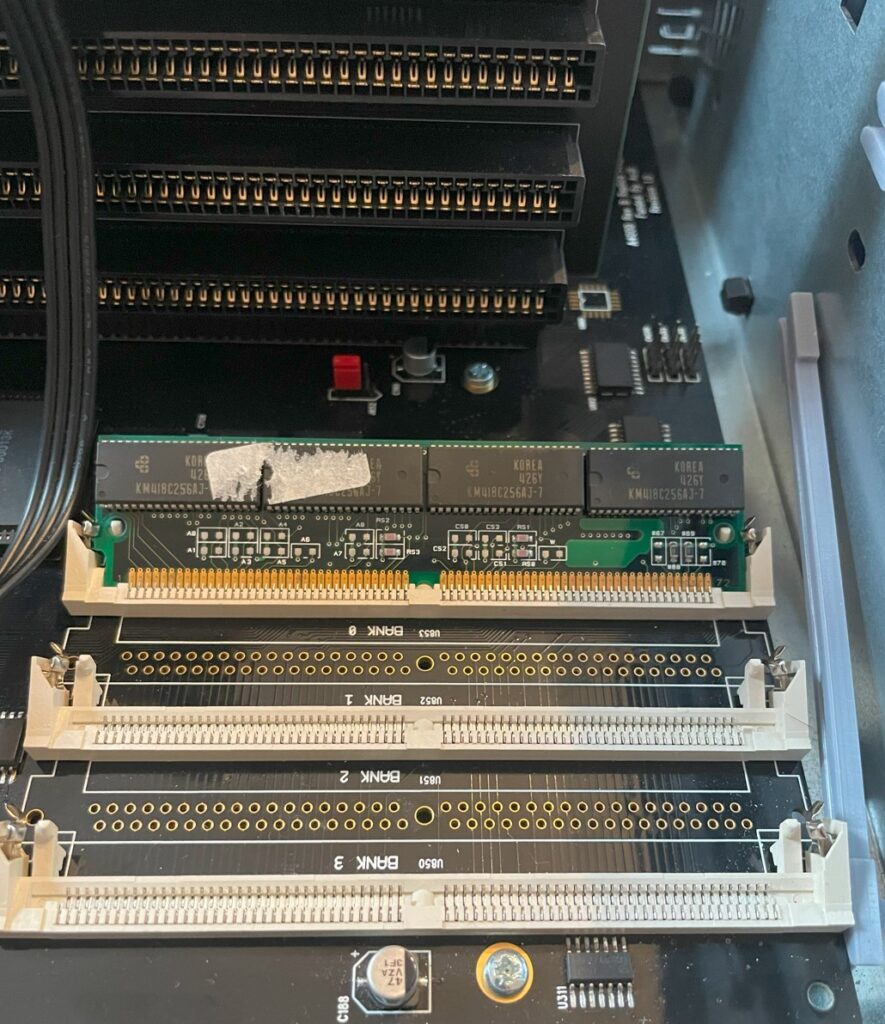
The A4000D supports up to 16 MB fast memory on the motherboard, either through four 4 MB memory modules or through two 8 MB memory modules. You can see that I built the A4000D motherboard with only two 72 pin sockets for fast memory, so I need two 8 MB modules to get 16 MB.

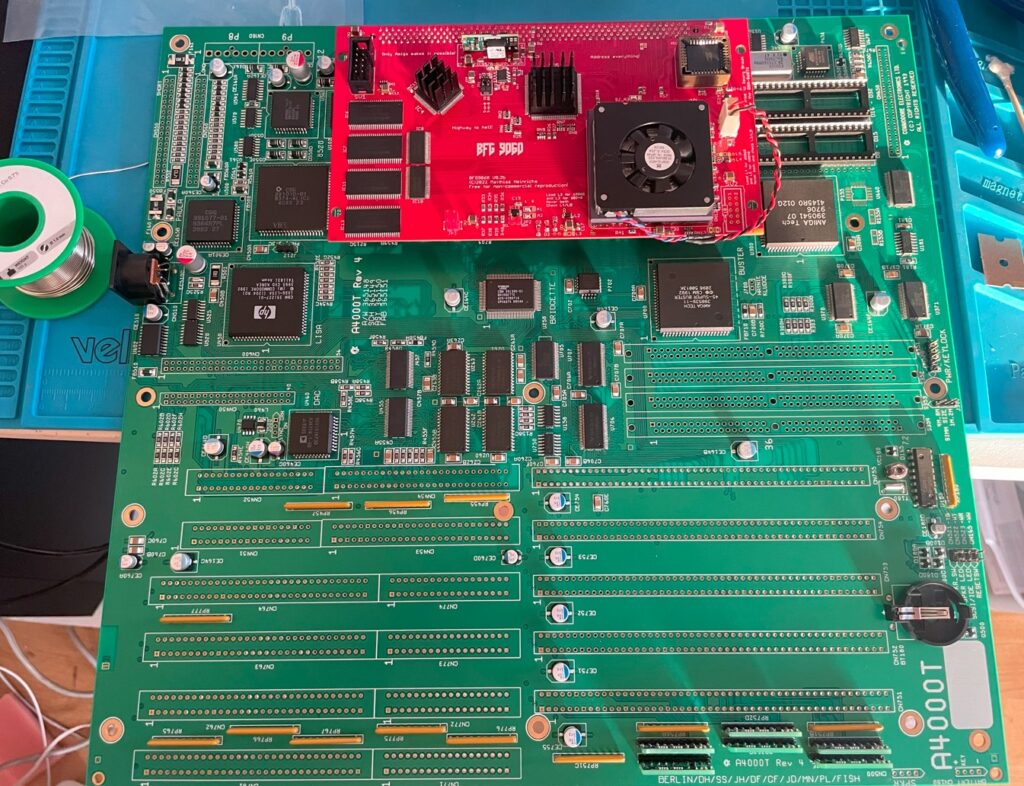
Unfortunately, I did not have any 8 MB SIMM memory (all I had was 16 and 32 MB modules) so the maximum memory I could add was 4 MB (one 16 MB SIMM becomes 2 MB in the socket). 72 pin memory modules rarely indicated memory size so it was necessary to test them in a computer. Now this is not really a problem since I will be running either a BFG9060 or a TF 060 card in this computer. But it is always nice to max out memory if it is possible to so.

Conclusion

  • I added a new thing to my todo list, find some 8 MB SIMMs.
  • I also flagged some things on the todo list as finished, CF card adapter + chip mem is working.

n2630 68030/Memory/IDE card for the Amiga 2000 (EATX)

I built my second Amiga 2000 EATX last year, it is a beautiful clone of the Amiga 2000 remade into a standard extended ATX format so it can fit a standard EATX case. You can be sure that I will add an article about that motherboard here in the future. The author of that project has also made the n2630 project, its a clone/reimplementation of Commodores 030 card for the A2000, the Commodore A2630.

To be honest, I wish there was a modern 060 or 040 card we could build for the A2000 since I think 030 is just too slow these days – at least for my modern Amiga standards. To be fair while the A2630 was 25 Mhz this one runs at 50 Mhz, so its a little bit faster. 040 runs so hot, but would be a perfect fit for the A2000EATX because of the improved case airflow (and having an 040 in one of my machines could be interesting to compare performance with 060 machines).

Anyways, I should be glad with what I have and I am thankful that we can build this cool modern 030 card for our A2000 computers. And the n2630 is such a nice compliment to the A2000 EATX motherboard having IDE/CF slot built in.

Building the n2630 for my A2000EATX

I decided to build my n2630 card earlier this year with 128 MB fast memory. There was an option to go for 256 MB fast memory also but thought it was not really worth it, maybe I will regret it in the future. Otherwise this build was very straight forward. It uses three CPLDs and six memory chips.

There was some parts that was difficult to find, first it was the 030 CPU socket. I actually got the parts number for one that was availble on Mouser after asking around, surprised about that. The CF slot at the back of the card needs to be the right one to fit solder points on the board, ask on the Discord if you wondering what type you should get if you are building one. Other than that it was an easy build. There are also two eproms you need to have and program, but as usual, most stuff that is rare can be found with some patience.

I have since mounted an FPU to the card and I also got a 3D printed bracket so I could secure it in my regular ATX tower that was converted to EATX. I ran out of black pin stripes that is why I used yellow and green (it was also a joke about obsessing over the color syncing of hardware).

Finishing the A4000T build and looking back at the build process

I finally got the last part that was missing from the BOM from a seller in Germany so that I could finish my Amiga 4000T motherboard replica build.

The motherboard is fully built, so is the AV module, the disk module and the ATX I/O module.

Unfortunately I do not have any AT PSUs anymore. I have ordered an AT to ATX converter, hopefully I can test the board once it arrives next week.

Looking back at building the Amiga 4000T

I think this build was fairly easy. The most difficult thing was locating parts on the PCB, thankfully there is an Ibom for both the main board and the modules here. If there was no Ibom, I honestly dont know how I would placed some of the components as placement can differ from Commodore made PCBs. You can not just compare part placement on pictures.

I will go through the build in more detail when I have tested the board fully.

Almost finished with my Amiga 4000T replica build

I am happy to say that my A4000T build is soon finished. I am waiting for some pinstrips and a couple of passives I missed out on in my first order of components. When I get them I will proceed with the video and Zorro slots and also the three ISA slots (and the P8P9 power connector).

I am always nervous when soldering the 200 pin KEL CPU card connector. If you do it wrong side, you have to desolder it and turn it around – that is a lot of work. Better option is to triple check everything before soldering.

The backside of the A4000T PCB contains a lot of passives to solder on. All passives are 1206 though installation went fairly smoothly.

All thats left to do is to solder in the pin strips, 72-pin SIMM sockets, P8P9 socket, edge card slots and some small parts and then I will clean up the bord, inspect everything twice and do a test run with Diagrom. You can be sure I will post about it here!

Amiga 4000T disk module (replica build)

I am building an Amiga 4000T motherboard and its modules at the moment. Here is the disk module for the A4000T. It is almost fully built, missing two double row pin headers and screws for the external SCSI2 port.

The disk module has the internal 50 pin SCSI port and the external SCSI2 port. It also has the SCSI switches (accessible from backside) and floppy port. It is attached to the Amiga 4000T motherboard on a pin header.

Amiga 4000T AV module (replica)

Work continues on my Amiga 4000T replica build. On the A4000T a lot of functionality is placed on daughter cards such as audio and video out that is placed on the AV module. The A4000T AV module slots into the Amiga 4000T motherboard in a 40 pin 20 x 2 double row 2.54 mm pin header.

As you can see on the image above, the AV module is about 95% done. It is missing the headphone jack, 20 x 2 double row female connector and two 3904 transistors (and some jumpers).

Finished all the passive components on my Amiga 4000T replica build

Backside of the Amiga 4000T replica motherboard

I am currently building an Amiga 4000T replica that I got from Amibay. I got the components from Mouser last week and spent the weekend starting the build. There was a lot of components to solder on this and I am far from finished, but happy to say that I am finished with 90% of all passives. Backside of the motherboard is finished!

I still have a ton of 1206 passives to solder on the daughter cards. But those will be far smother to build since the cards are smaller.

Amiga 1200 build based on the ReAmiga A1200 motherboard

Black Amiga 1200

I just finished building my black Amiga 1200 that is based on a ReAmiga 1200 motherboard and a TF1260 turbo card and I am very happy with it!

System specifications:

  • ReAmiga A1200 v1.5 (black PCB)
  • TerribleFire 1260 (black PCB)
  • Indivision AGA MK3
  • Micronik 1.76MB floppy drive
  • Hard keyboard membrane
  • 4GB compact flash card
  • A1200.net replacement case, black
  • A1200.net replacement keycaps, black
  • Custom metal backplate

Comments on the build

Terrible Fire 1260

I like to run either 030 or 060, preferably 060, in my Amigas. Previously I had an Apollo 1260 in my old A1200 so I replaced it with a TF1260 that I built. The Terrible Fire1260 supports easier overclocking than the Apollo 1260 did and also has more memory, 128 MB.

Indivision AGA MK3

A scandoubler is a must have in the Amiga IMHO and the Indivision is a great option for that since it hooks up to HDMI directly. I got the first version years ago but sold it. Both versions has been proven to be reliable and good solutions, but price for it has went up a lot in 15 years.

Case and keyboard

The case and keys came from a1200.net. I got a hard keyboard membrane which worked great after the I had wiped the rubber key bottoms on a paper to make them conductive again. I also got a metal backplate from CenturionTech, it is a nice replacement for the ugly metal bottom shield, makes the whole system professional and fresh.

Other

I had an old MicroniK HD floppy drive and used that in the build. No idea where I got it from and I will probably never use it, but an A1200 does not look right without a floppy. I dont use old ball mouses anymore, so I got a MouSTer DB9 to USB adapter so I can use a wireless mouse.

Building the ReAmiga 1200

I built the ReAmiga A1200 from an empty motherboard PCB myself. I used parts from a broken Amiga 1200 motherboard. Halfway in the build I decided to build a second one as a backup so I got a white motherboard and built them both back to back. Both motherboards are tested and fully working. They are equiped with full LEDs. The white one has all green LEDs while the black one reminds of a christmas tree when its powered on.

The build was farily simple, as with most replicas close to original C= designs the amount of passives that has to be soldered is a lot, although not as insane as an A4000D/T.

I decided to build my motherboards without any sockets. There are two primary reasons for this, I can not professionally clean the motherboard, and cleaning flux from sockets is very difficult for me without an ultrasonic bath. The motherboard acts as a heatsink and it is more efficient if the chips are soldered to the motherboard IMHO. For example, Alice gets very hot (as does Lisa). Off course it is also more reliable, I have yet to find a socket that is not reliable though.

You can see the LEDs in action on the picture

Summary

If I had to chose to keep just one Amiga it would be difficult not to chose this A1200, it is fast thanks to having an 060 CPU. HDMI output is a nice luxury and with high resolution monitor drivers running at 1024×768 (in 8 colors) it almost feels like you had an RTG graphics card in it when you are in Workbench.